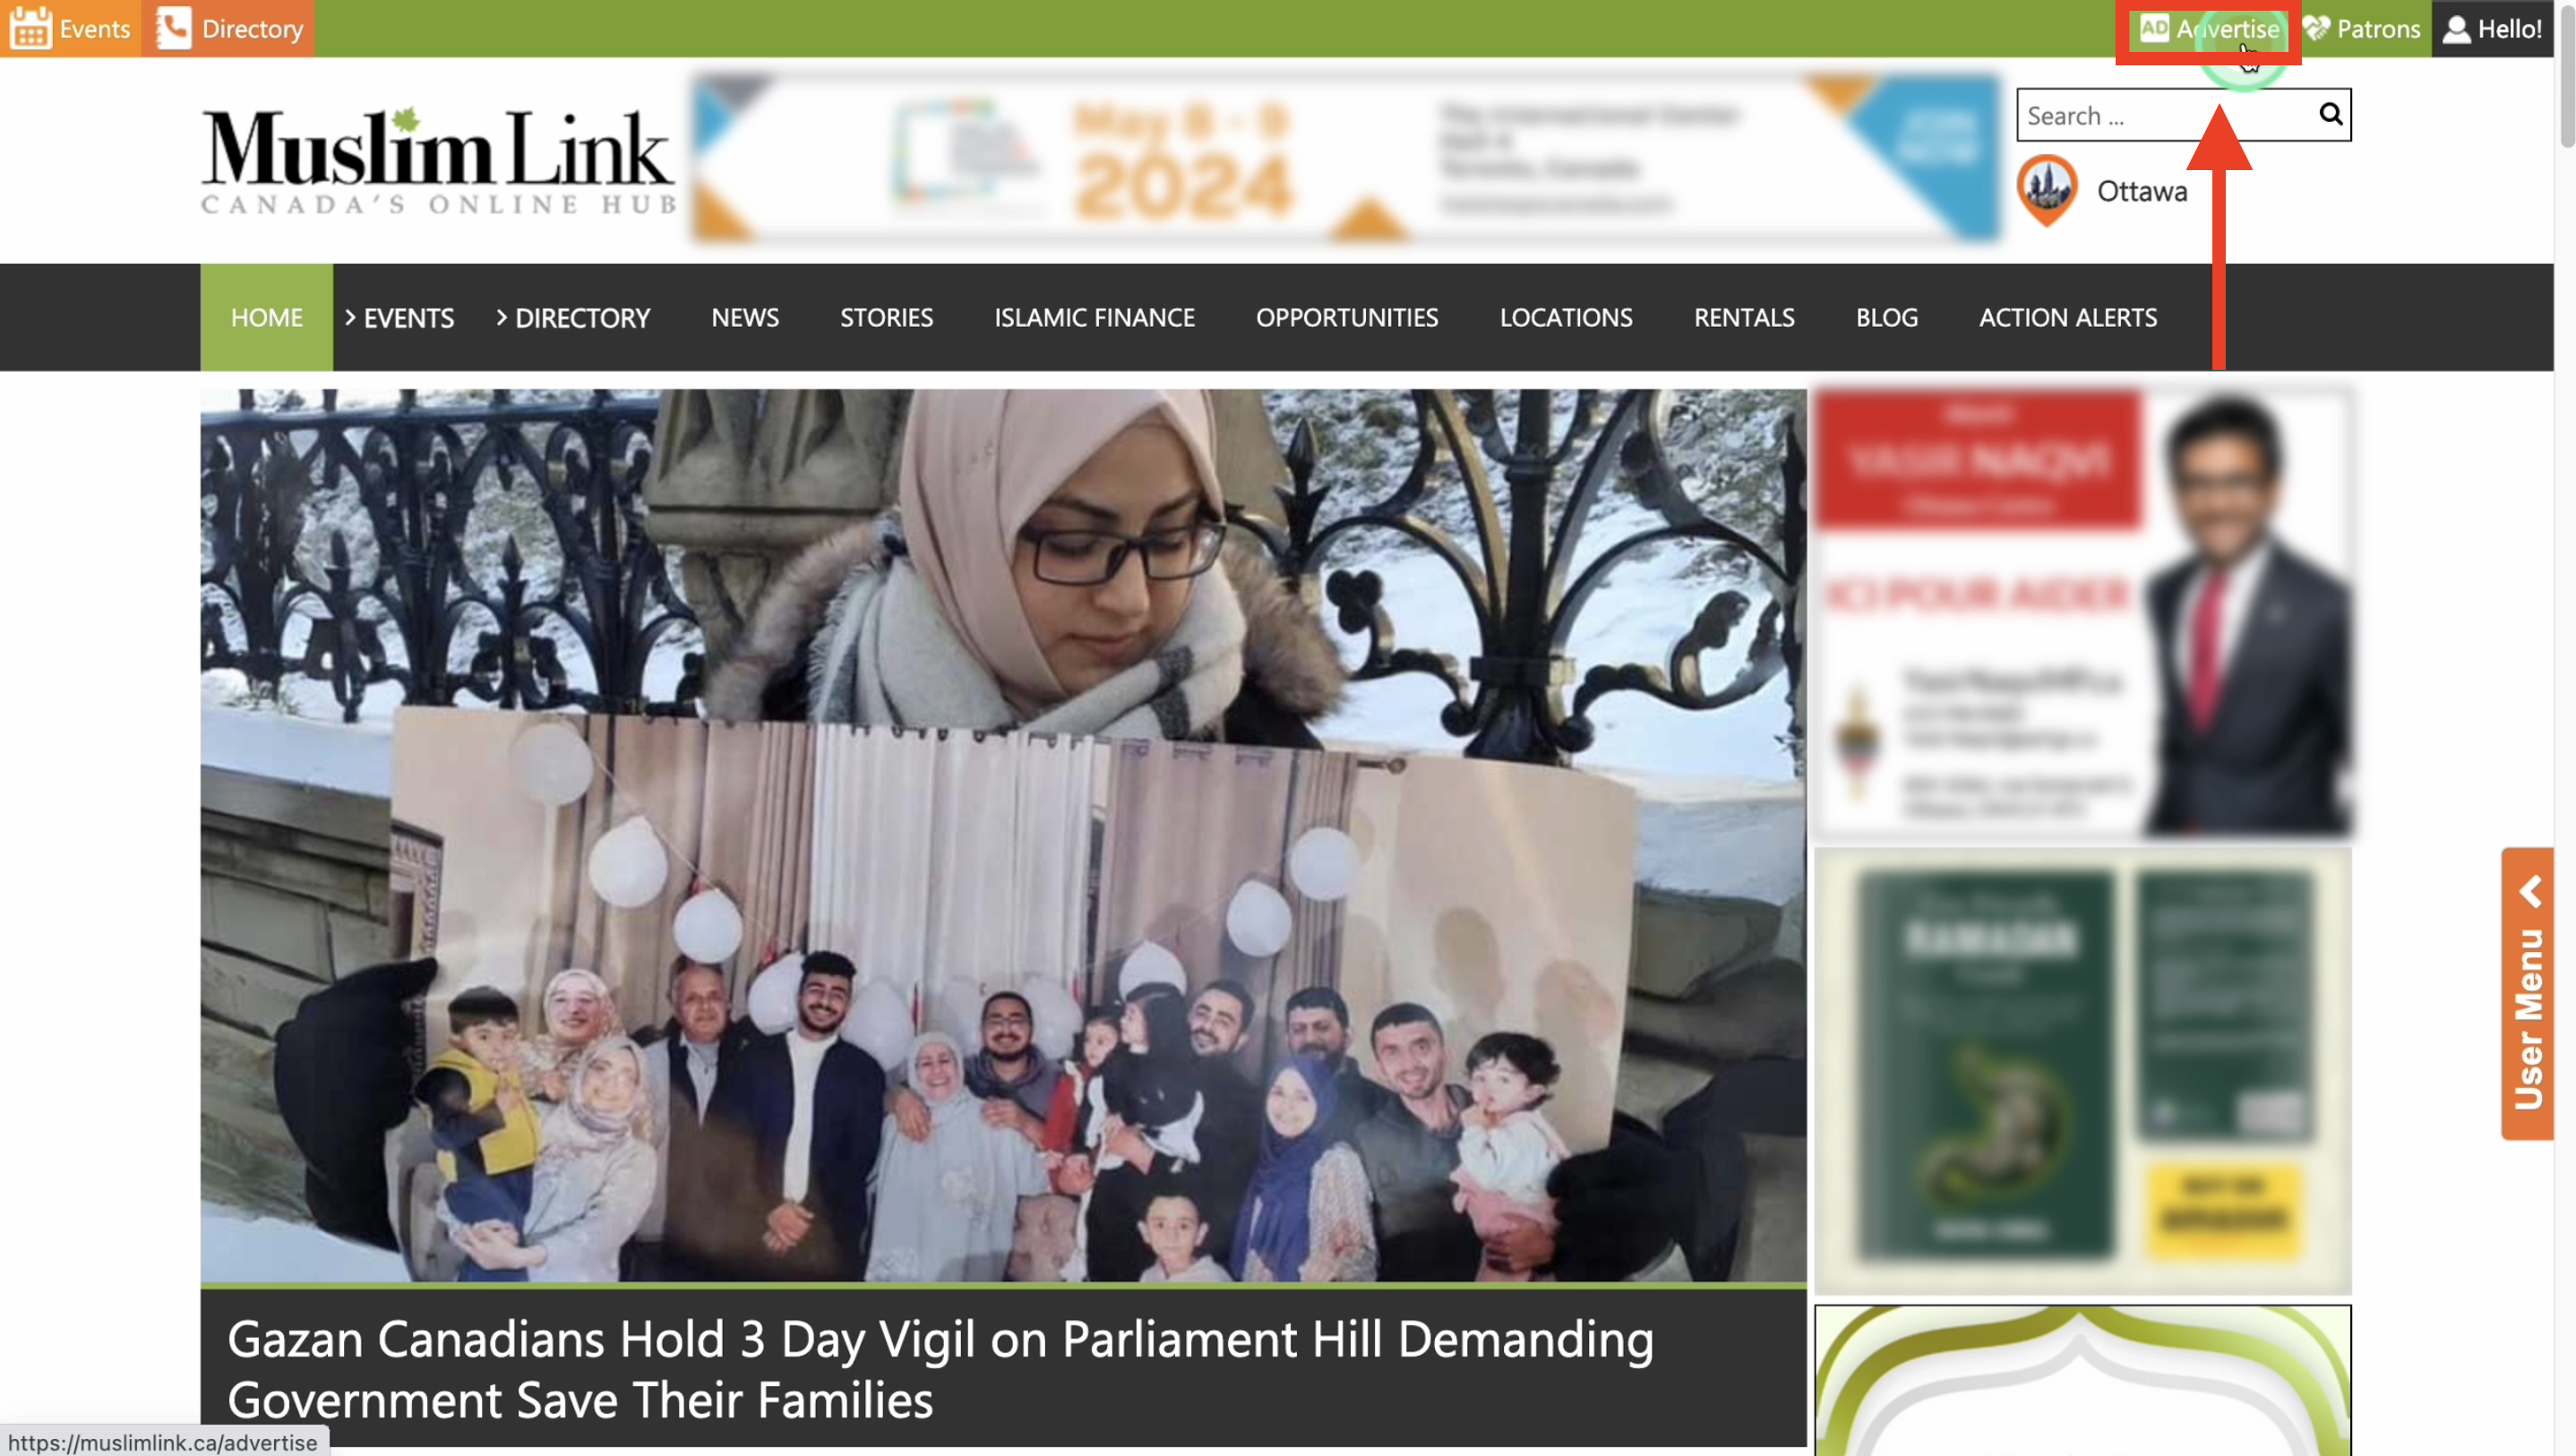
1. Click “Advertise” on the upper right corner.
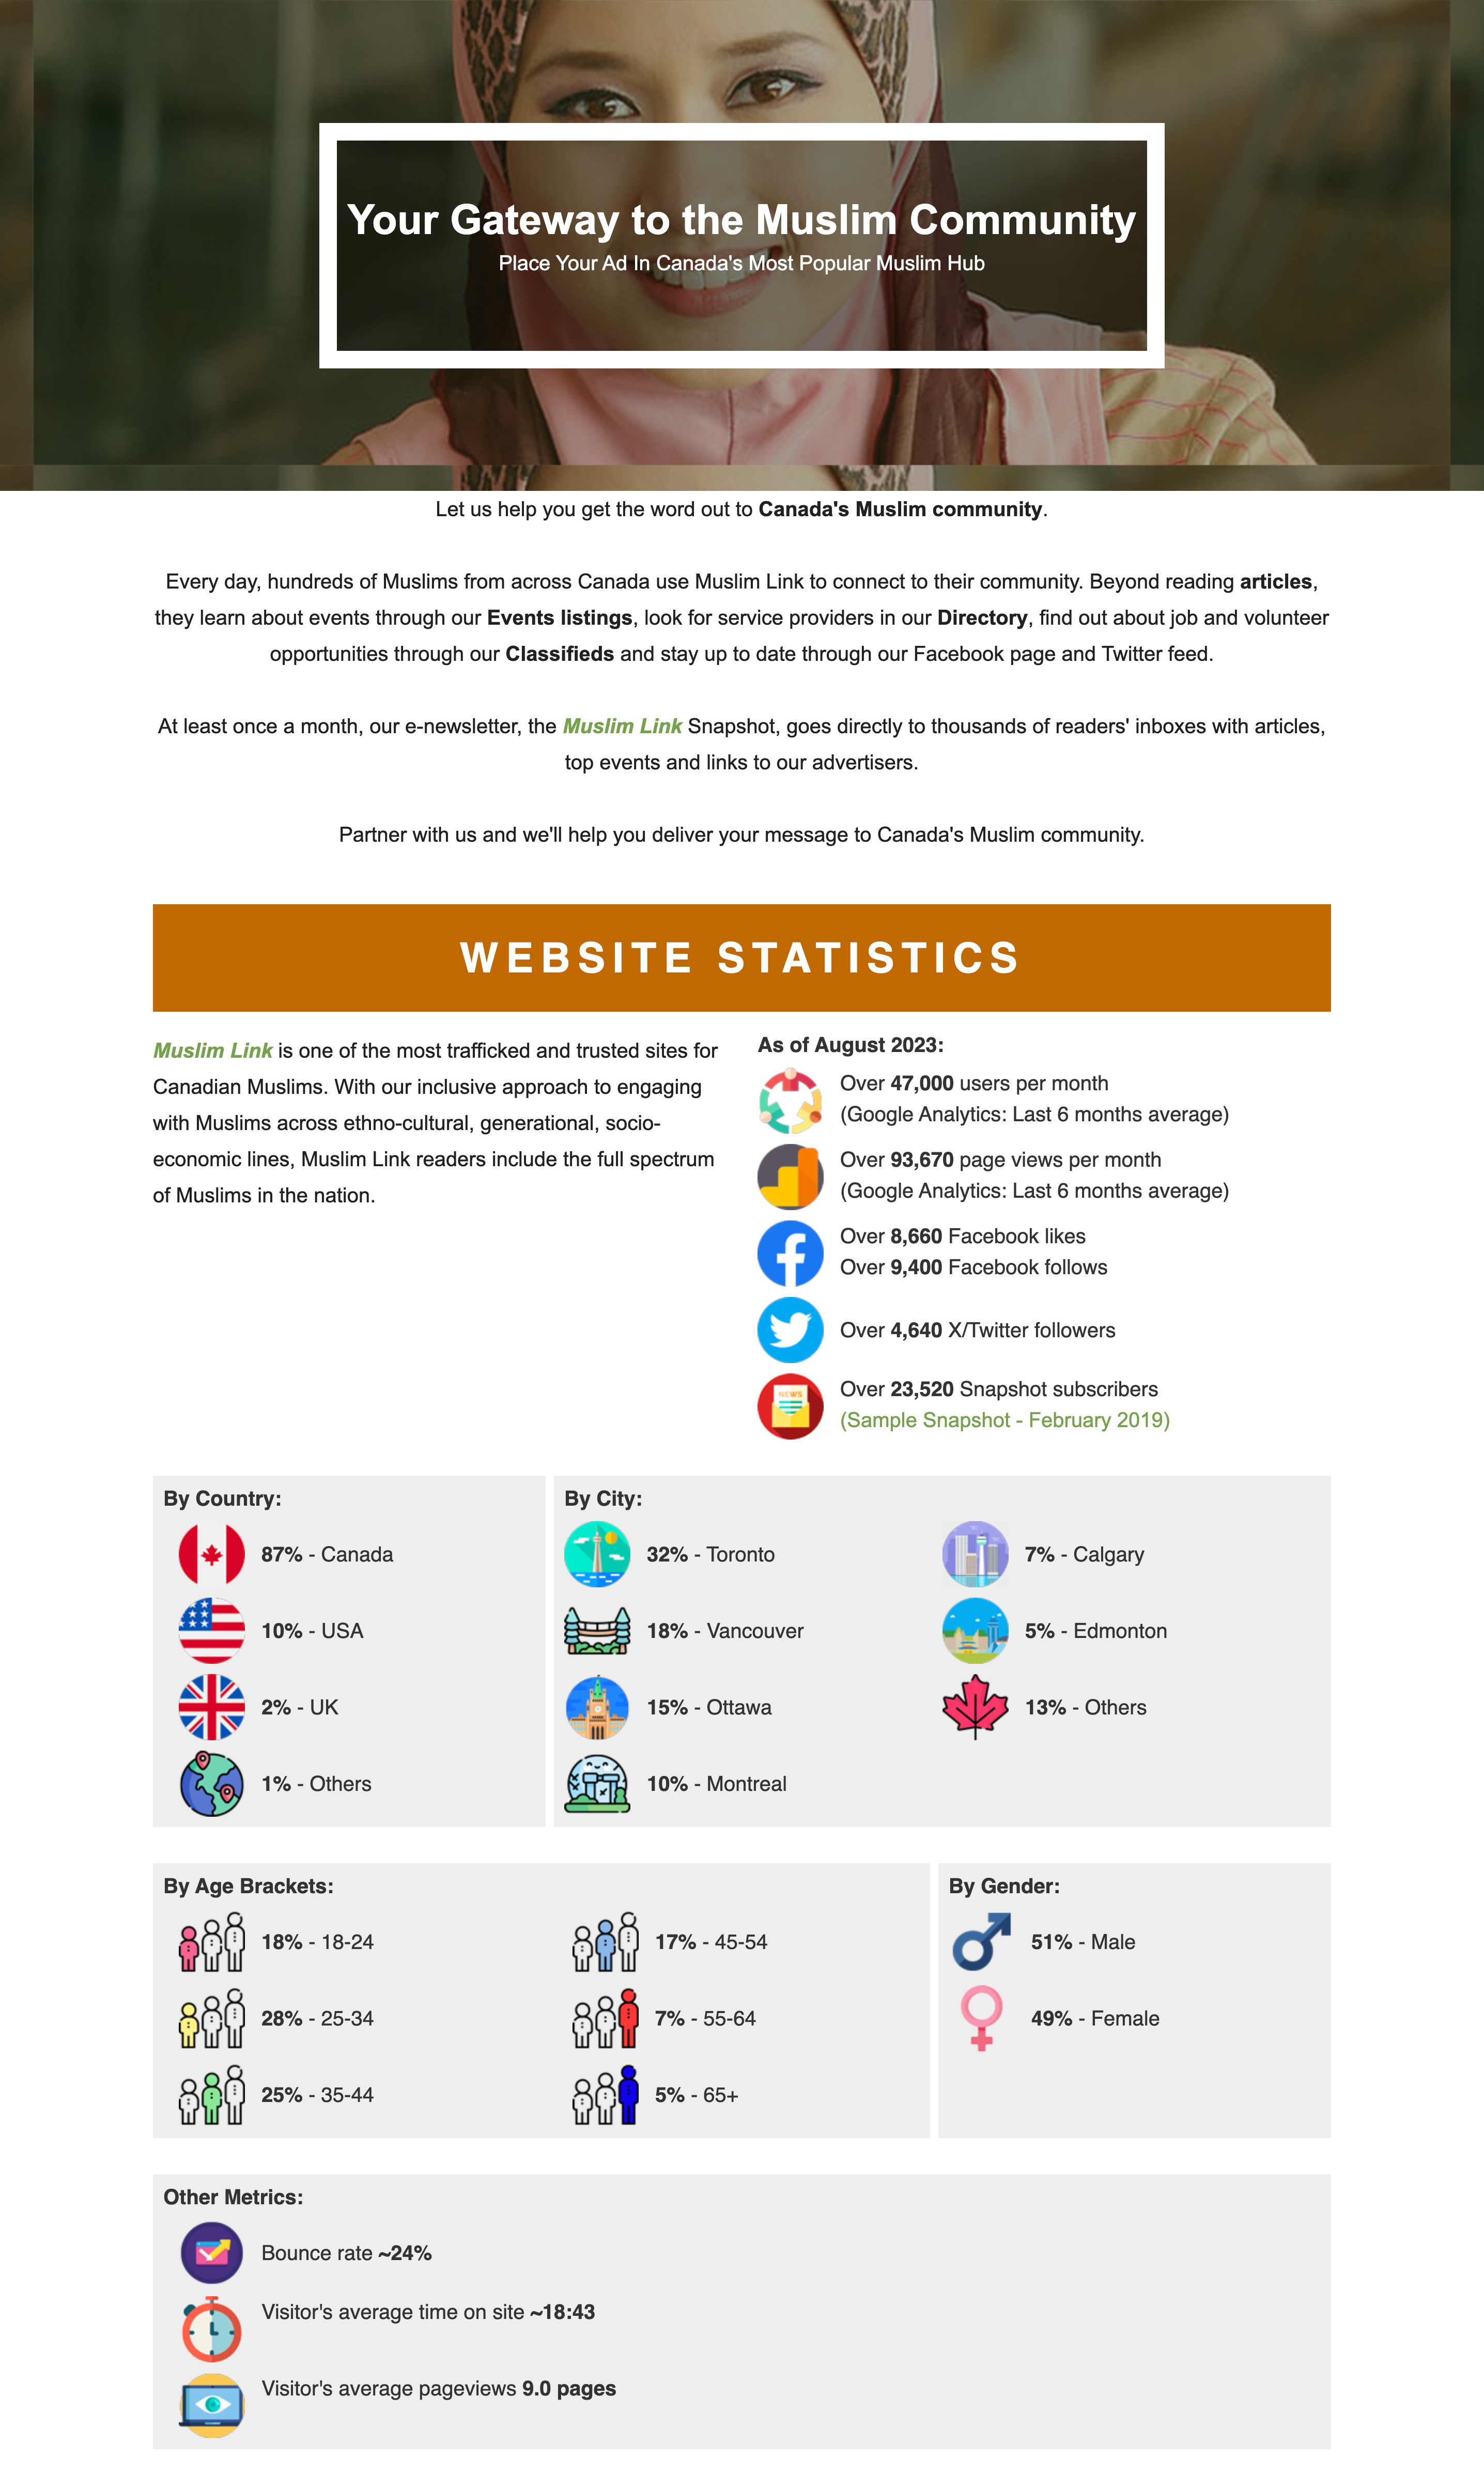
2. Here are the website statistics for Muslim Link, demonstrating that our site is among the most visited and reliable websites for Canadian Muslims.
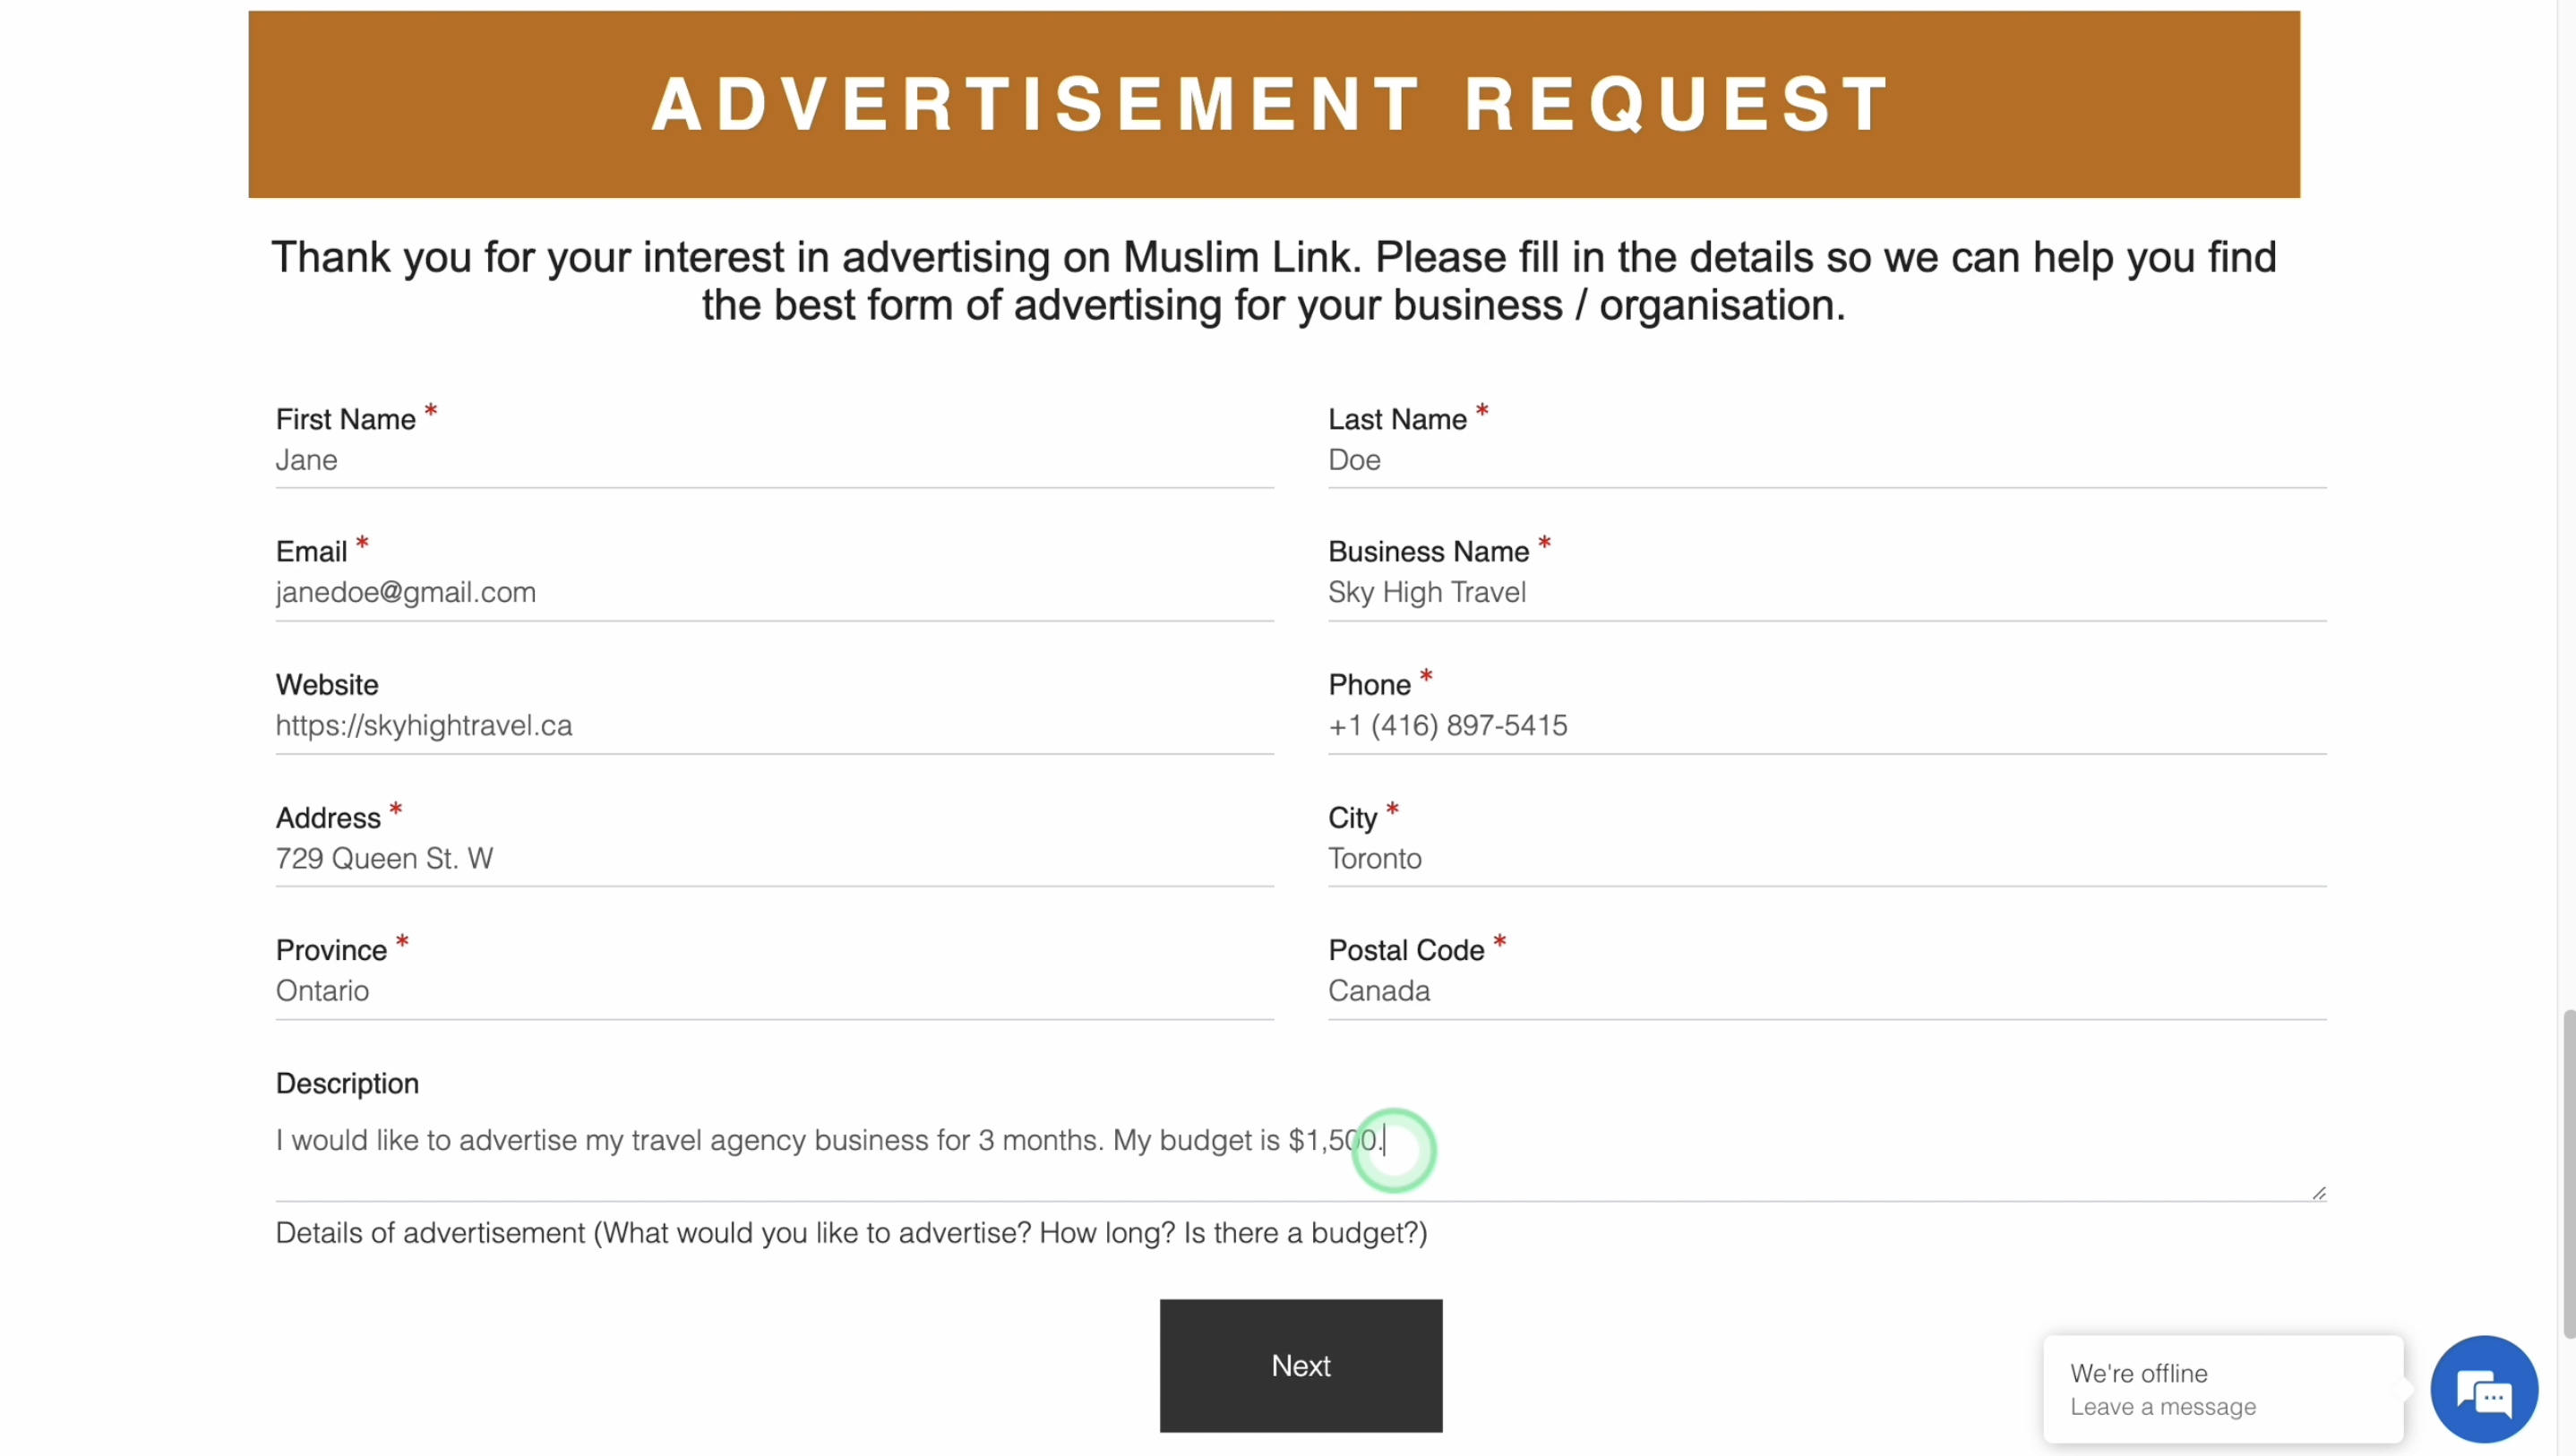
3. Fill up the advertisement request form by providing your name, email, business name, and website if you have any. Please also fill in your phone, address, city, province, and postal code where we can easily reach you at. Specify here the details of the advertisement. You can provide specific information about what you would like to advertise, including the duration of the advertisement and any budget considerations.
4. Click “Next”.
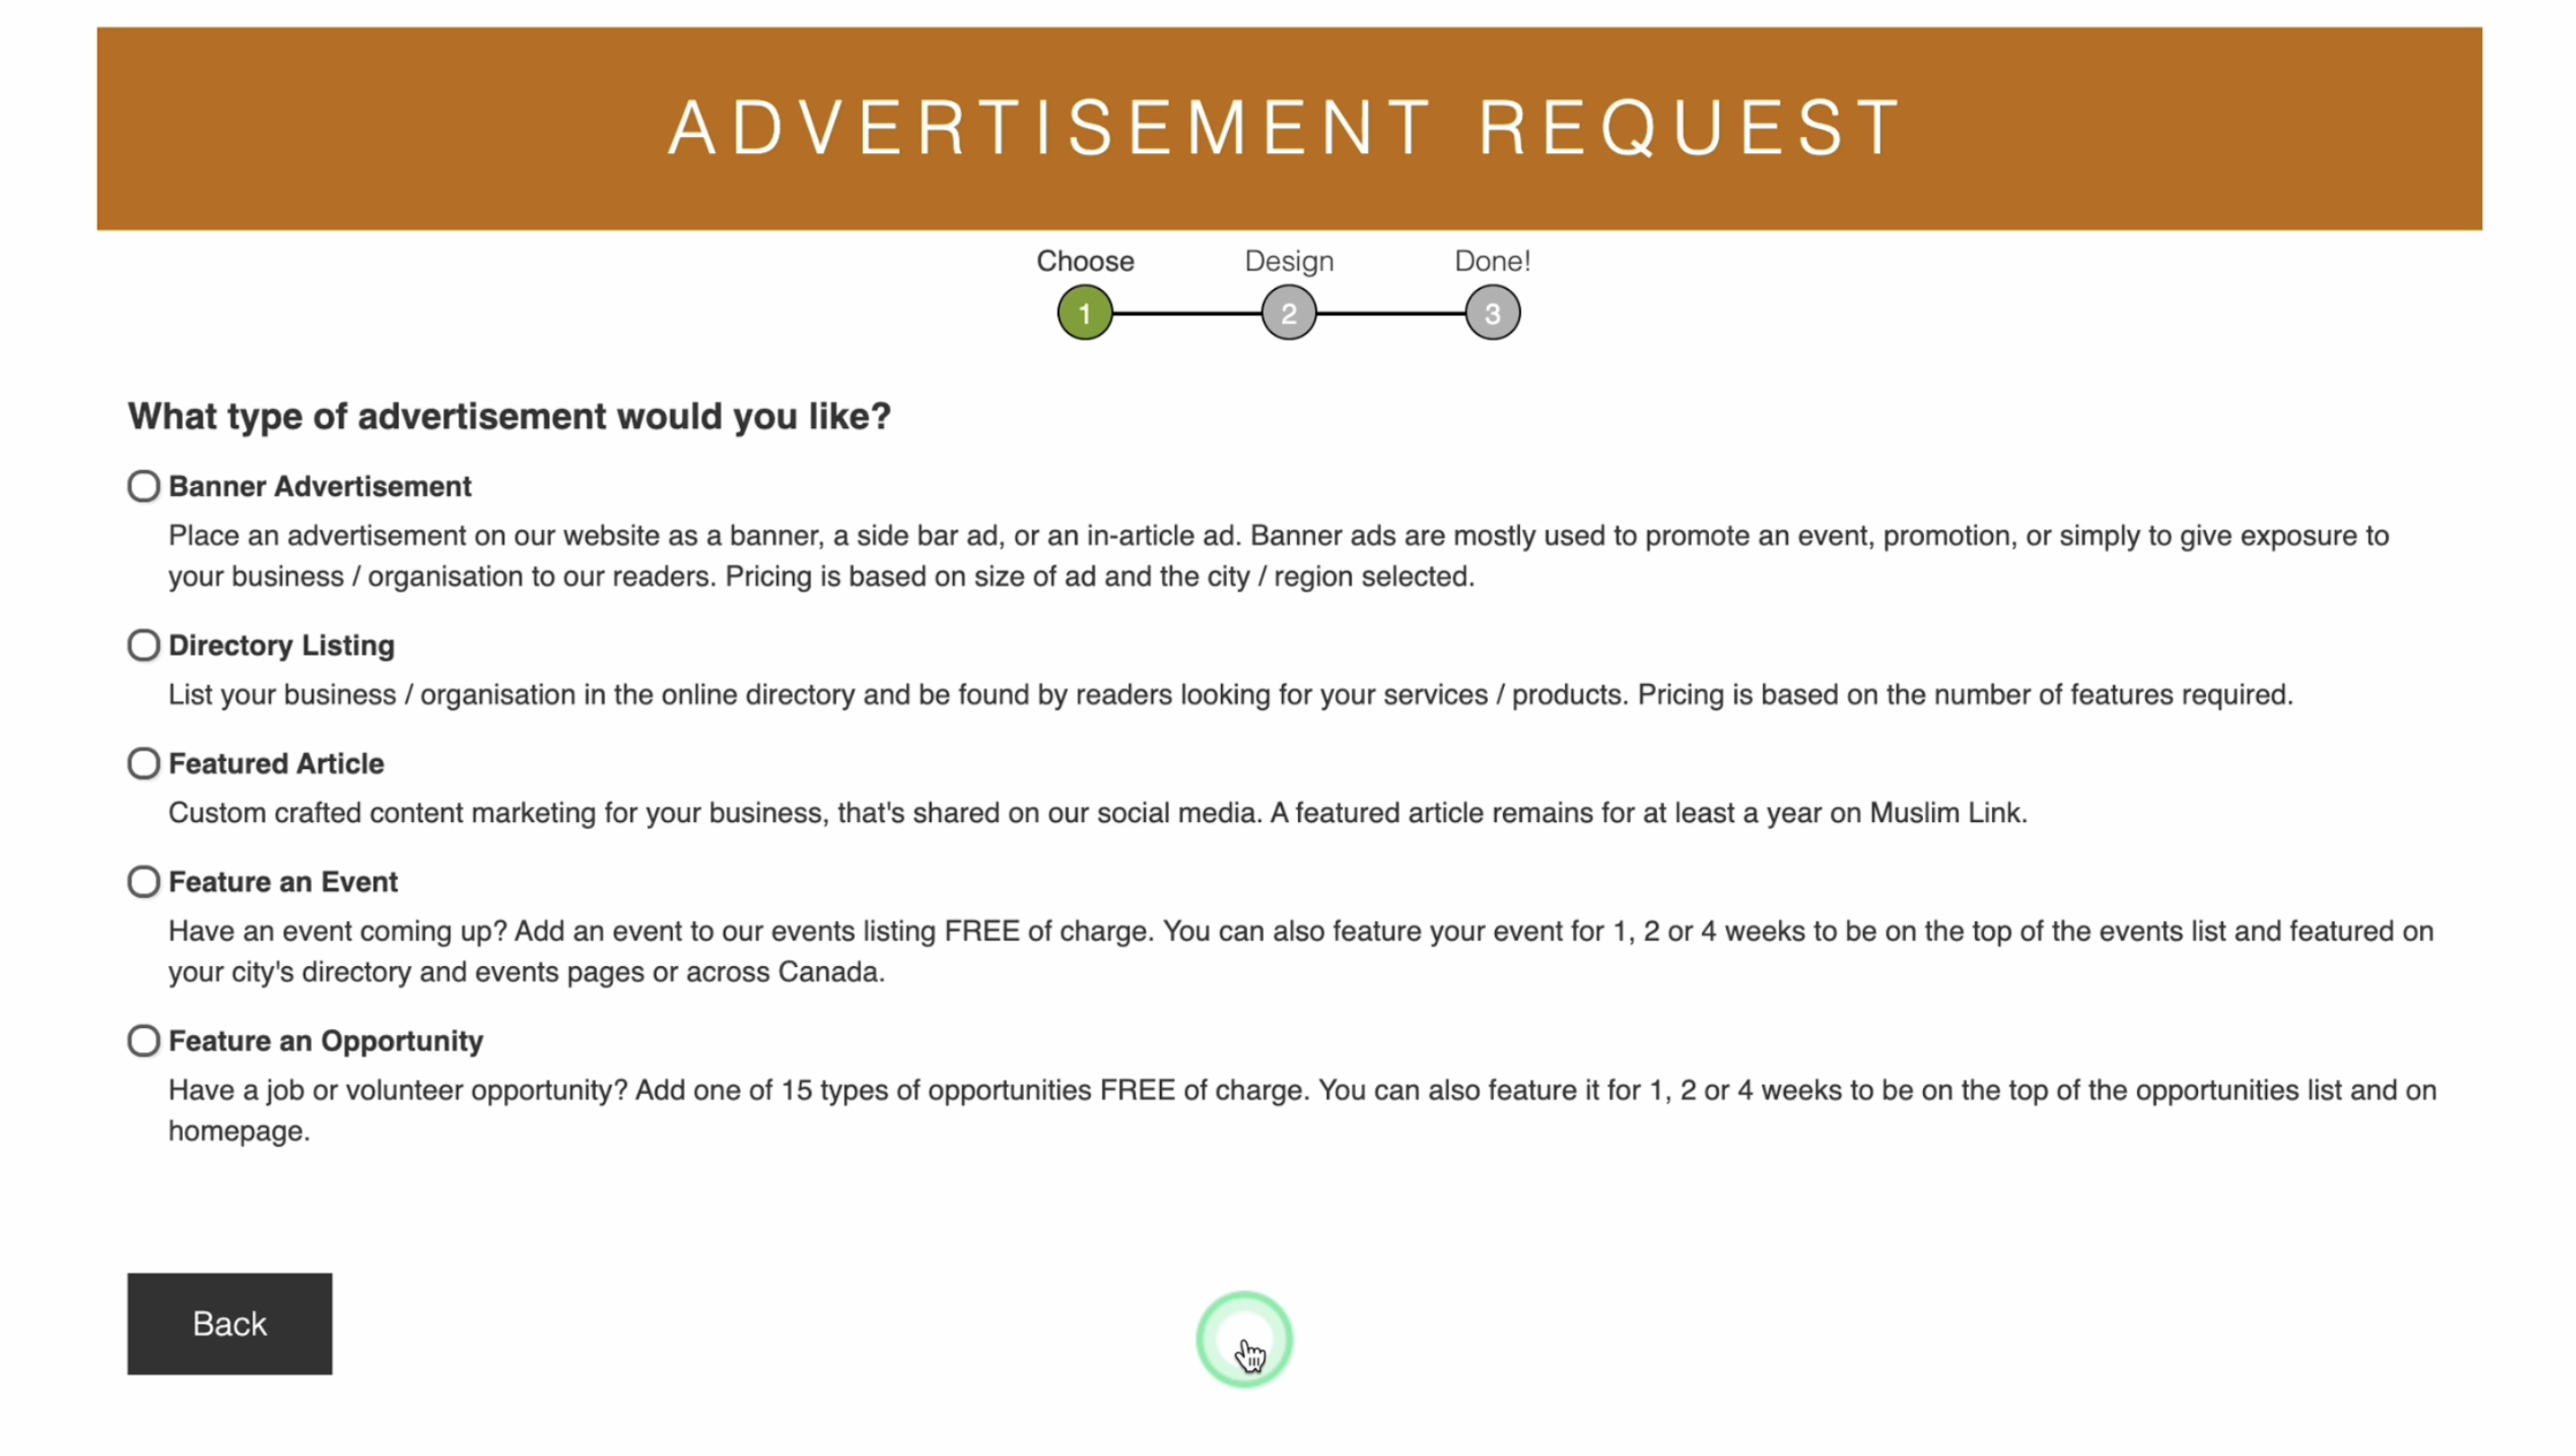
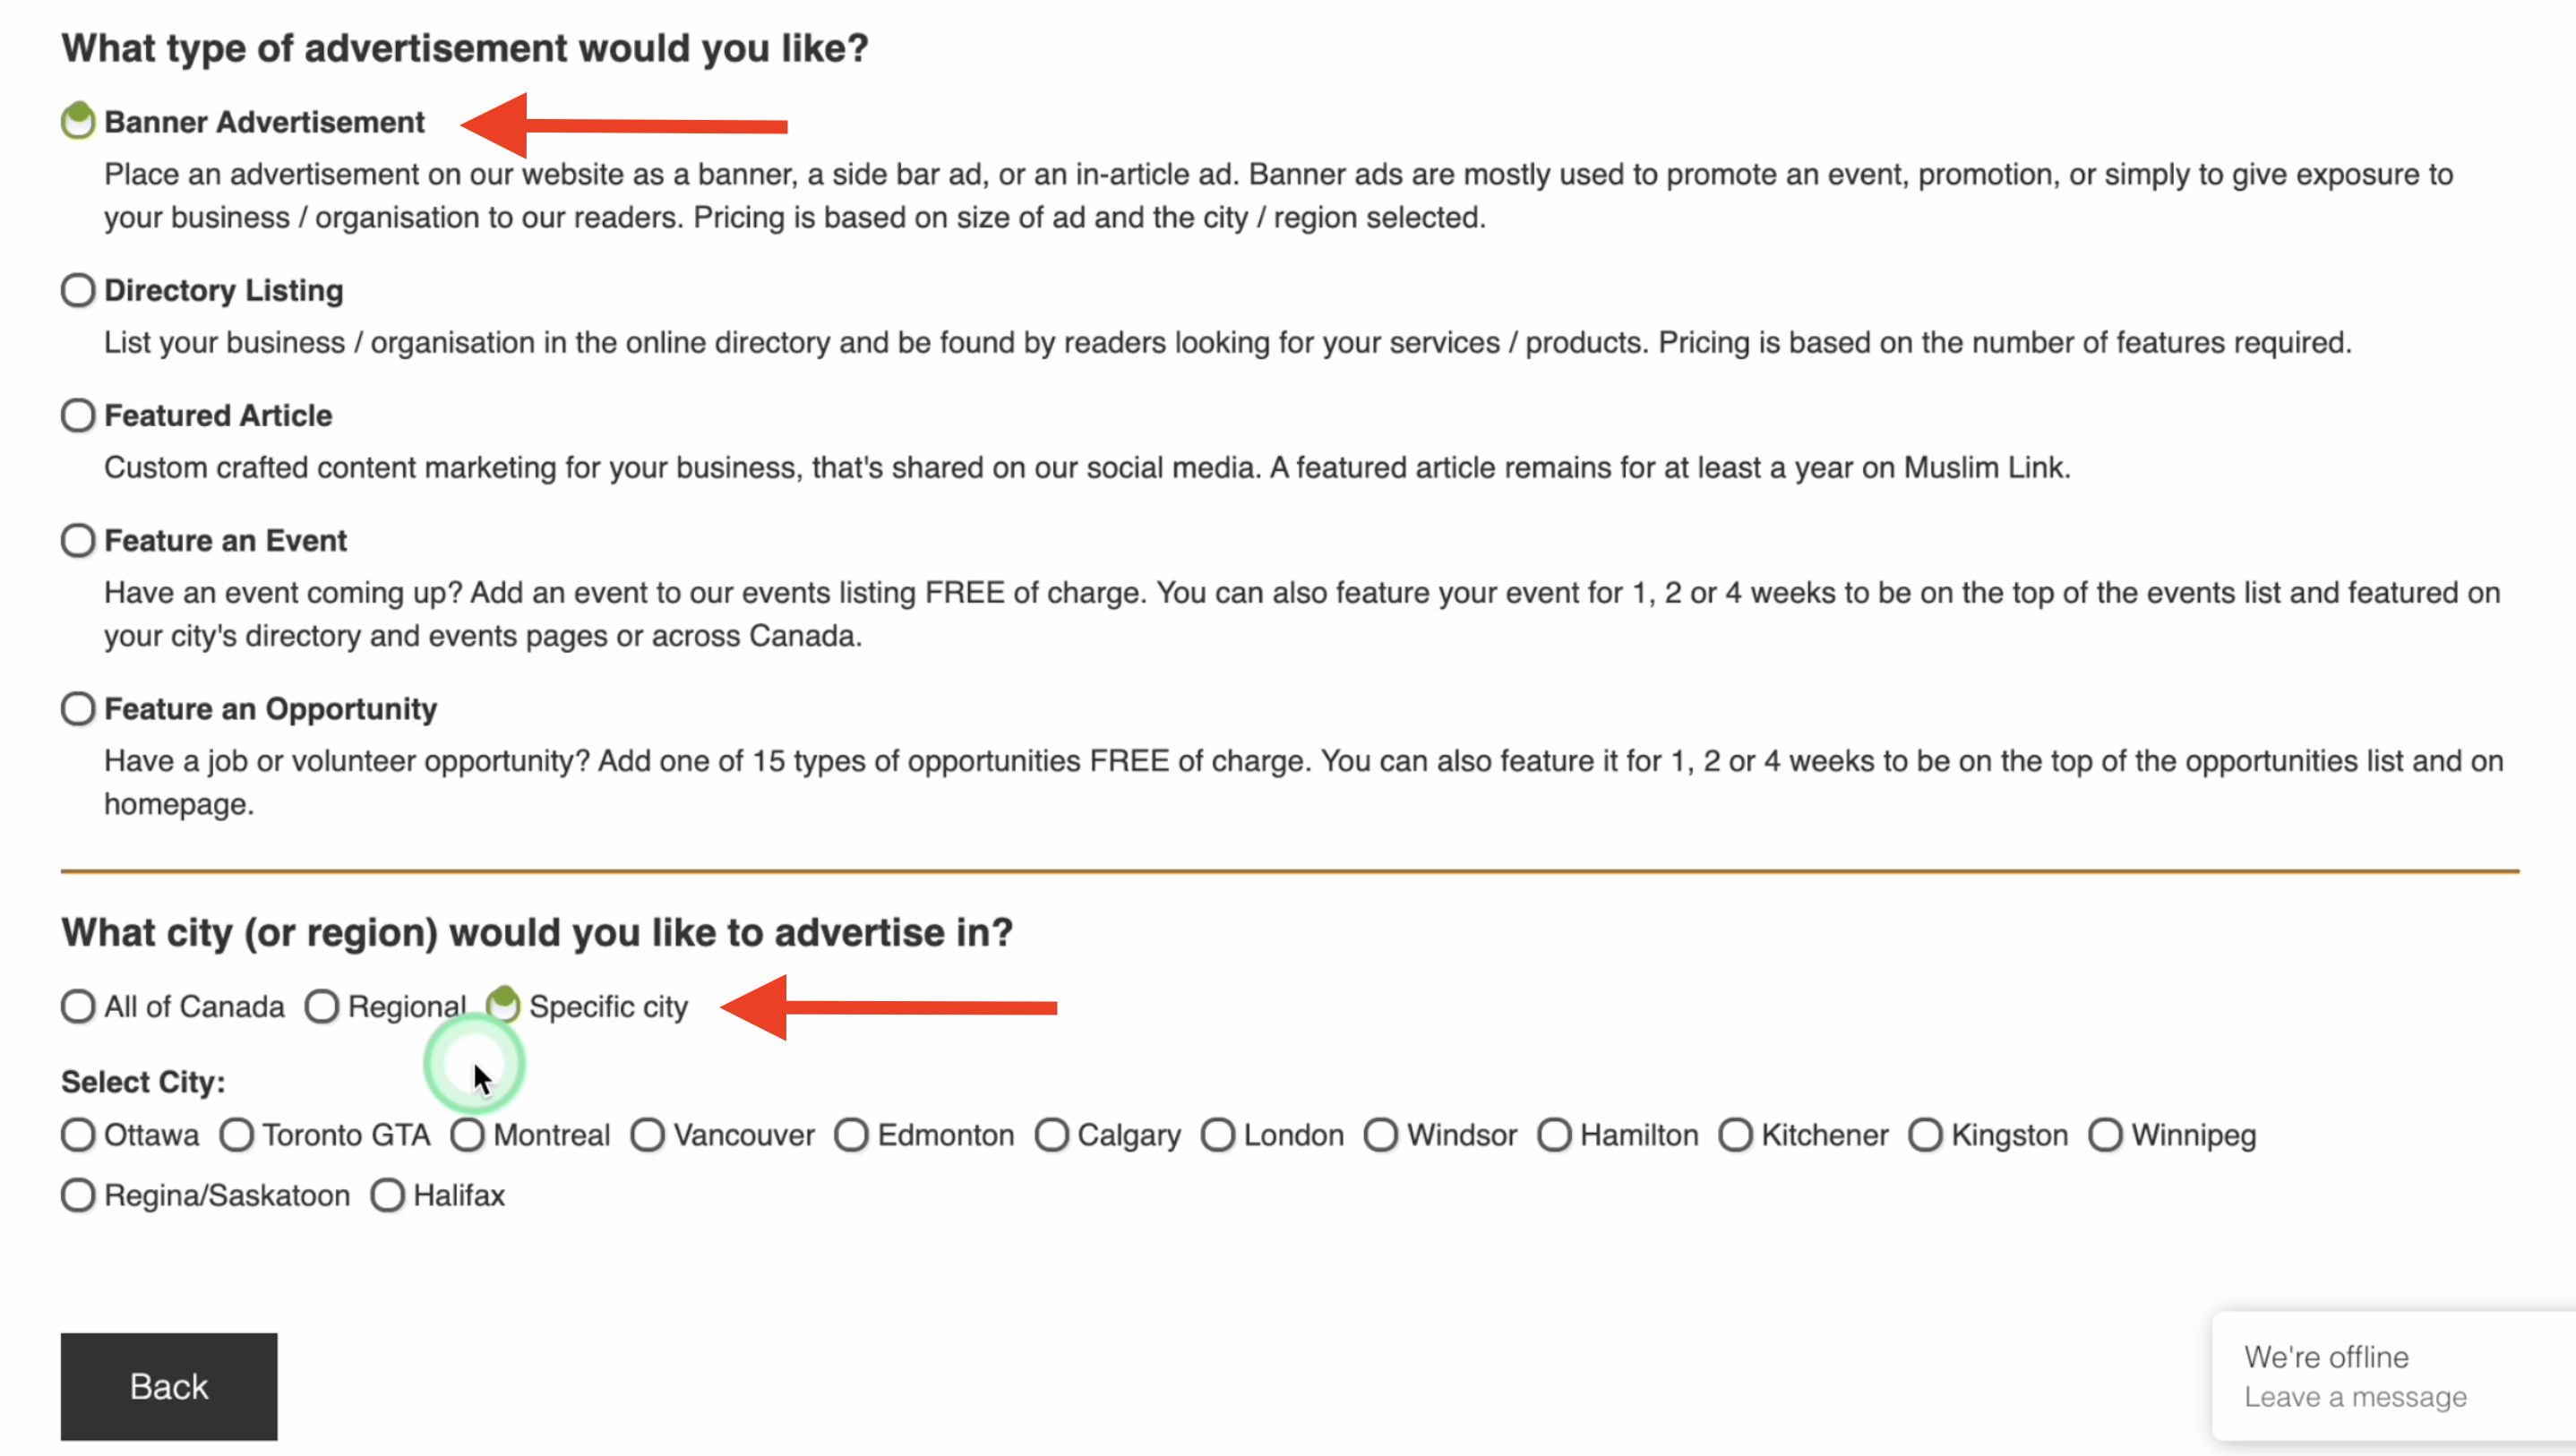
5. You can choose what kind of advertisement you like.
6. The Banner Advertisement is mostly used to highlight events, promotions, or your business on our site. The ad is placed on our website as a banner. Pricing depends on ad size and location.
7. The Directory Listing boosts visibility by listing your business on our online business directory. Pricing varies with features. The Directory Listing is explained further in a video called “How to Add and Feature a Directory Listing on the Online Directory?”.
8. You can get a custom article on our site for a year, shared on social media with Featured Article.
9. In Feature an Event, you can add your event for free or feature it for top visibility. You can watch the video called “How to Add and Feature an Event?” to know more about the process.
10. Lastly, you can Feature an Opportunity. You can post a job or volunteer opportunity free or feature it for top visibility. This is explained further on a video called “How to Add and Feature an Opportunity?”.
11. For banner advertisement, select “Banner Advertisement”.
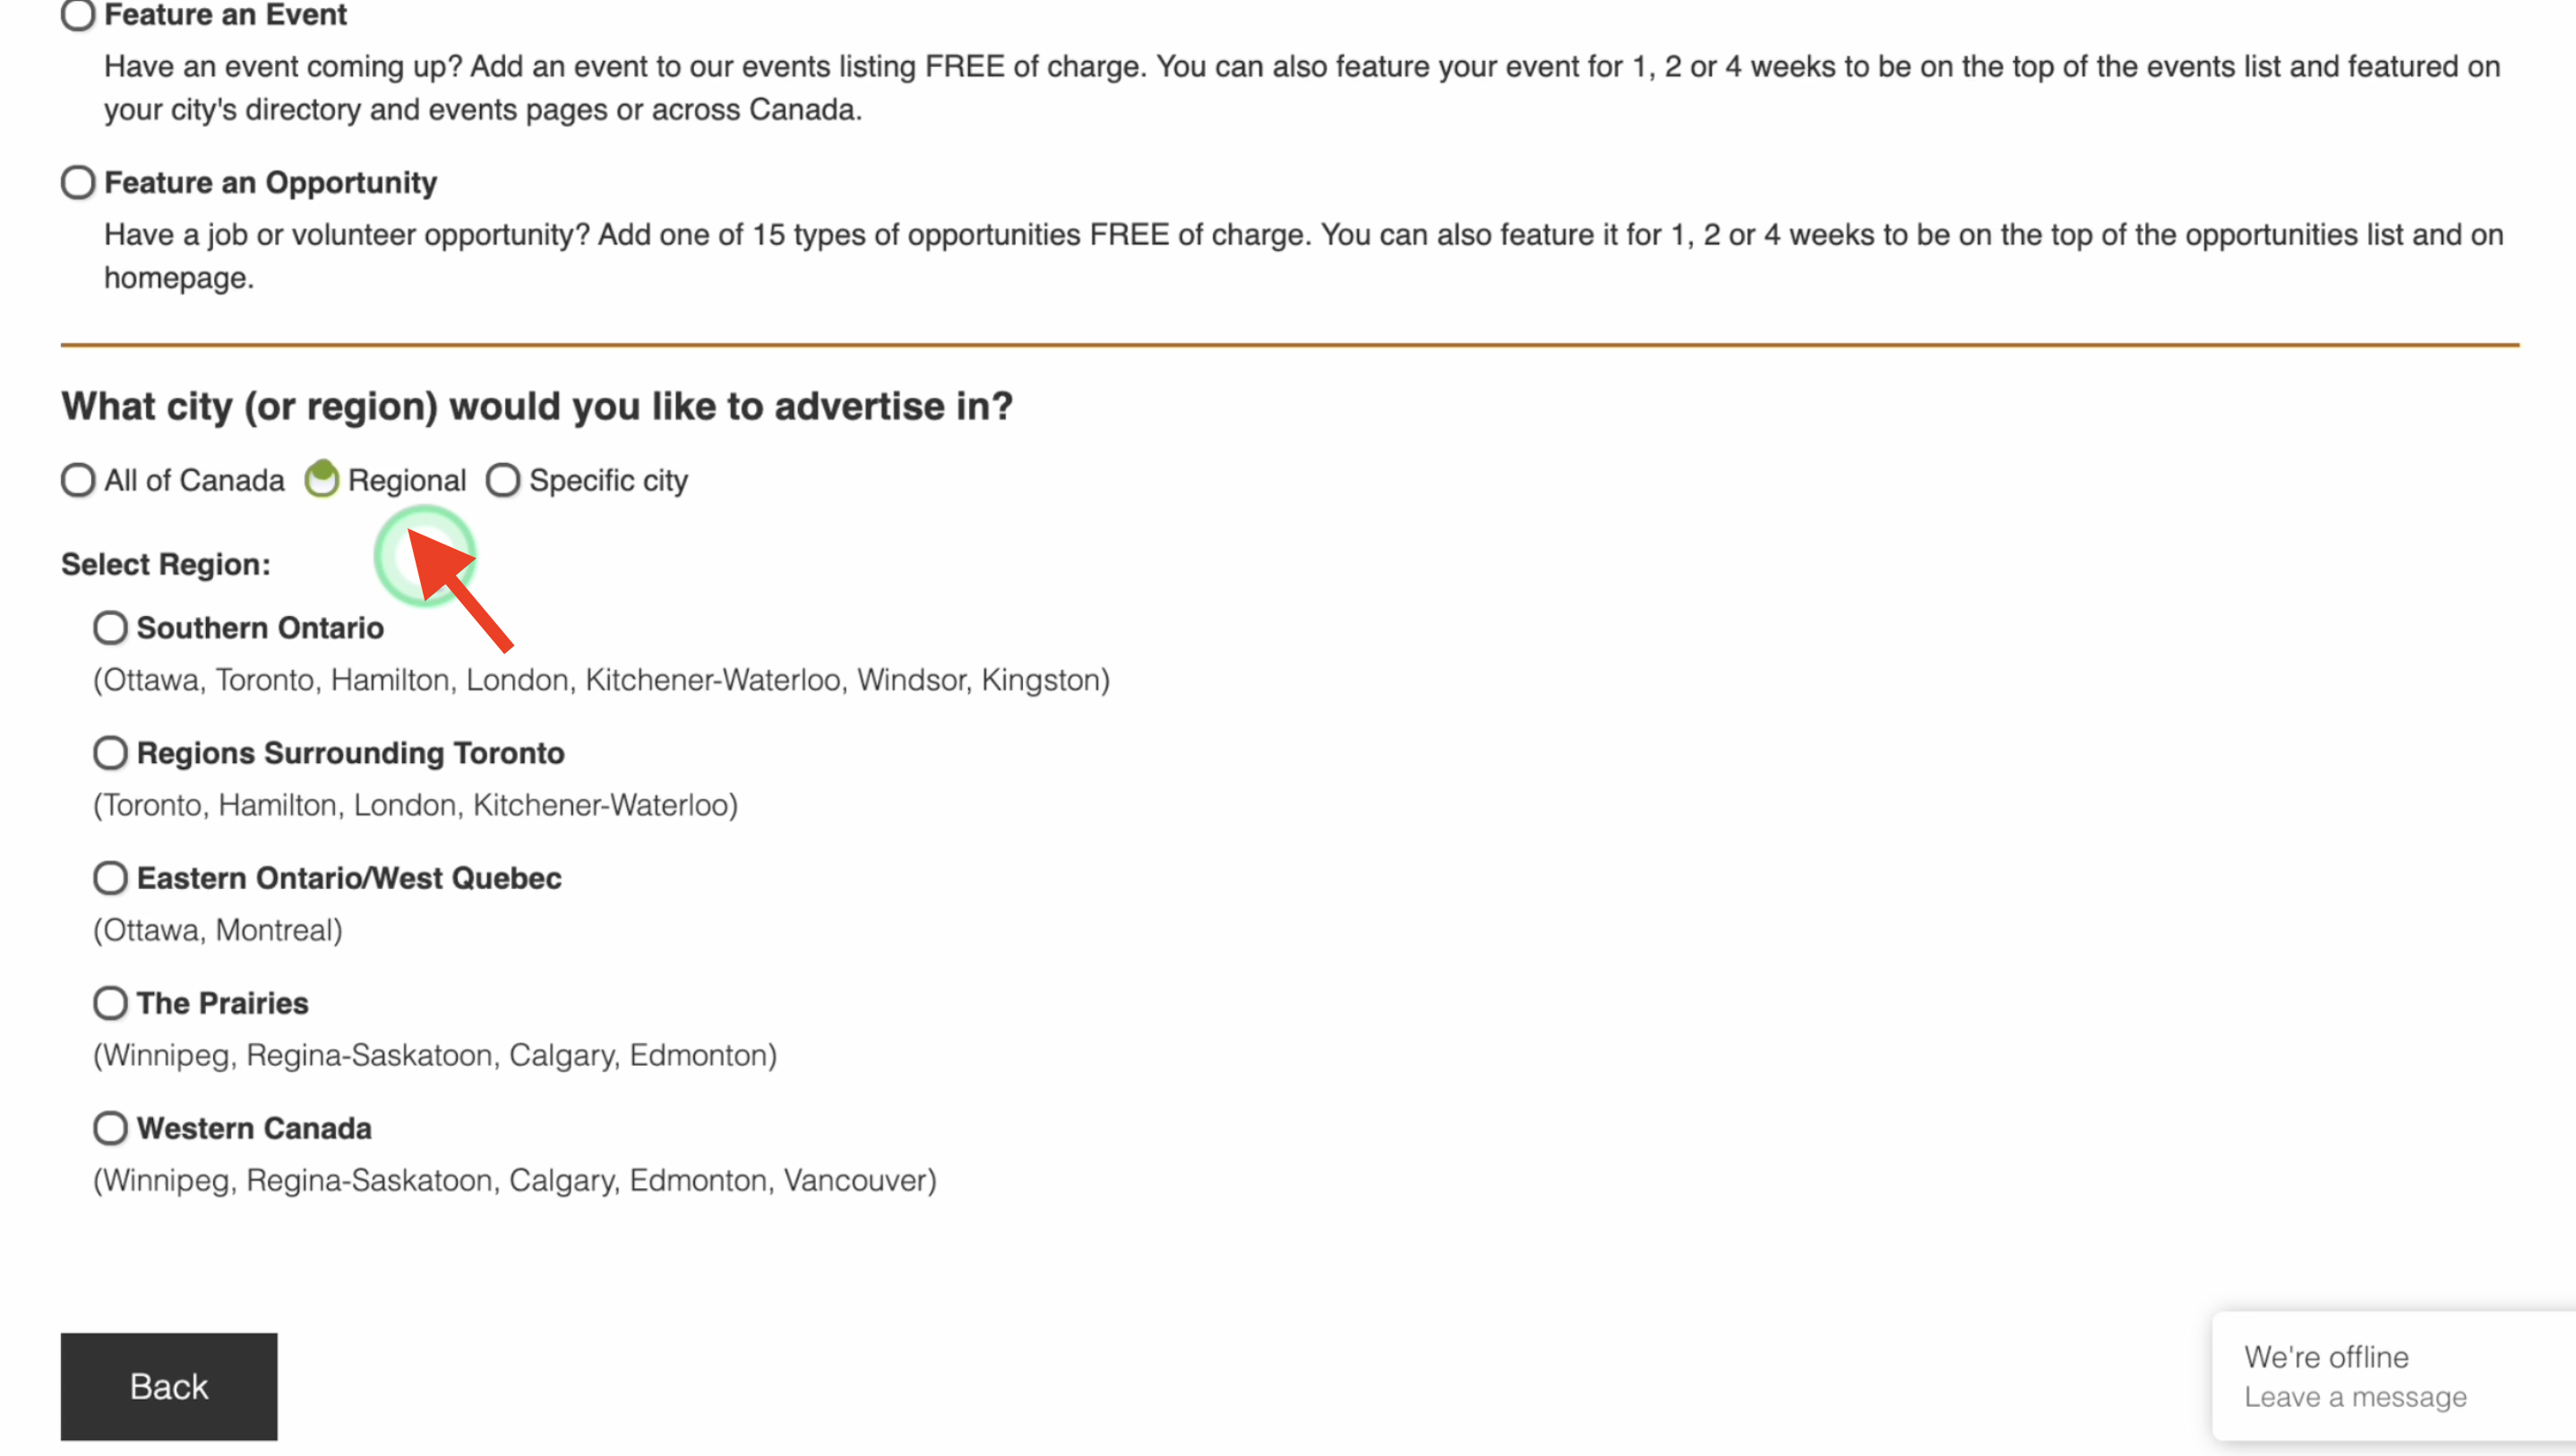
12. Choose what city or region you would like to advertise in. It could be nationally, regionally, or in a specific city.
13. If you choose to advertise in a specific city, the pricing will vary based on the website traffic in that city. Cities like Ottawa and Toronto, with a high number of users, have higher advertising costs compared to other cities.
14. This same goes for the regional. the advertising costs will also be higher if the region has a significant number of users compared to other regions.
15. You can also advertise in all of Canada.
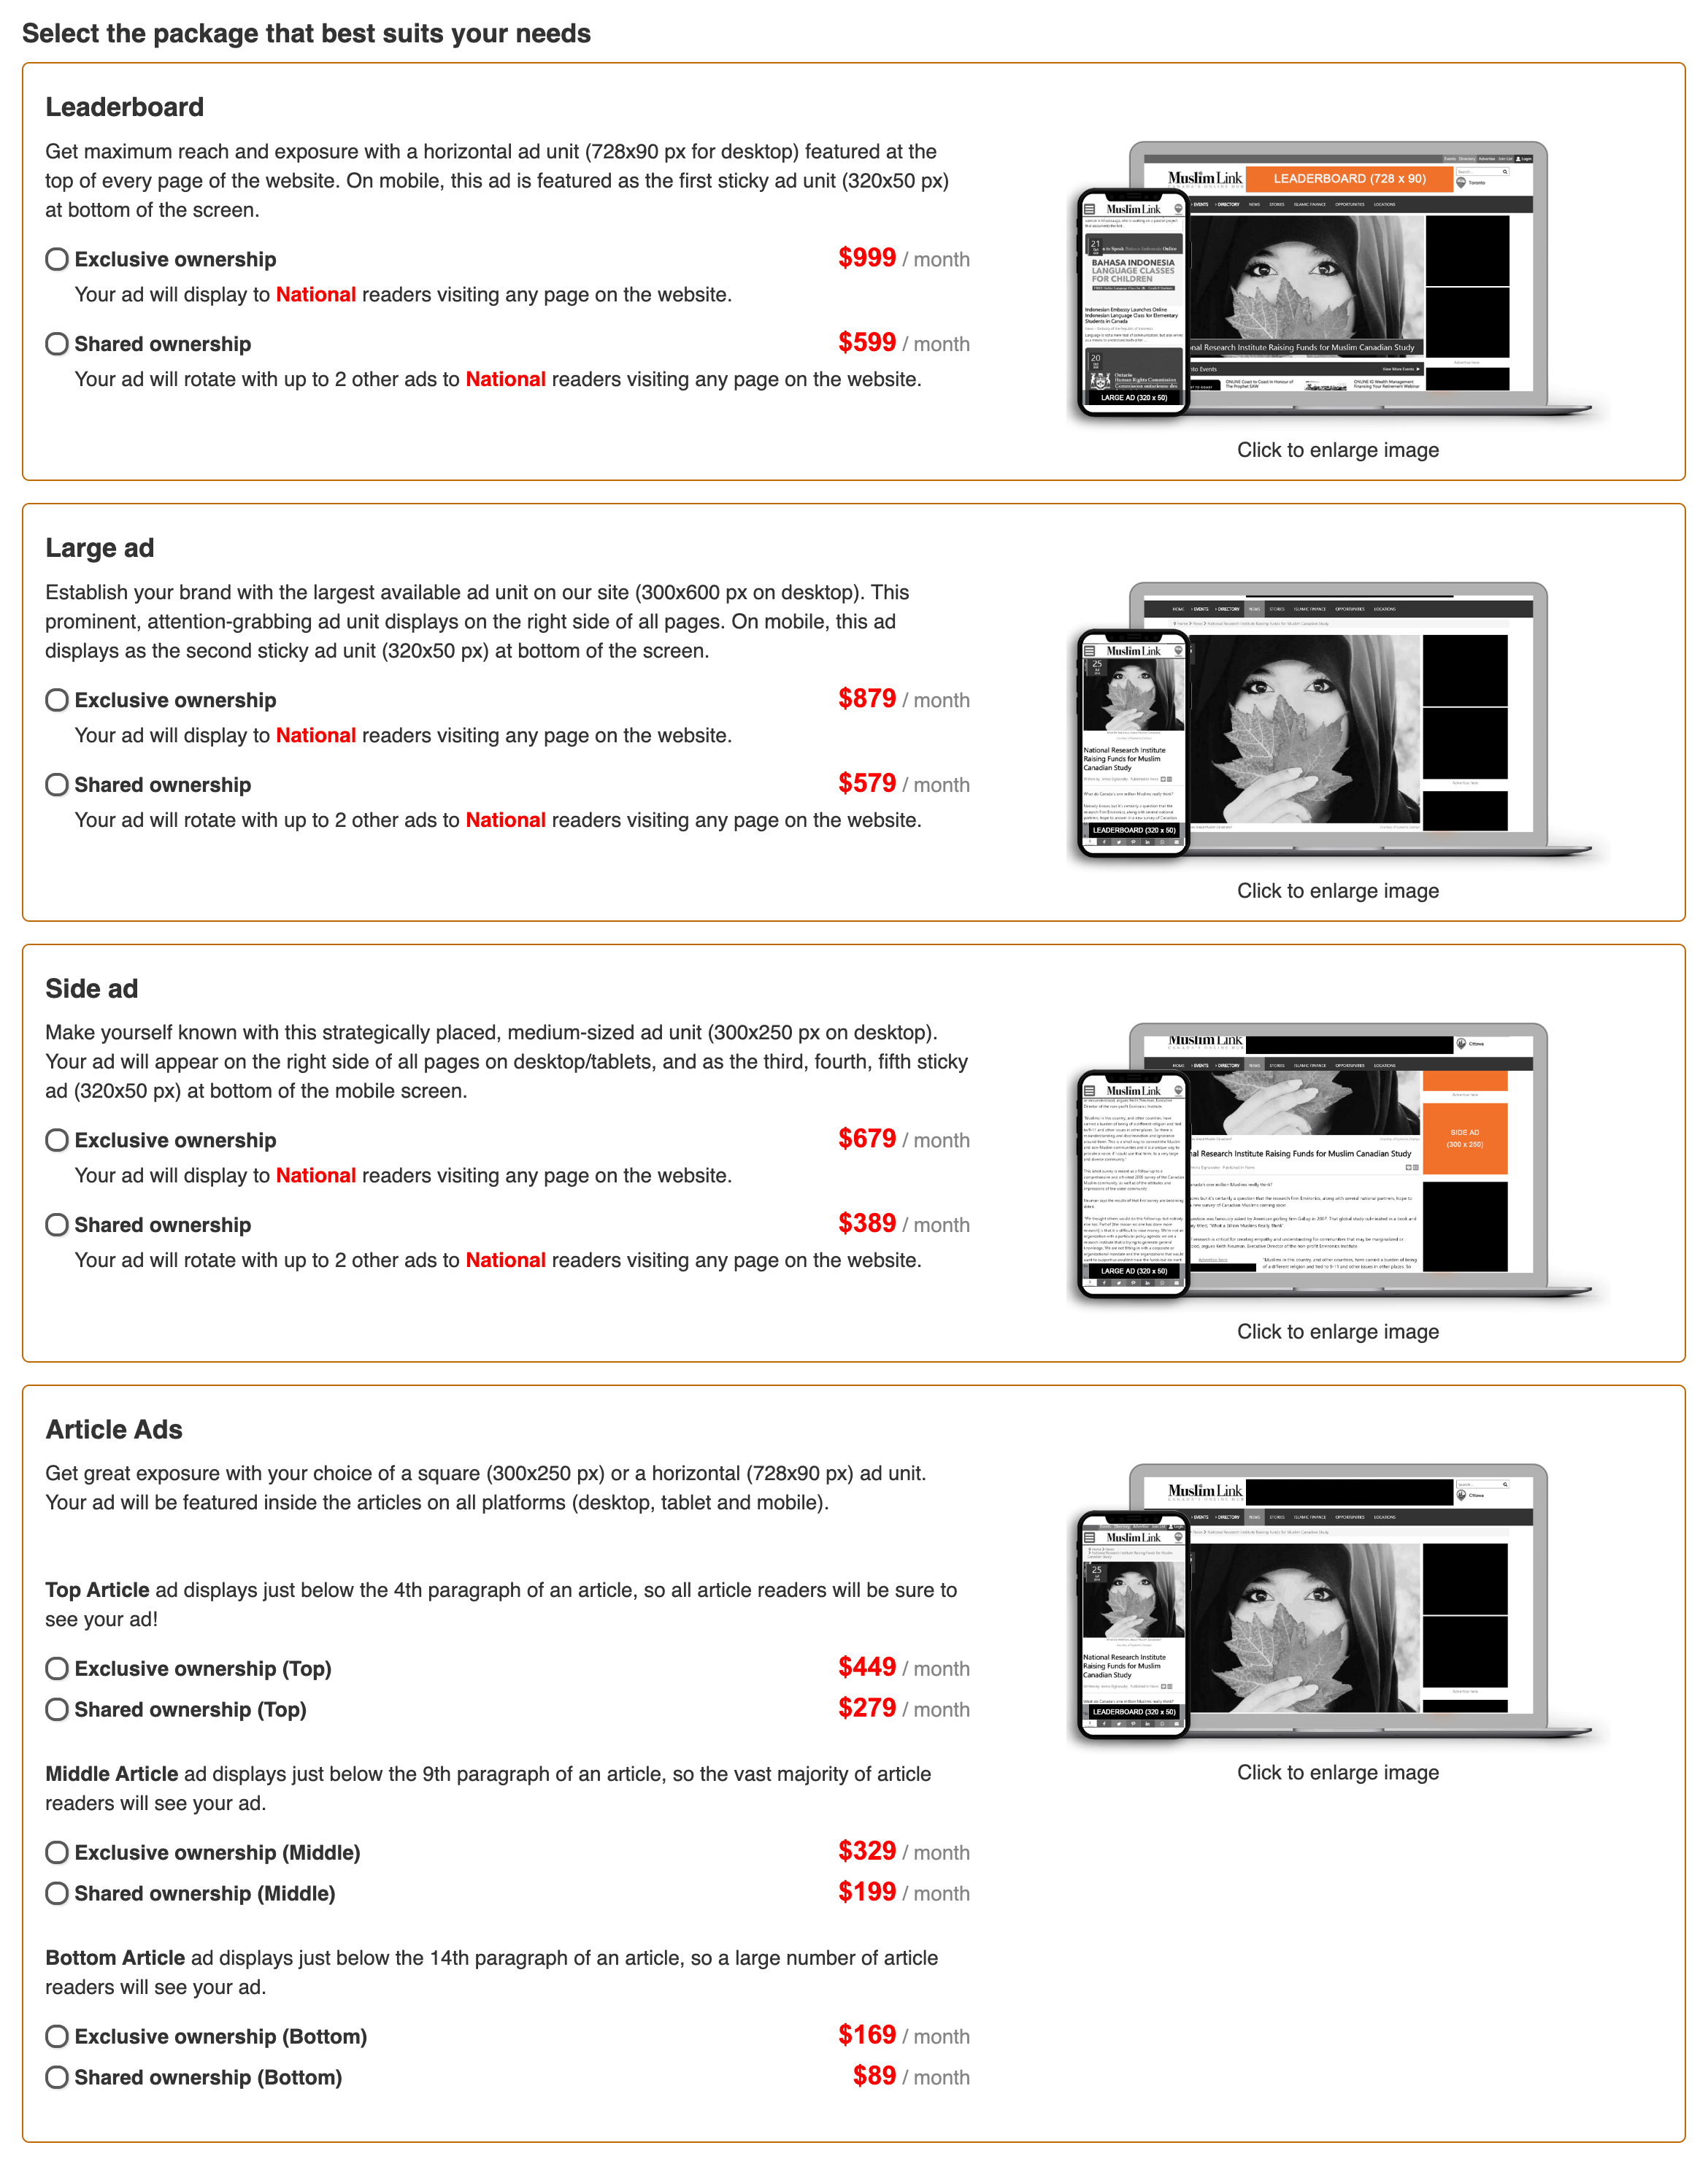
16. Here are the advertising options you can select from.
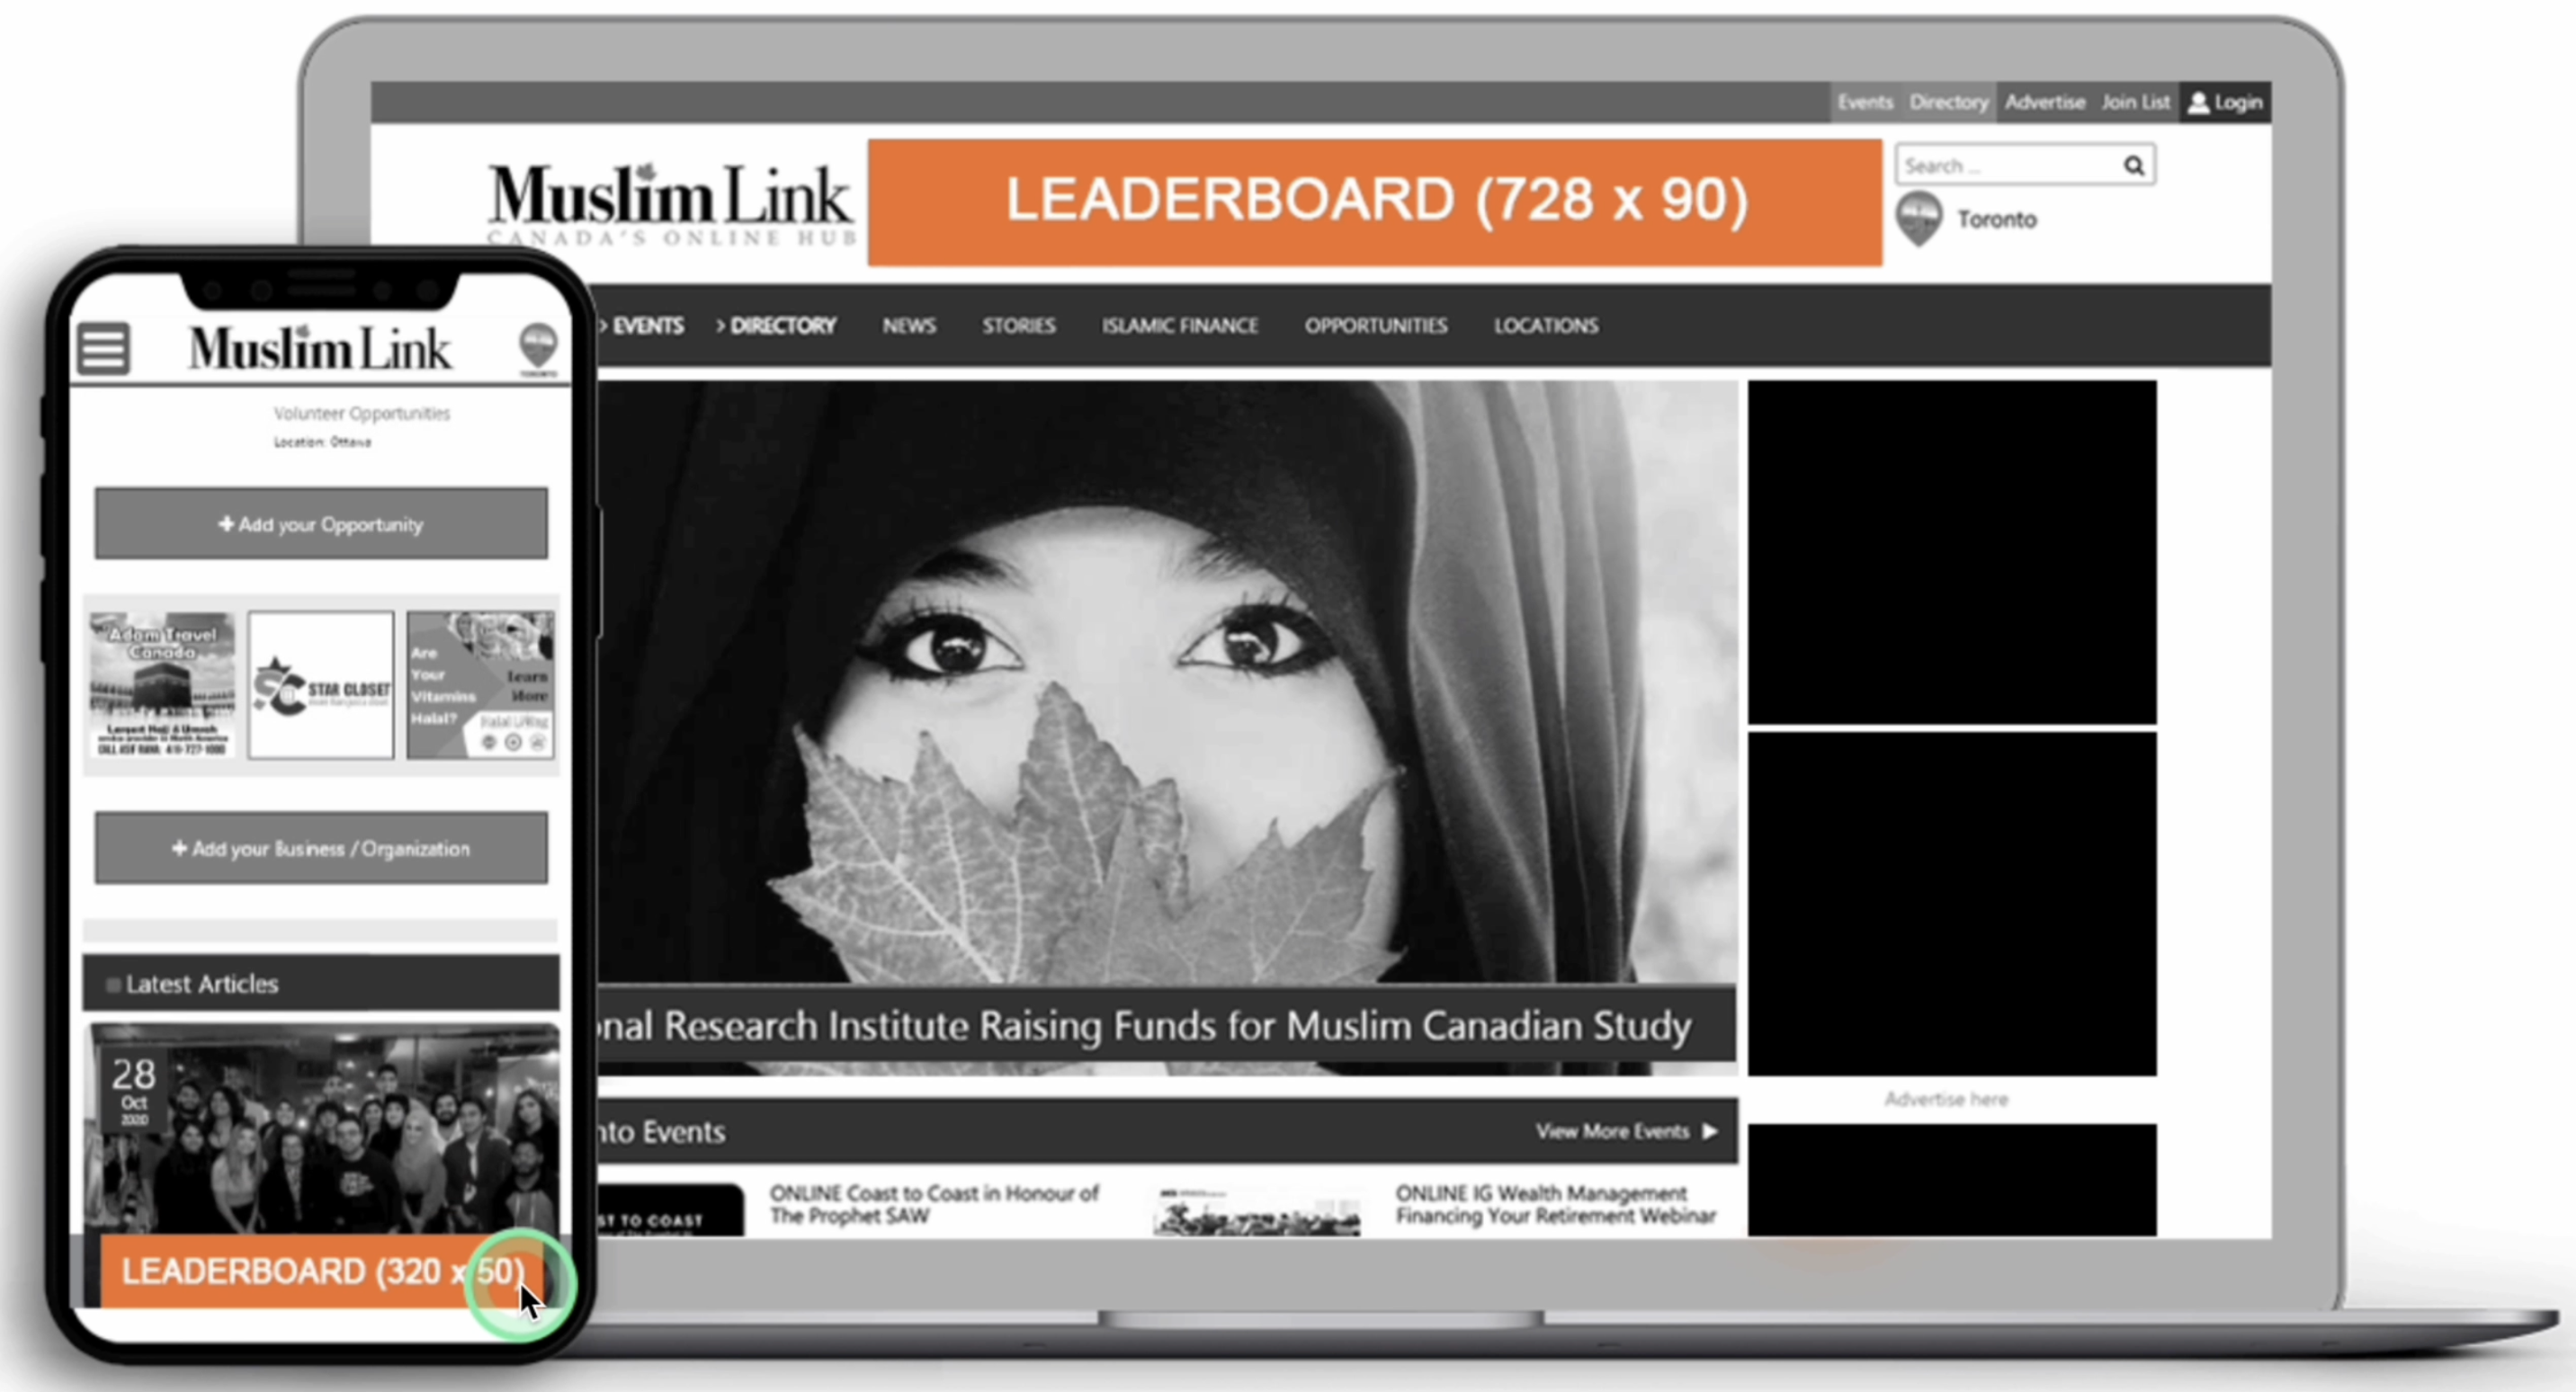
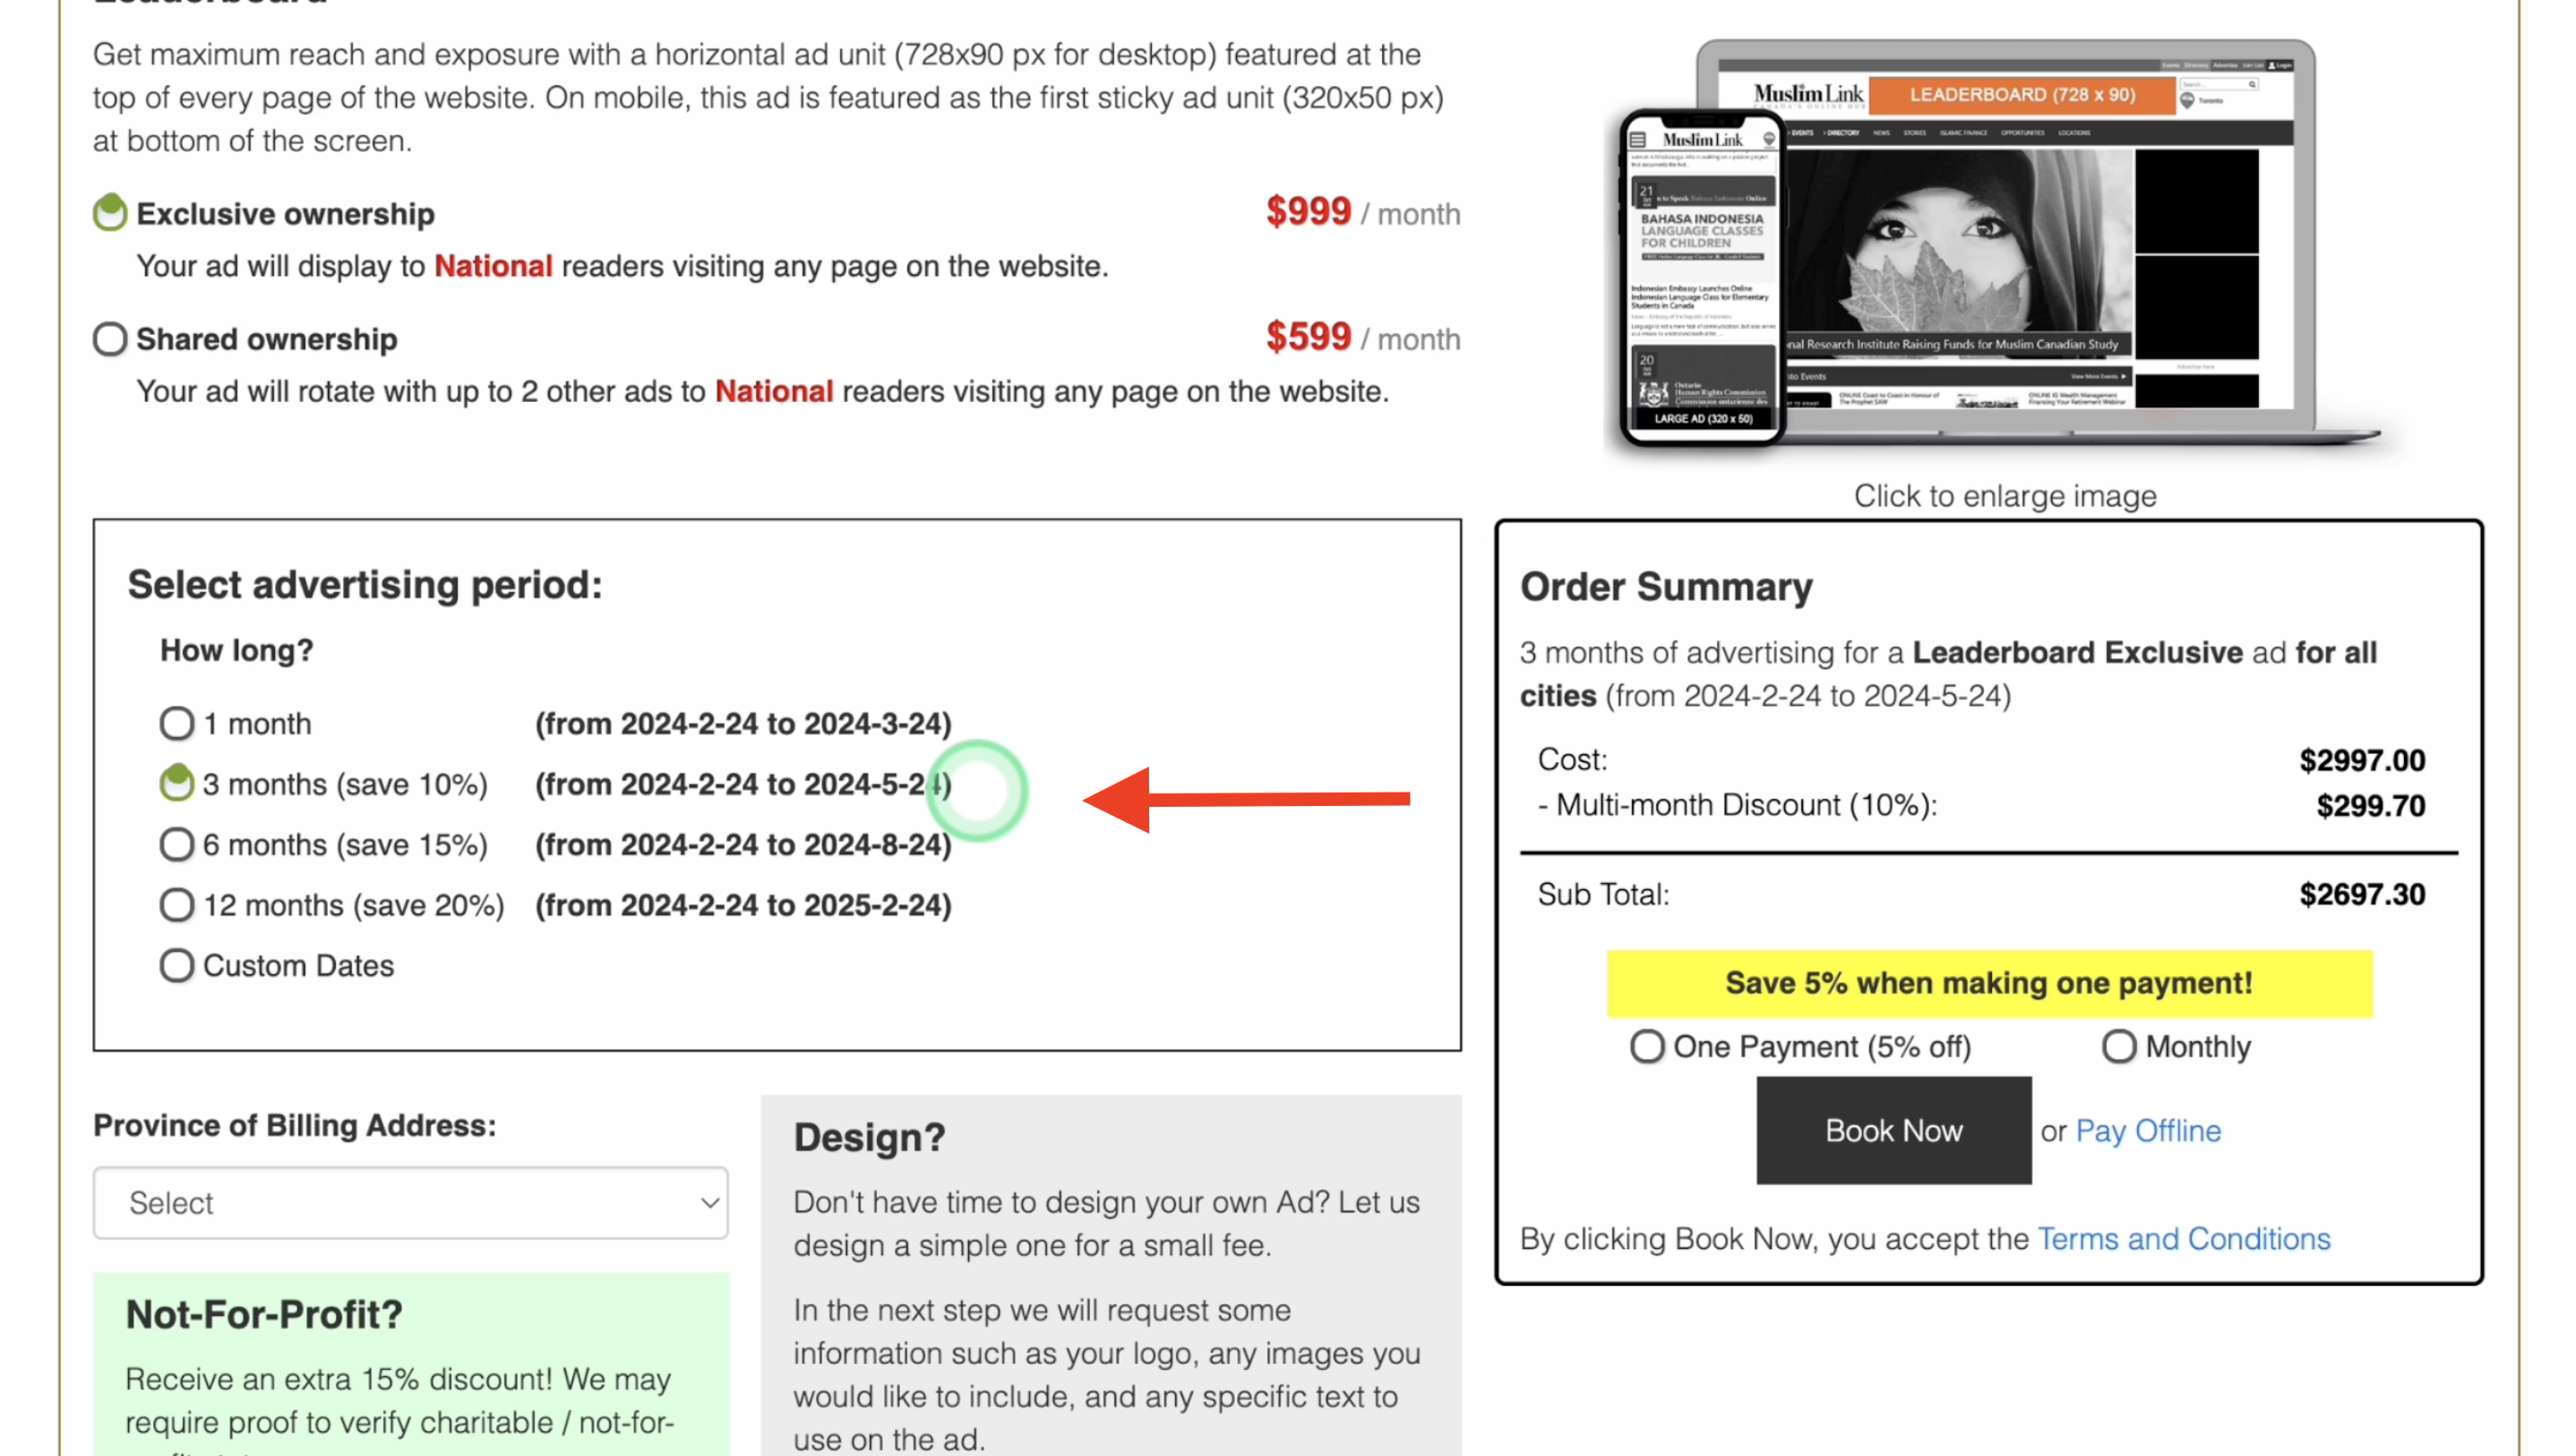
17. First is the Leaderboard. On desktop, it's 728 by 90 pixels, featured at the top of every page. On mobile, it's a 320 by 50 pixel ad, sticking to the bottom of the screen as the first sticky ad. You can gain maximum reach and exposure with a horizontal ad unit.
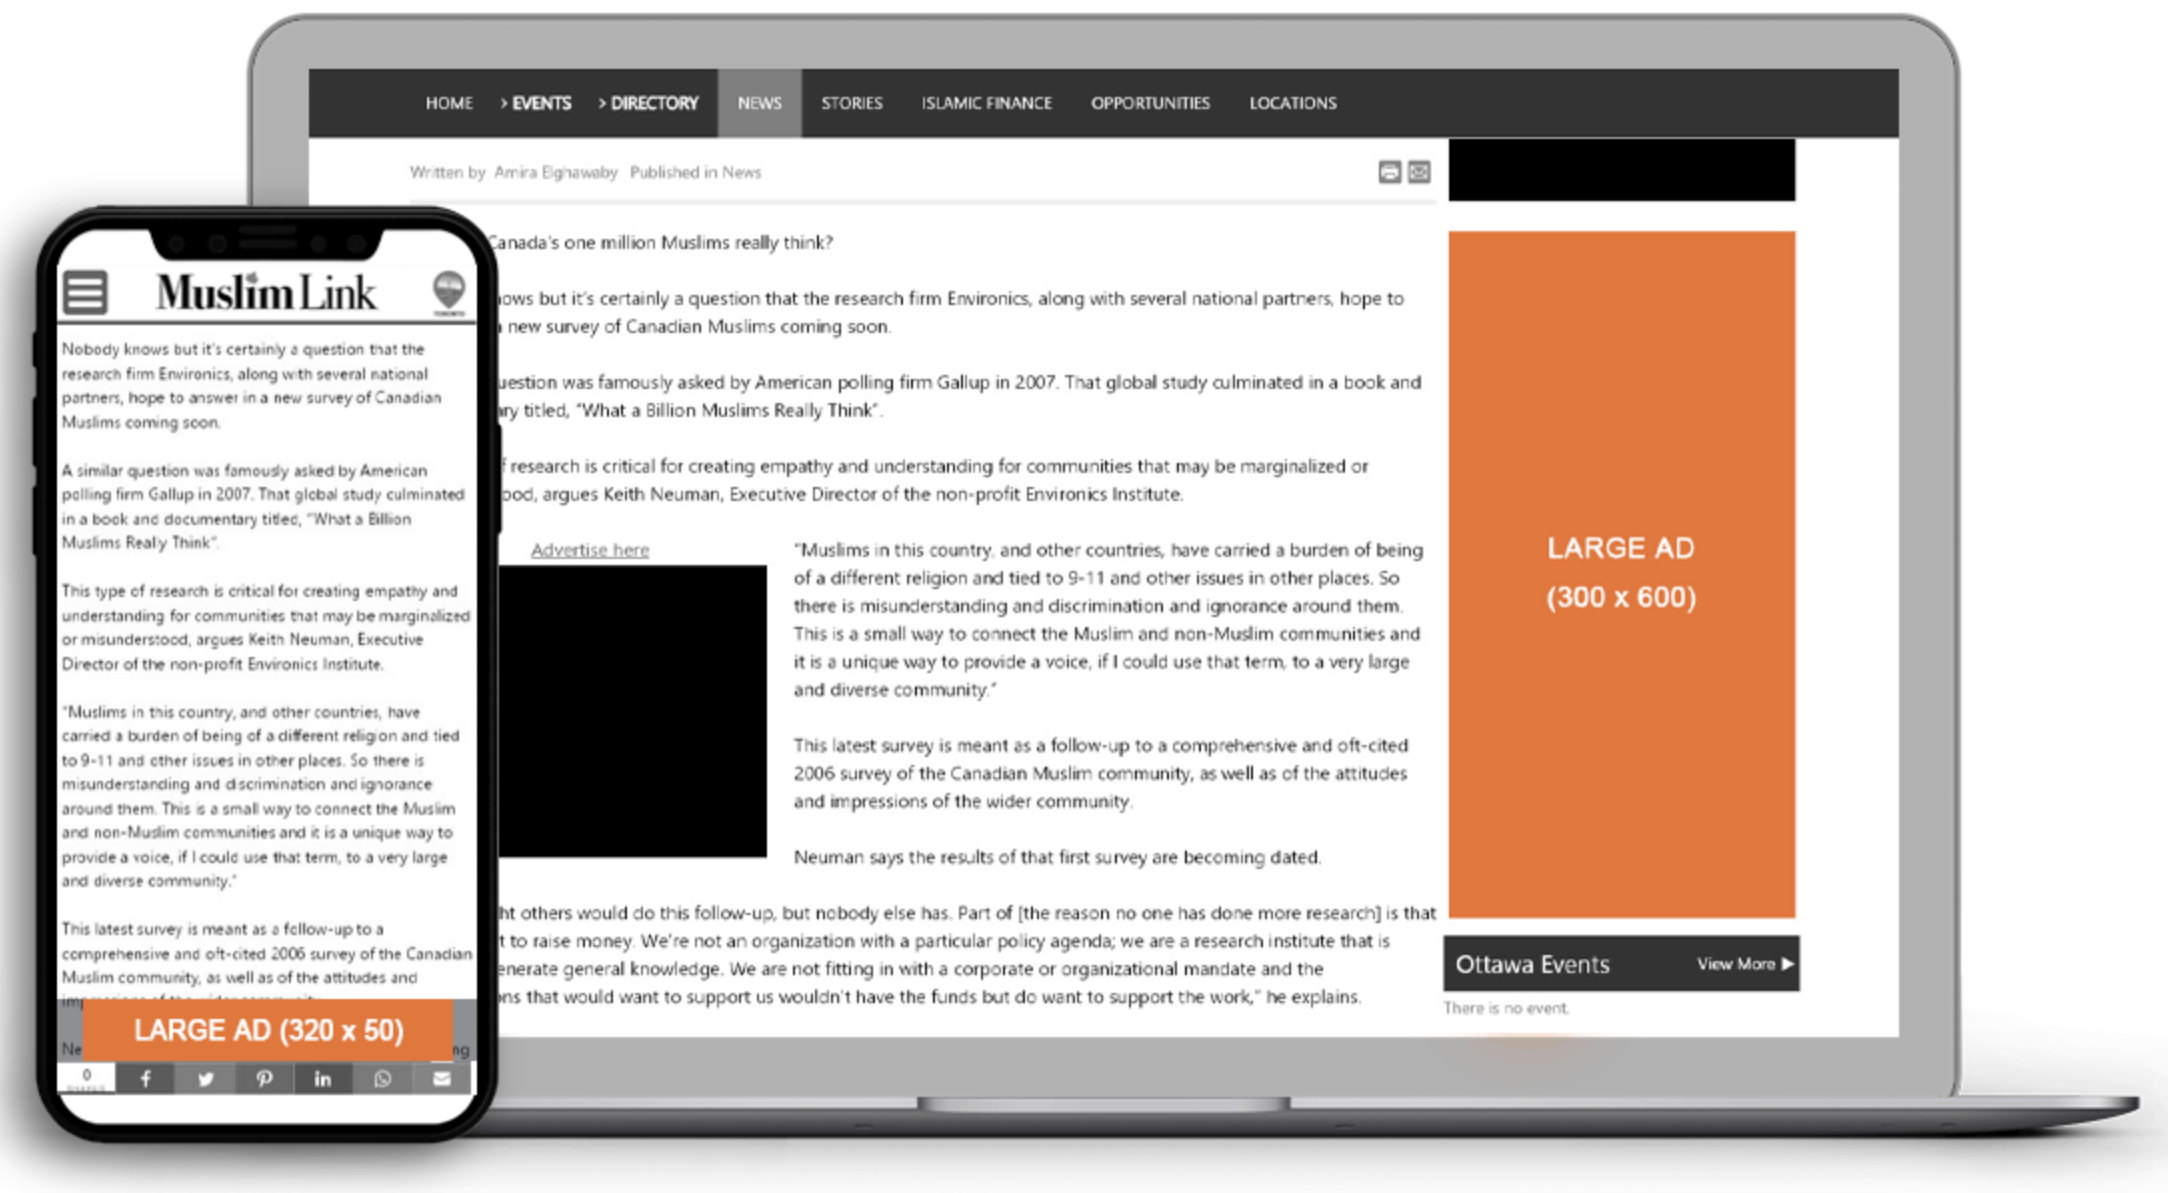
18. Second option is the Large Ad. It is a 300 by 600 pixel ad on desktop, positioned prominently on the right side of every page. On mobile, it's a 320 by 50 pixel ad, sticking at the bottom of the screen as the second sticky ad.
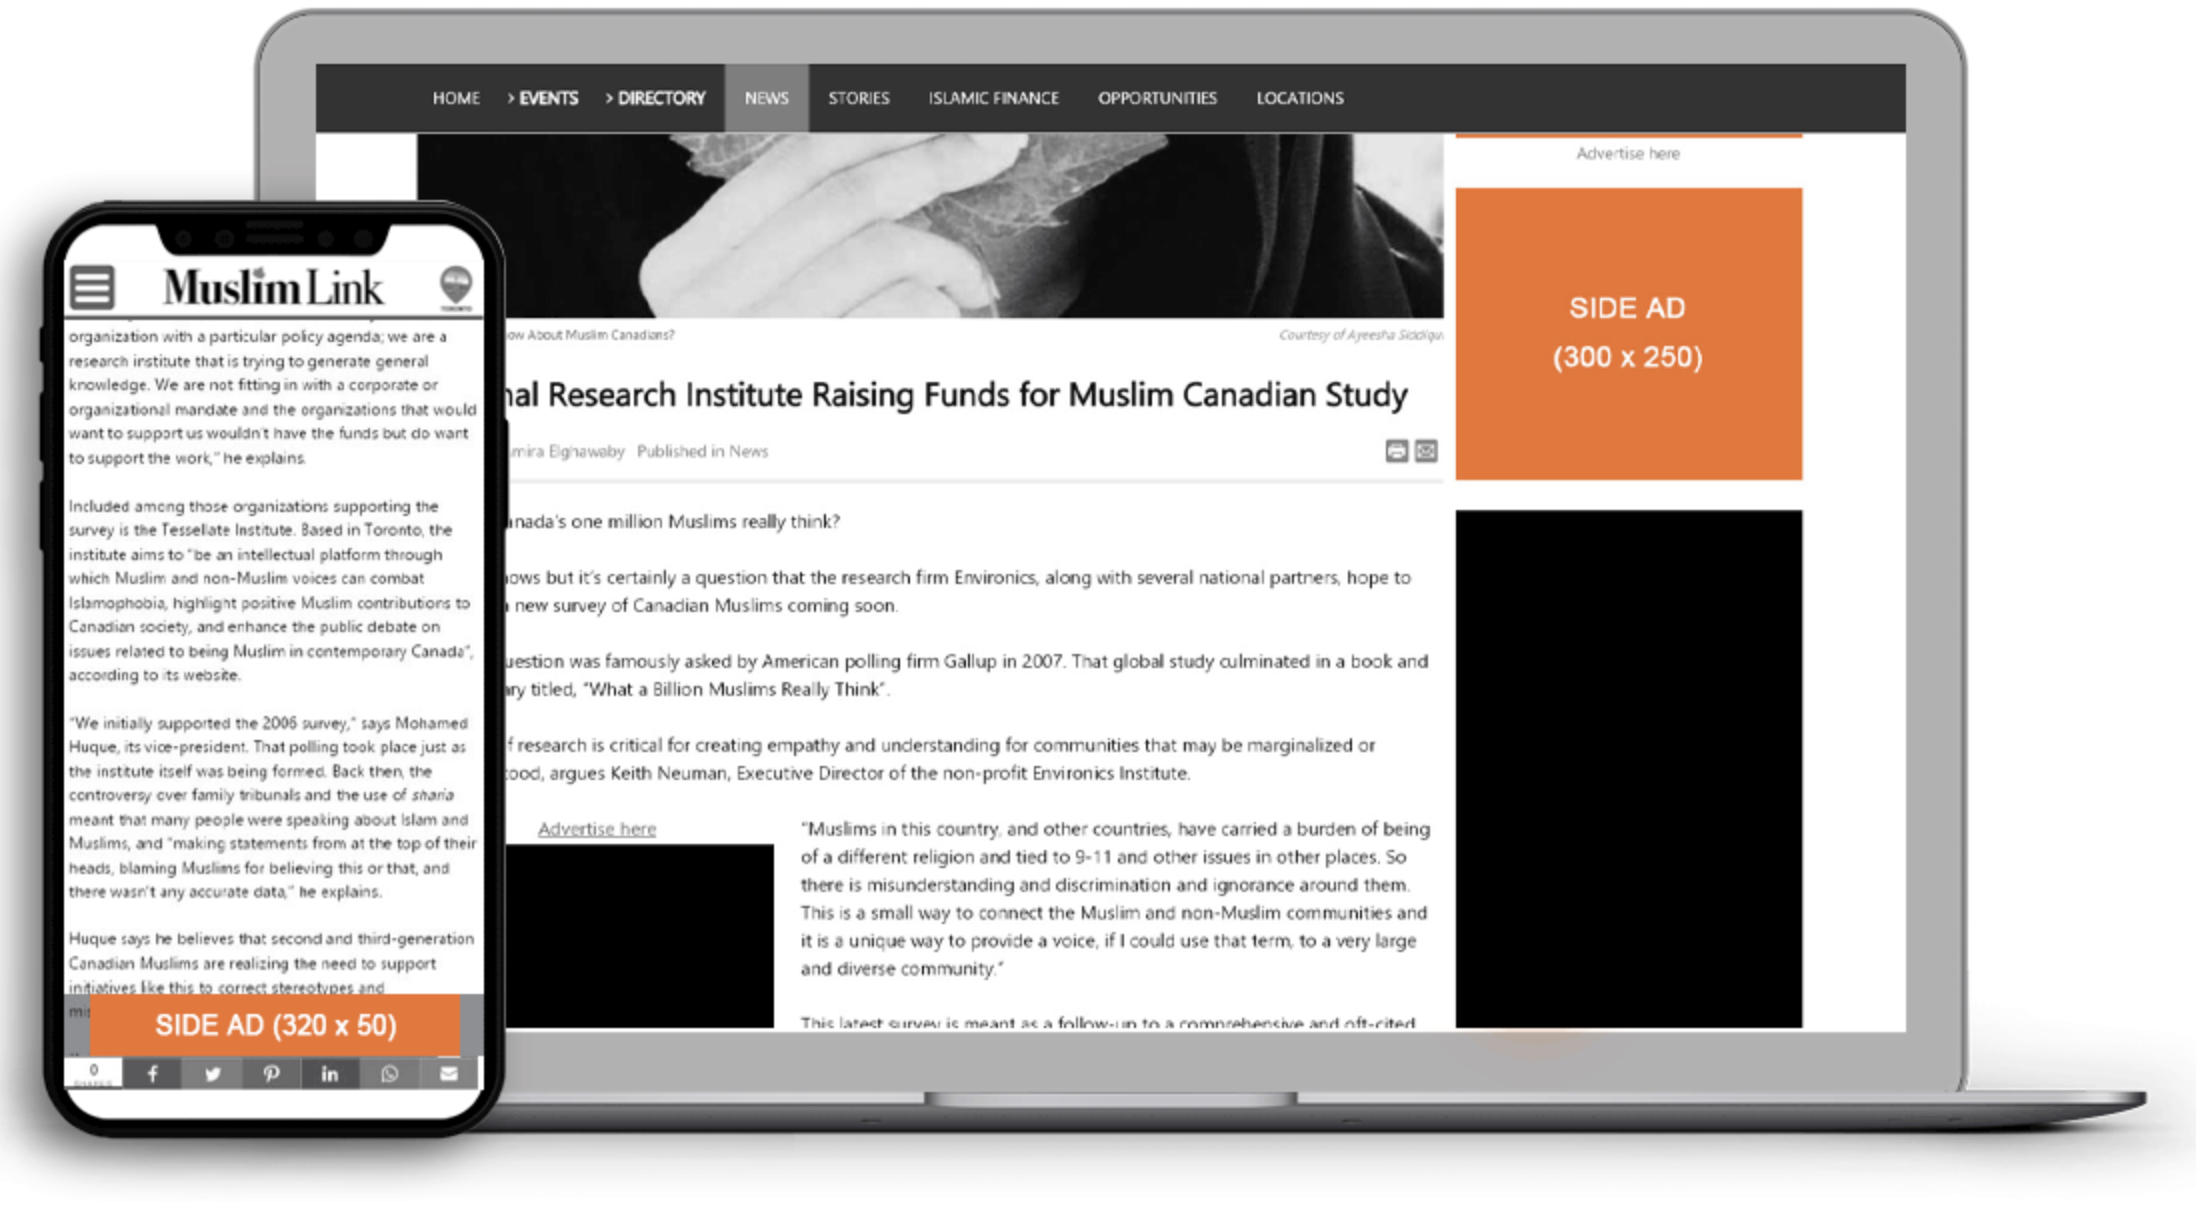
19. Third option is the Side Ad. It is a 300 by 250 pixel ad on desktop, placed on the right side of all pages. On mobile, it is 320 by 50 pixel ad your ad appears as the third, fourth, or fifth sticky ad at the bottom of the screen.
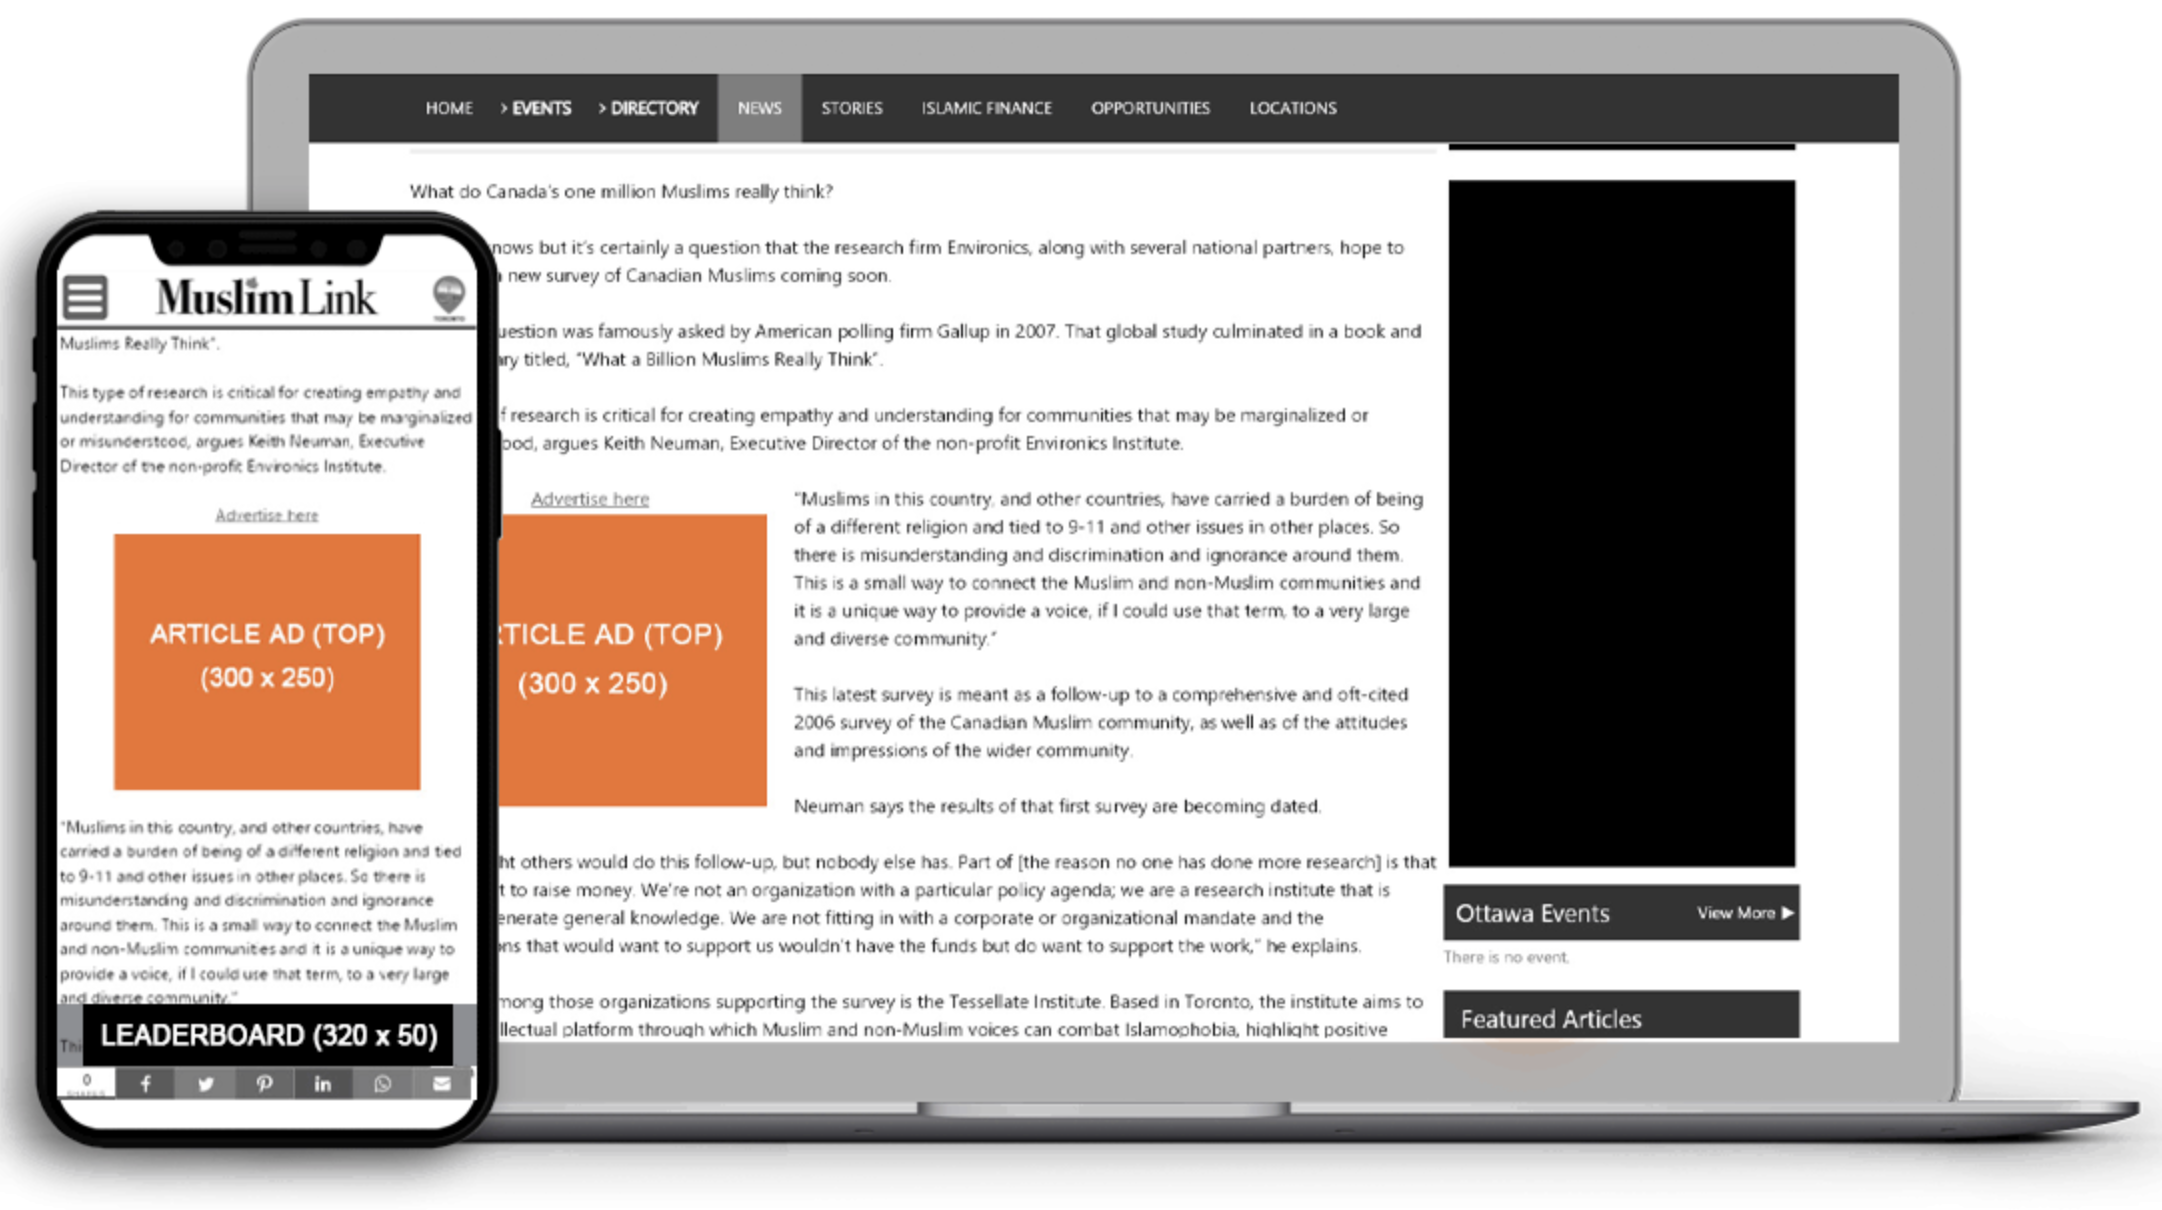
20. Last option is the Article Ad. The article ad is only available for national readers but not for regional or city ads. It is a 300 by 250 square pixel ad. Your ad will be prominently displayed within articles across all platforms. You can choose where to position your ad such as at the top, middle, or bottom of the article.
21. For the Top Article Ad, it is strategically placed just below the 4th paragraph, ensuring all article readers see your ad.
22. You can opt for the Middle Article Ad, it is positioned just below the 9th paragraph, reaching the vast majority of article readers.
23. Or you can choose the Bottom Article Ad, appearing just below the 14th paragraph, capturing a large number of article readers.
24. Each advertising option offers exclusive ownership or shared ownership. With exclusive ownership, you can display your ad alone on all pages of the website. With shared ownership, your ad will rotate with up to two others and appear on all pages of the website.
25. From all the advertising options, choose one. Then select how long is the advertising period. Multi-month discounts are automatically given for 3, 6, and 12 months.
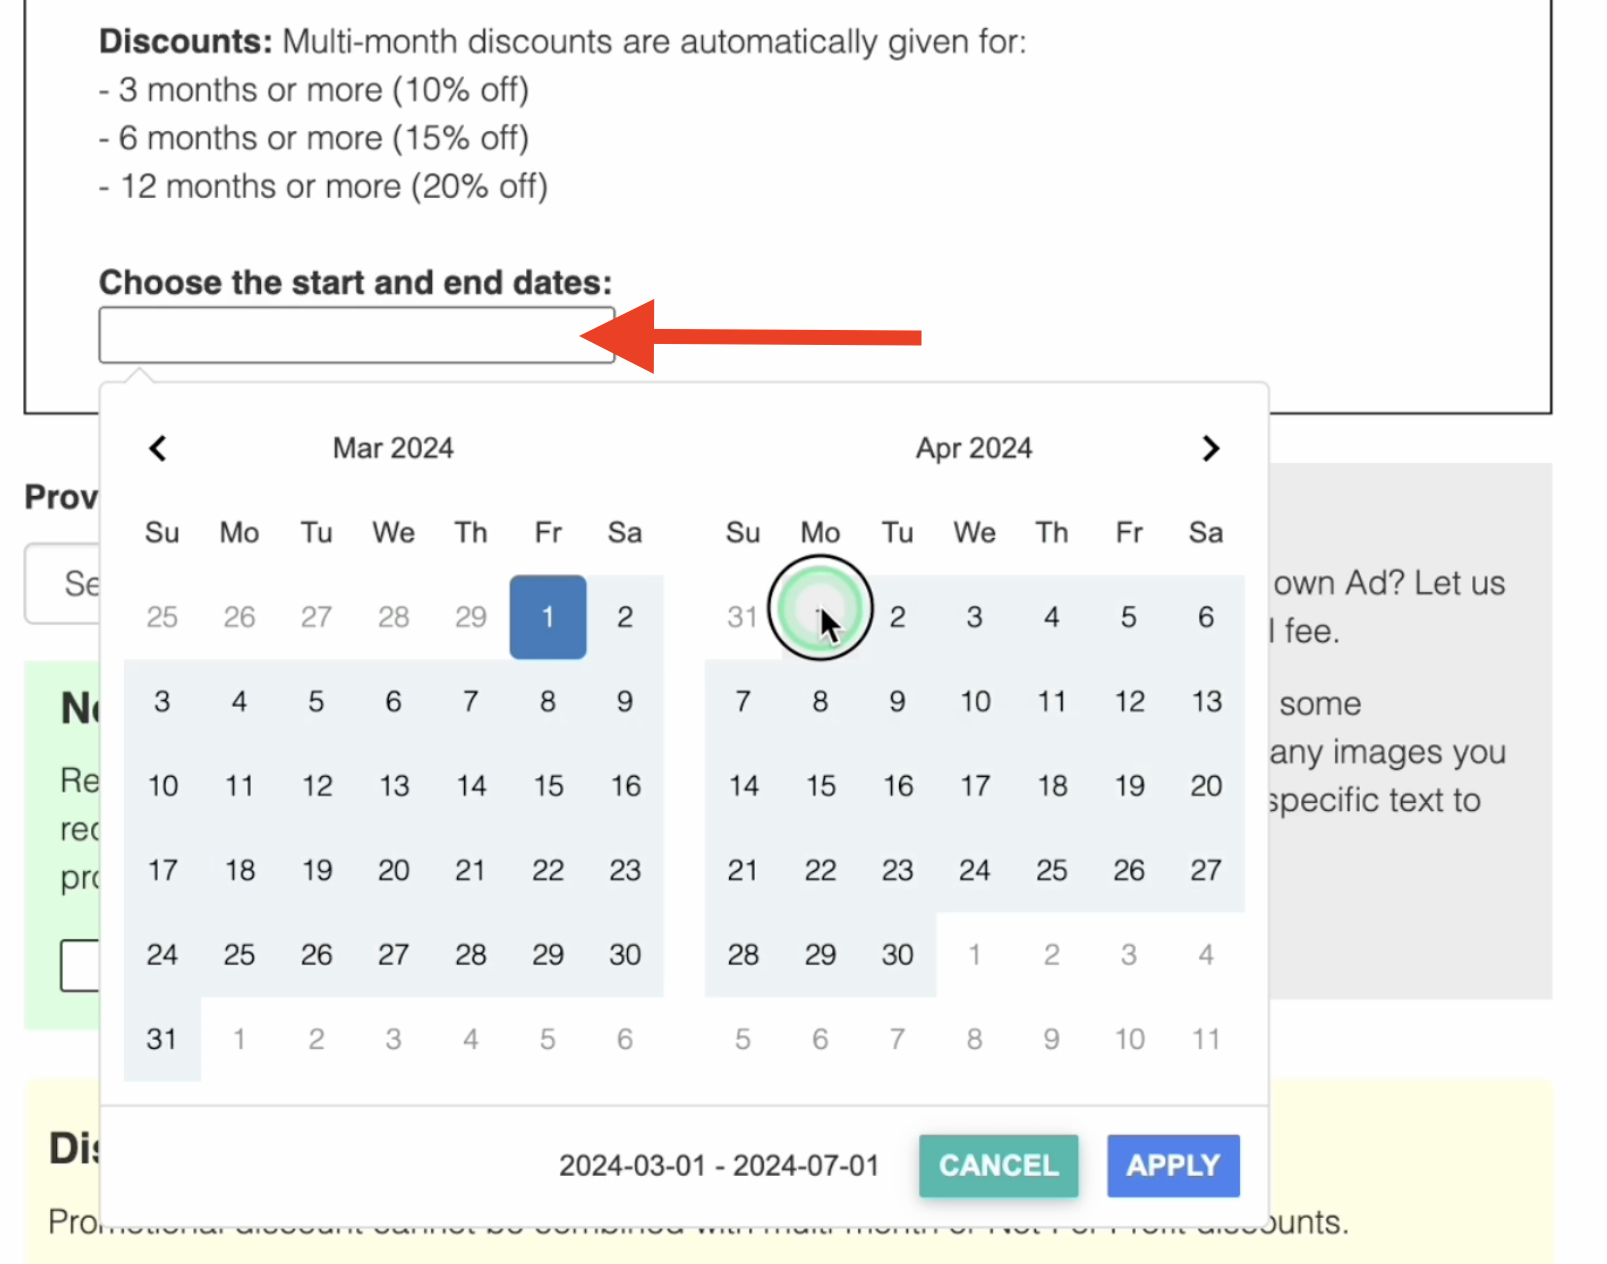
26. By default, selecting any option will automatically start the campaign advertising period if the ad is ready. If the ad submission is delayed or if the design is to be created by us, then the start and end date of the campaign will be delayed accordingly. The campaign will start once the ad is ready to publish.
27. However, you can choose custom dates if you need more time to prepare your ad or if you want to start or end the campaign on a specific date. The discounts will apply accordingly based on the length of the period chosen.
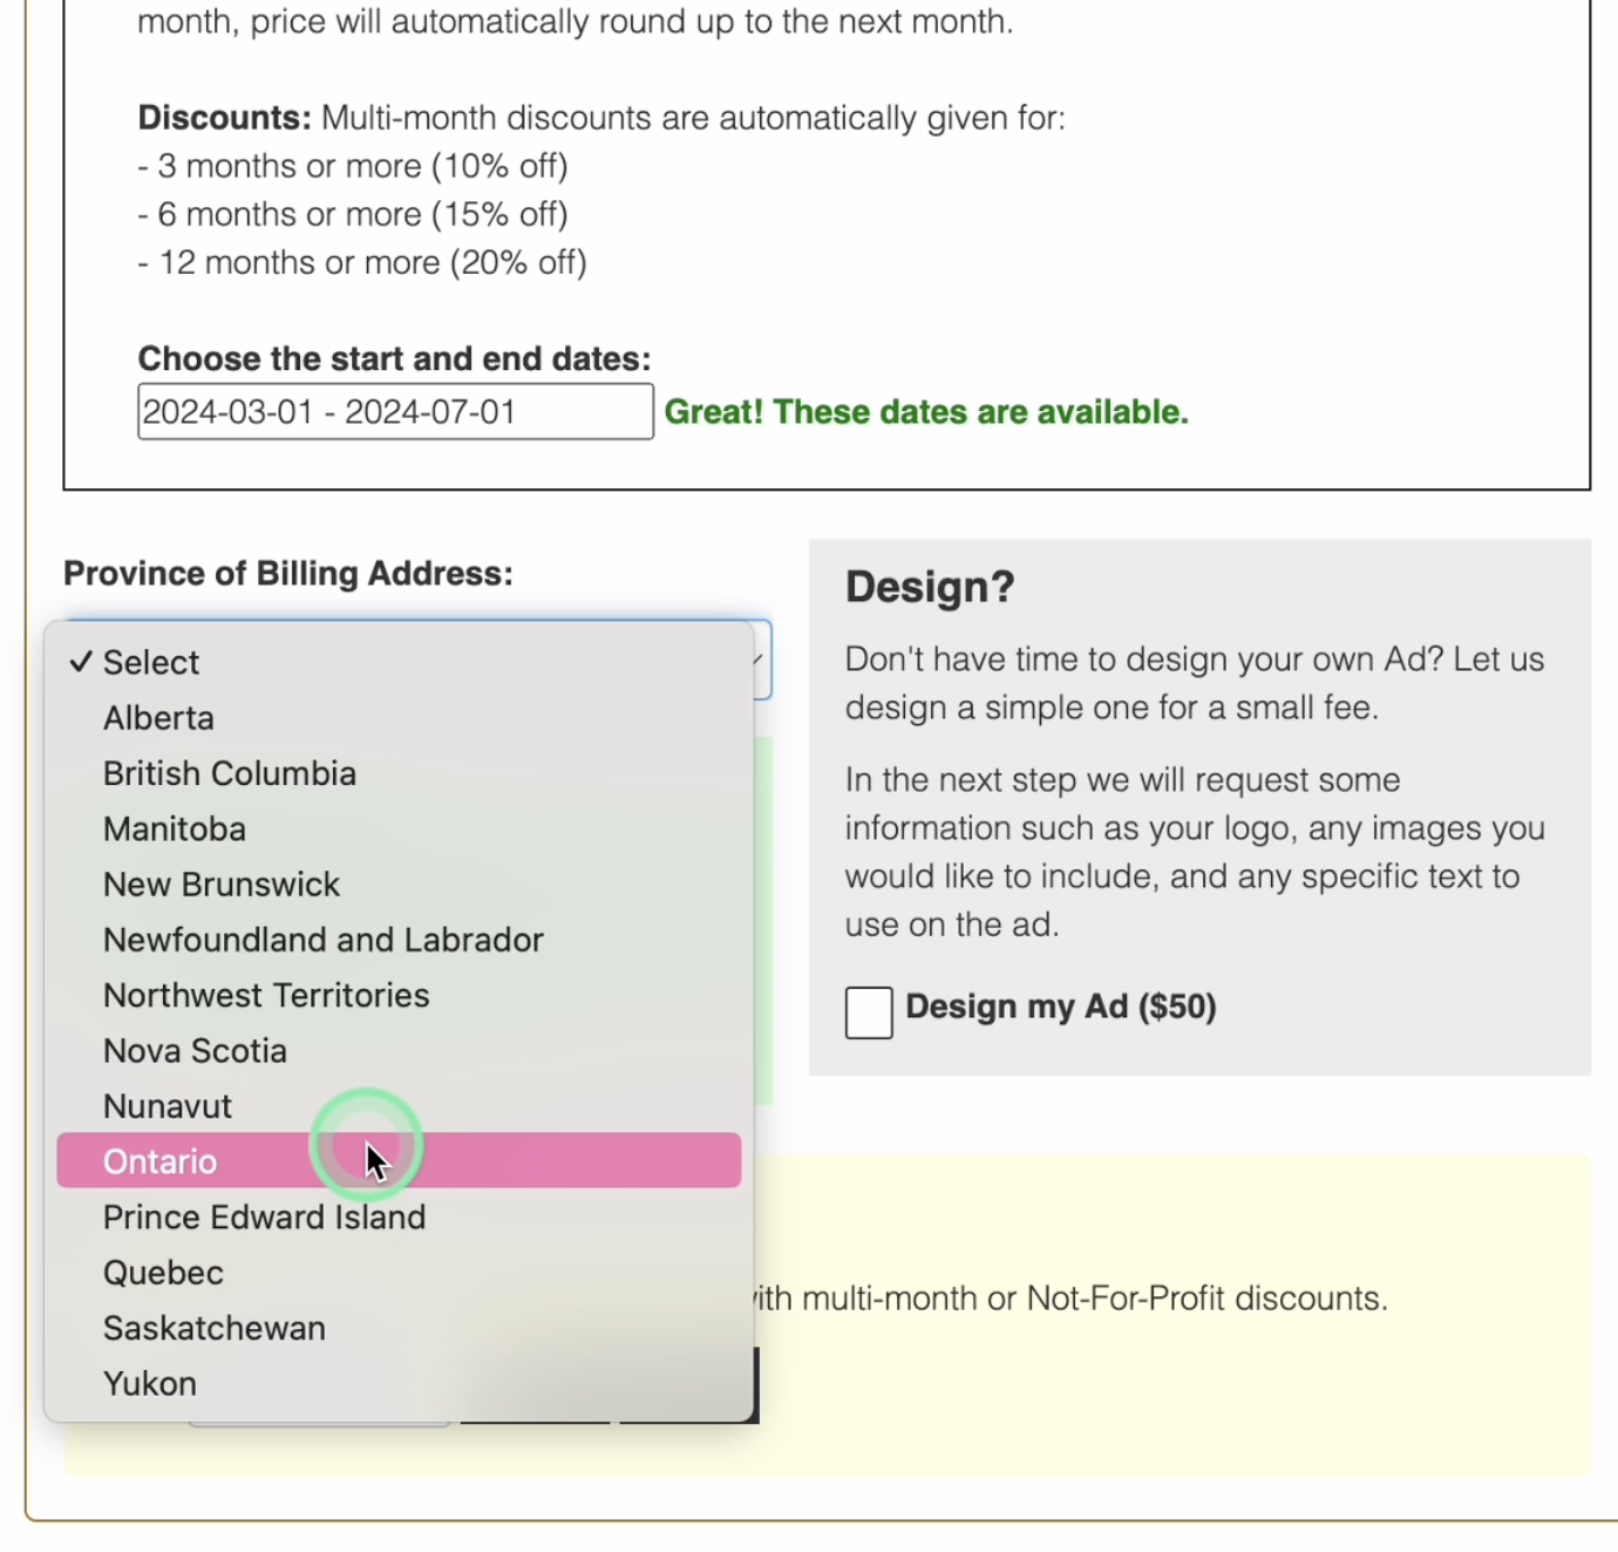
28. Select the province of billing address.
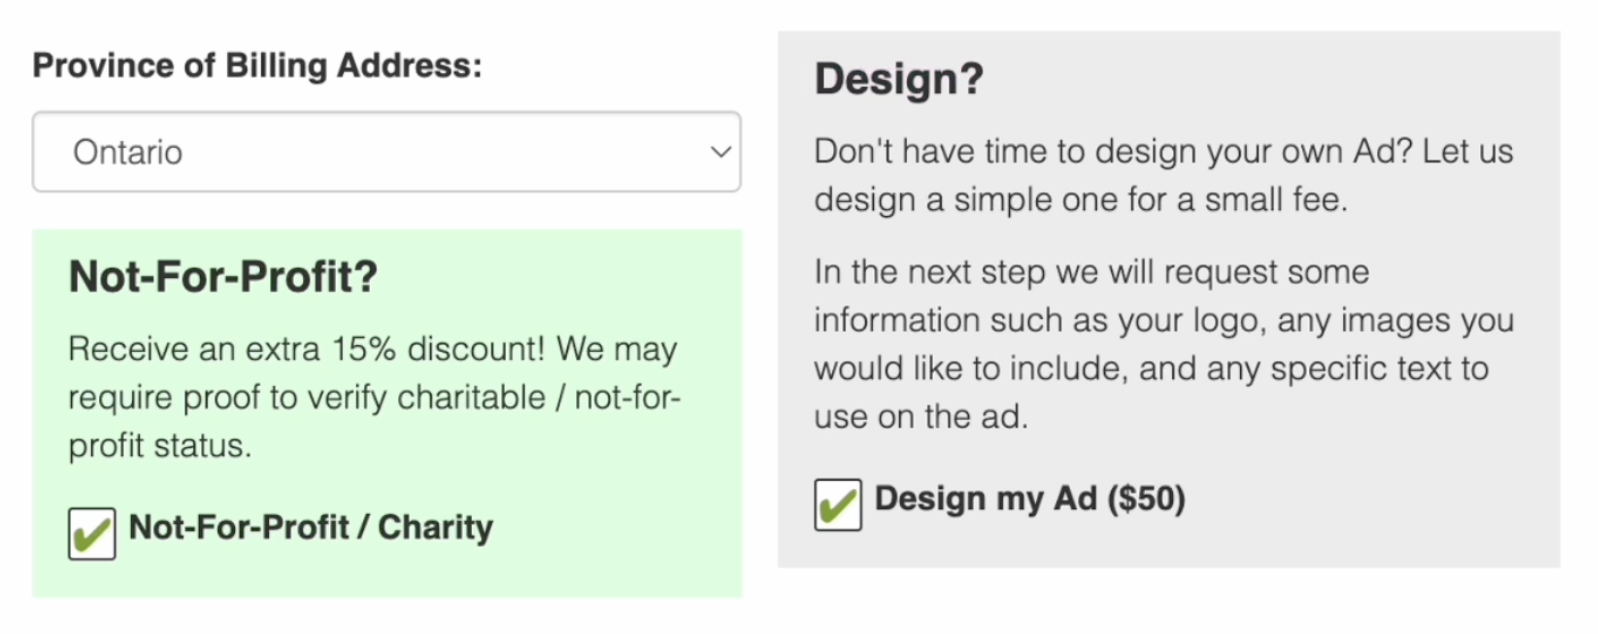
29. Not-For-Profit: You can Receive an extra 15% discount for non-profit. We may require proof to verify.
30. Design: You can allow us to design a simple ad for $50. In the next step, we'll ask for details like your logo, images you want to include, and any specific text for the ad.
31. Apply here a Discount code if any. Promotional discount cannot be combined with multi-month or Not-For-Profit discounts. Just enter here your discount code then click “Apply”.
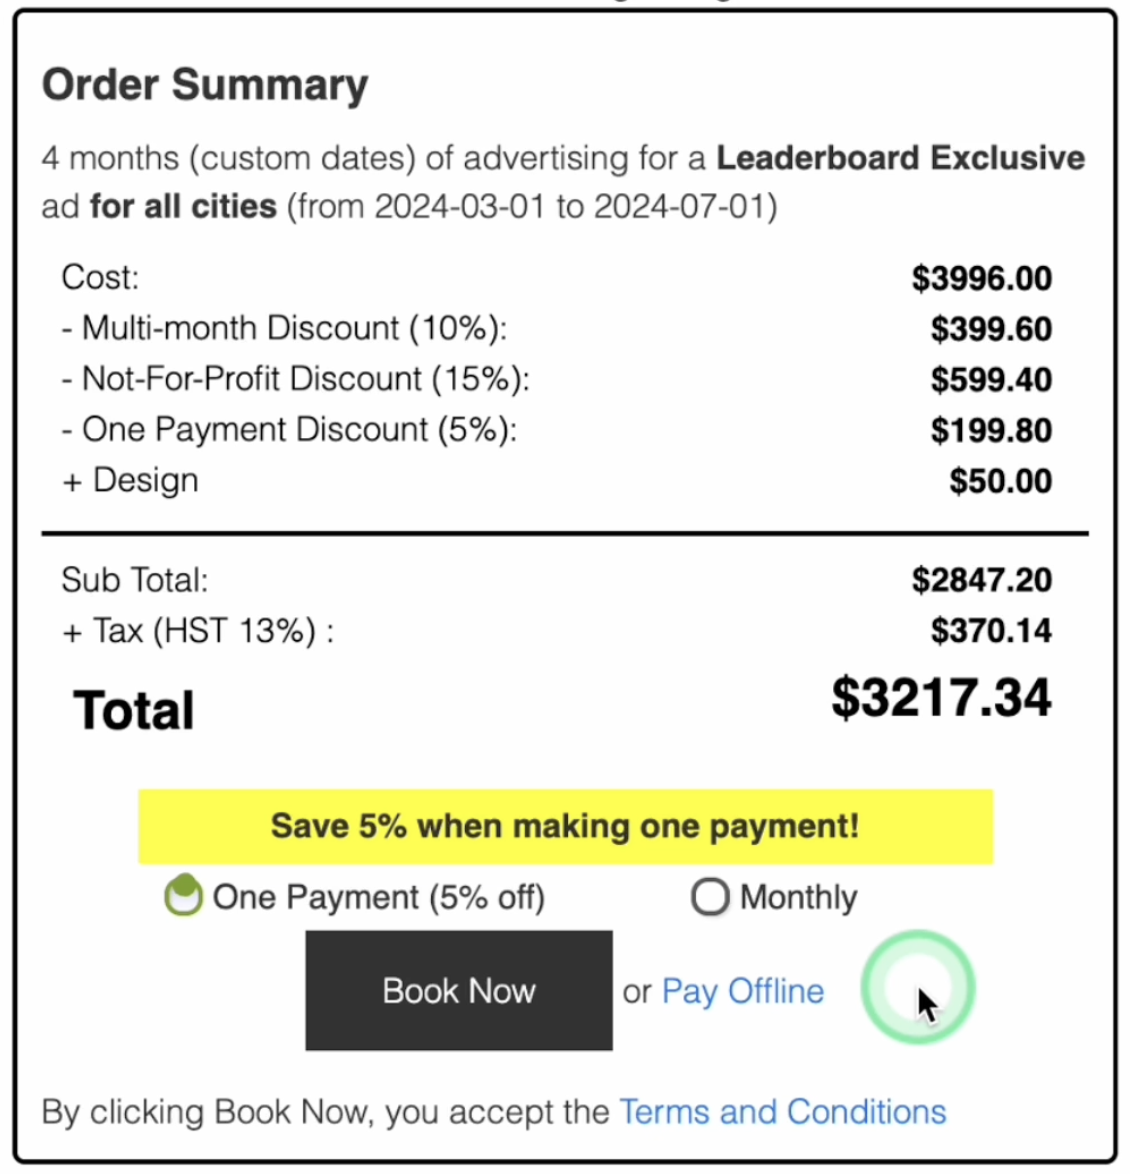
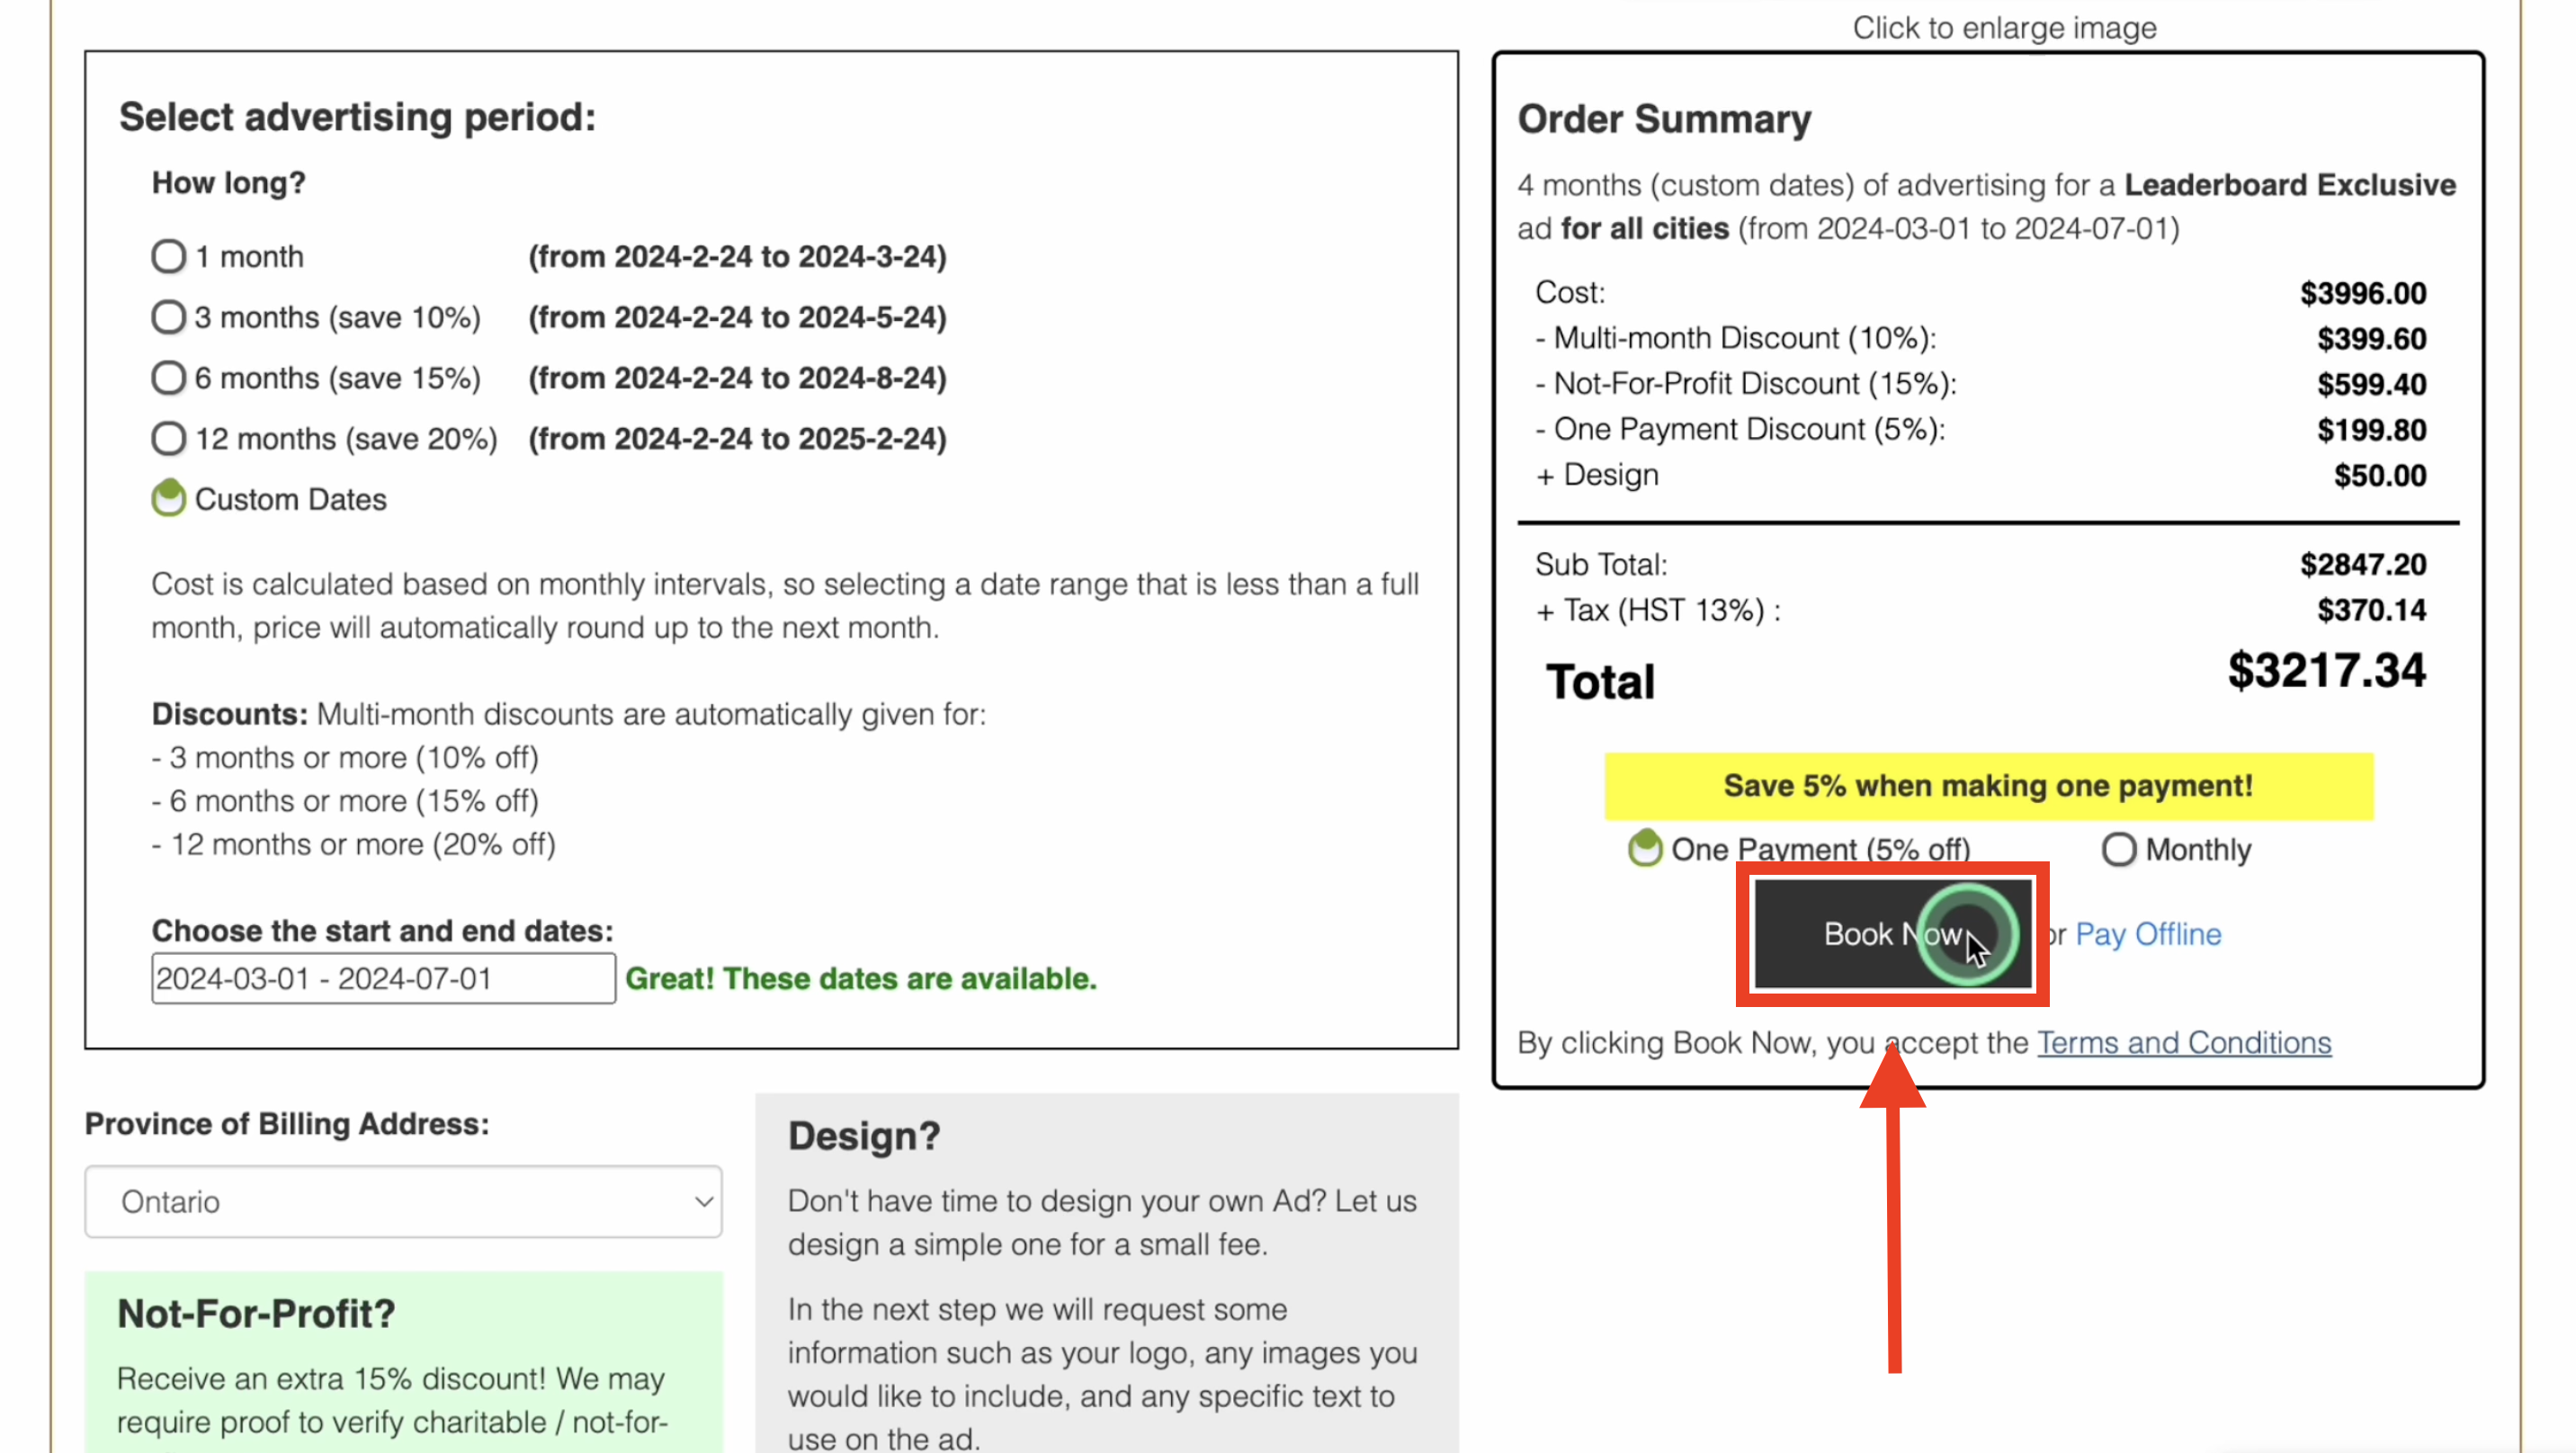
32. On the right side, you can see your order summary. It includes details such as the advertising period, advertisement package, and location. Additionally, the total cost of your order and applied discounts are shown here.
33. You can pay in one payment with 5% off or monthly.
34. You have the option to book online or offline. Paying online is the fastest way to process your advertisement, while paying offline may take a few days for approval.
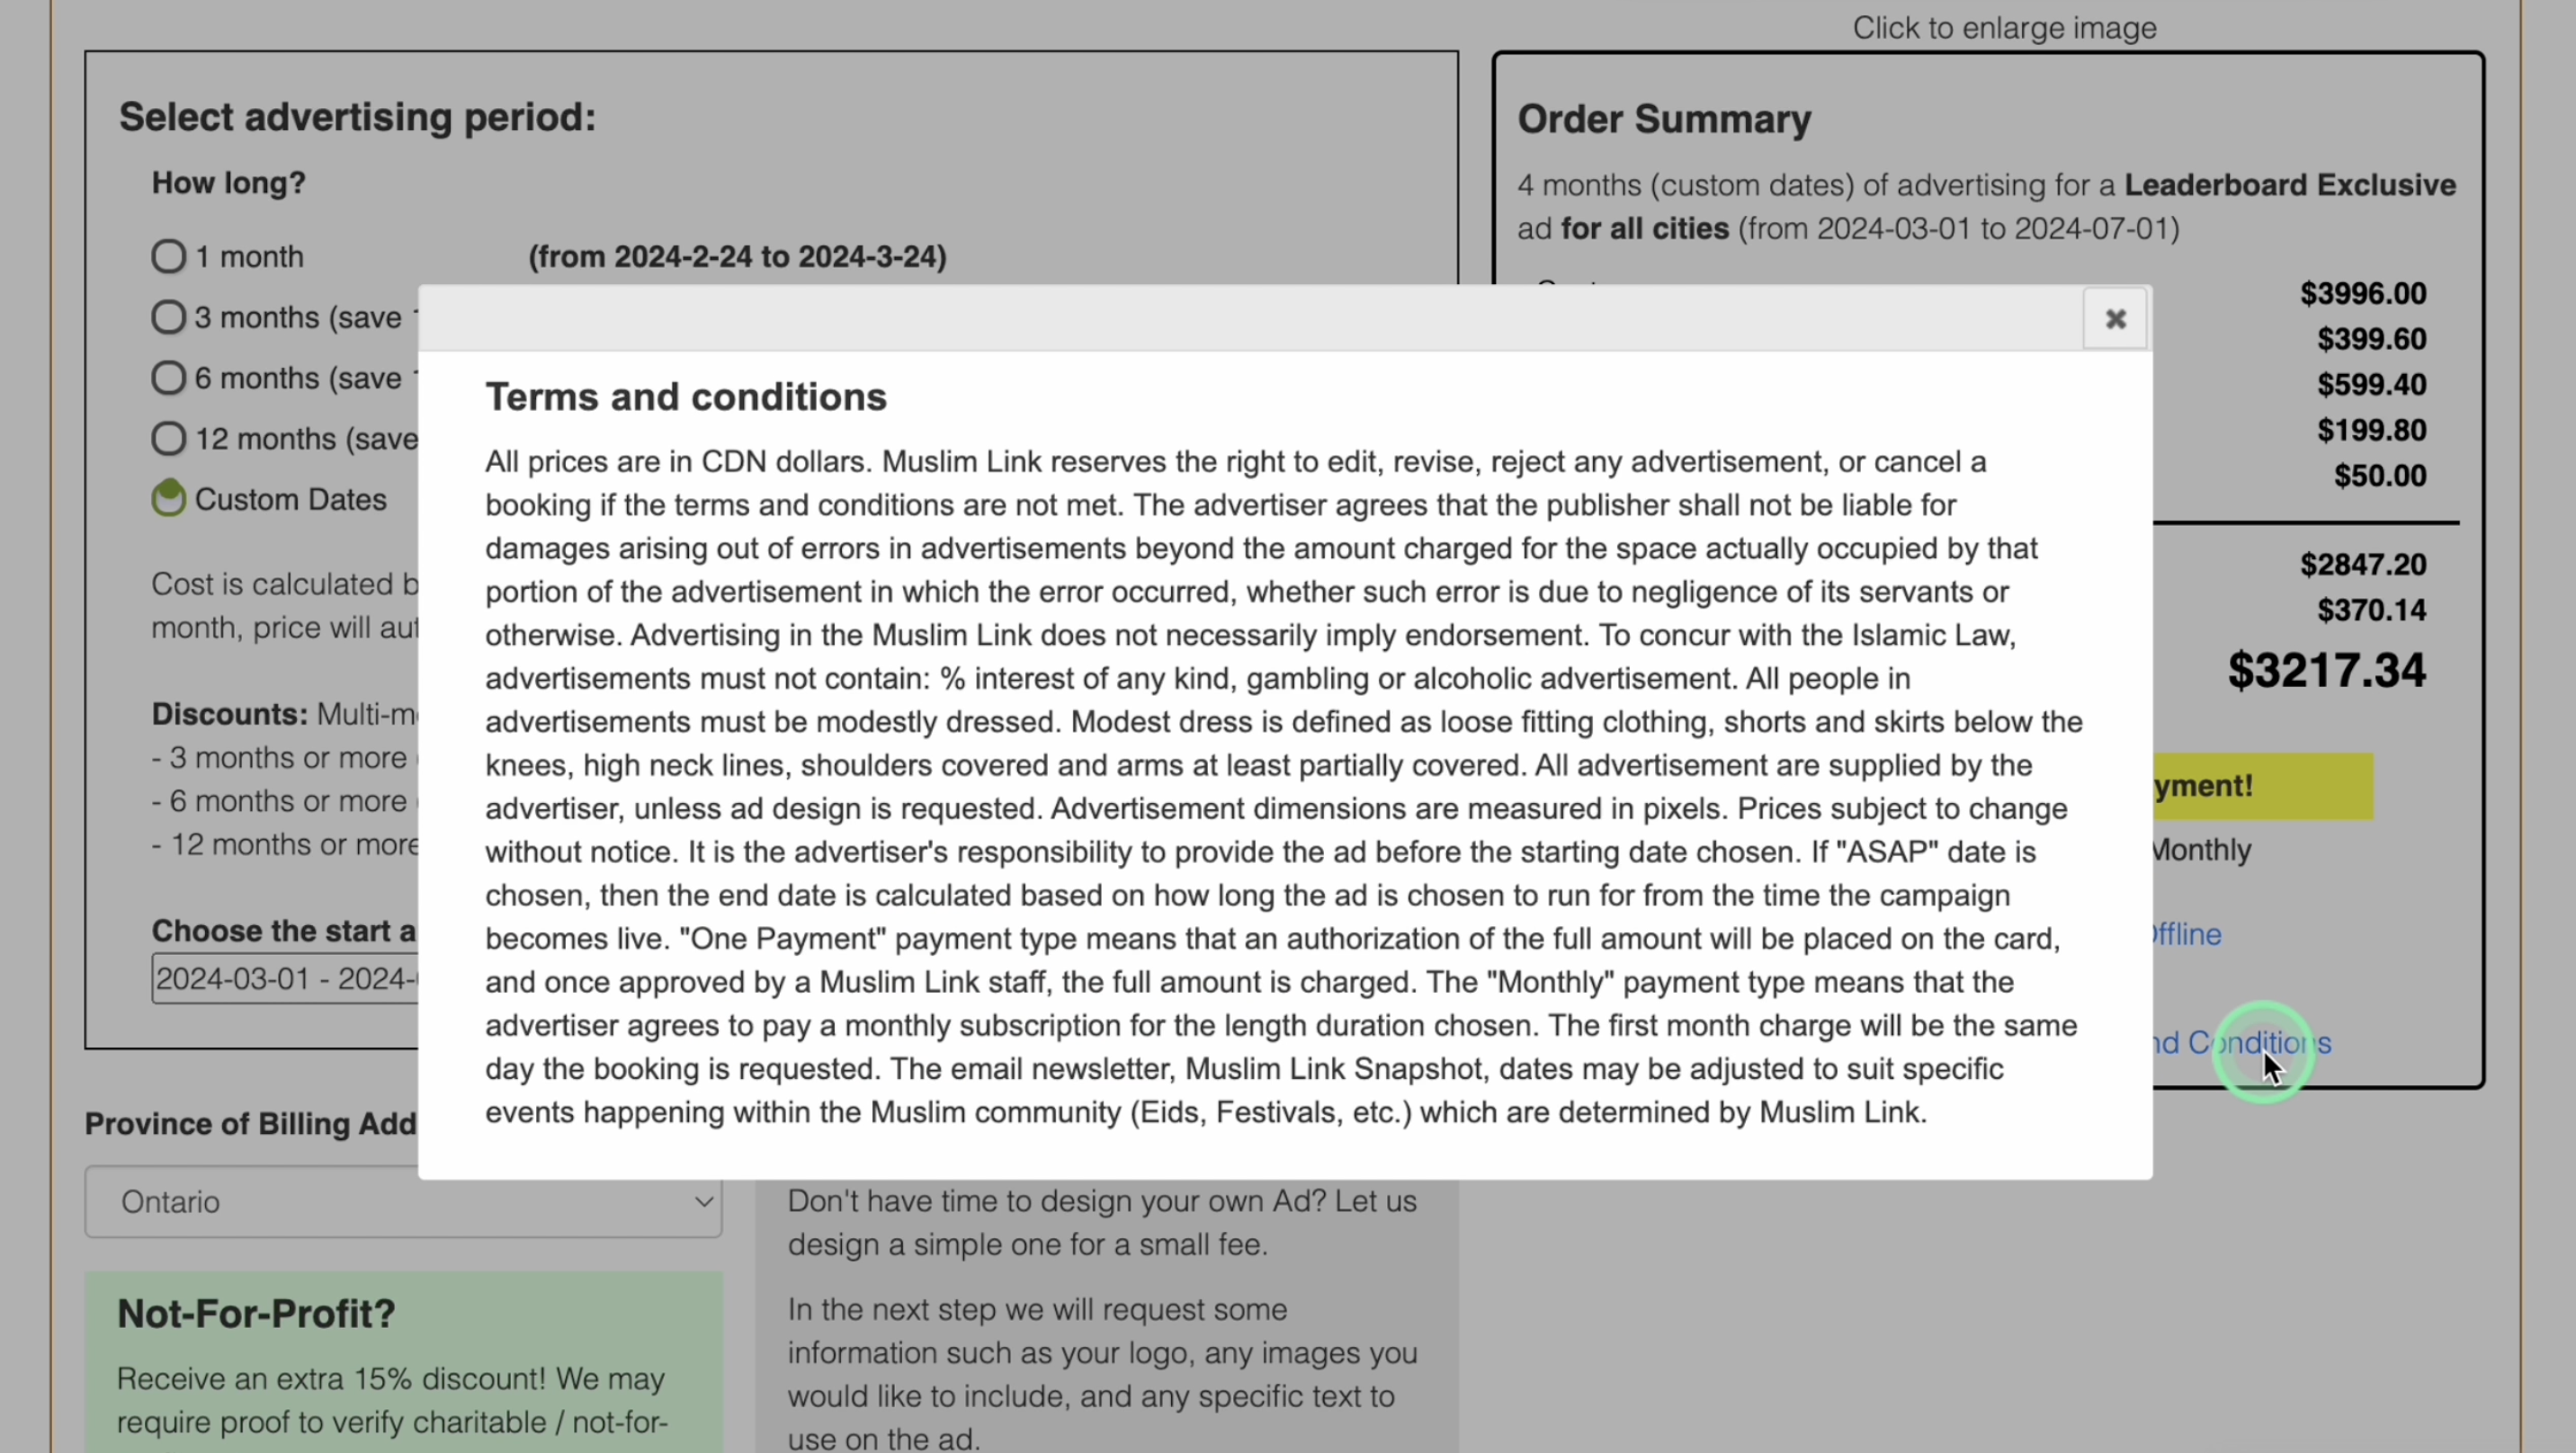
35. Your booking implies that you have agreed to our terms and conditions.
36. If you choose to book online, click “Book Now”.
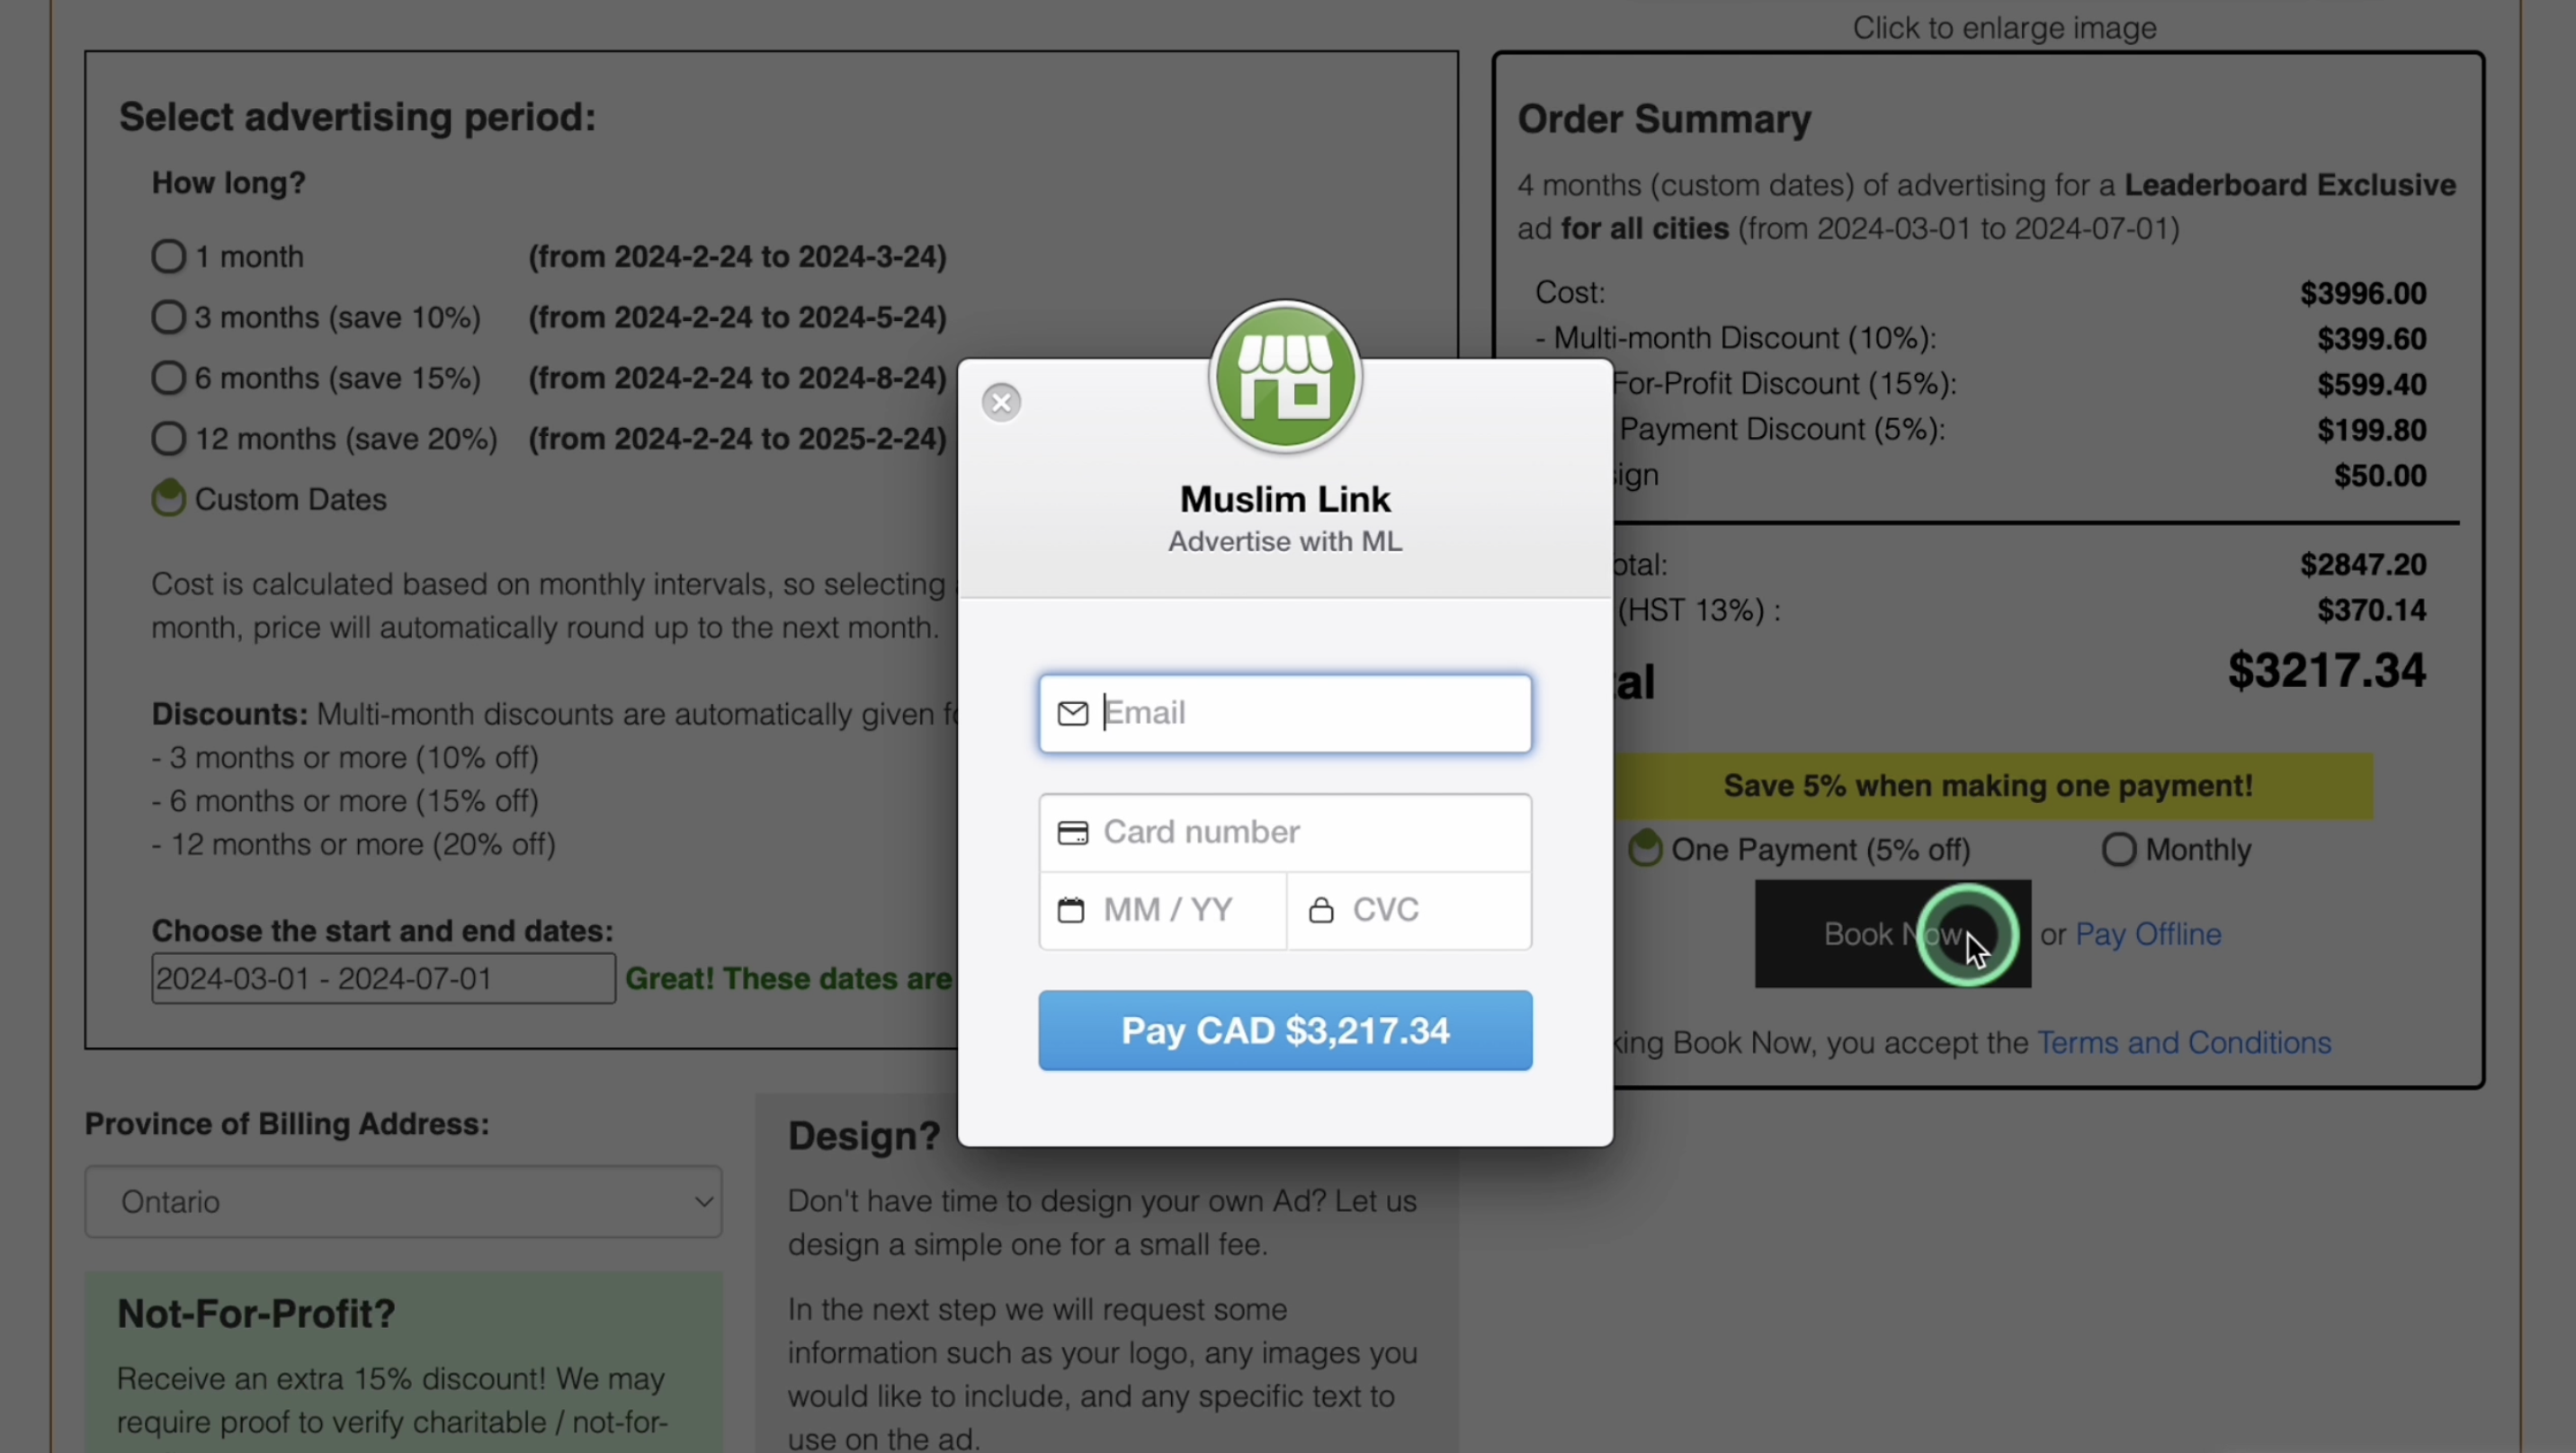
37. You will need to enter your email and payment details to complete the process. We use Stripe Payment as our encrypted payment method.
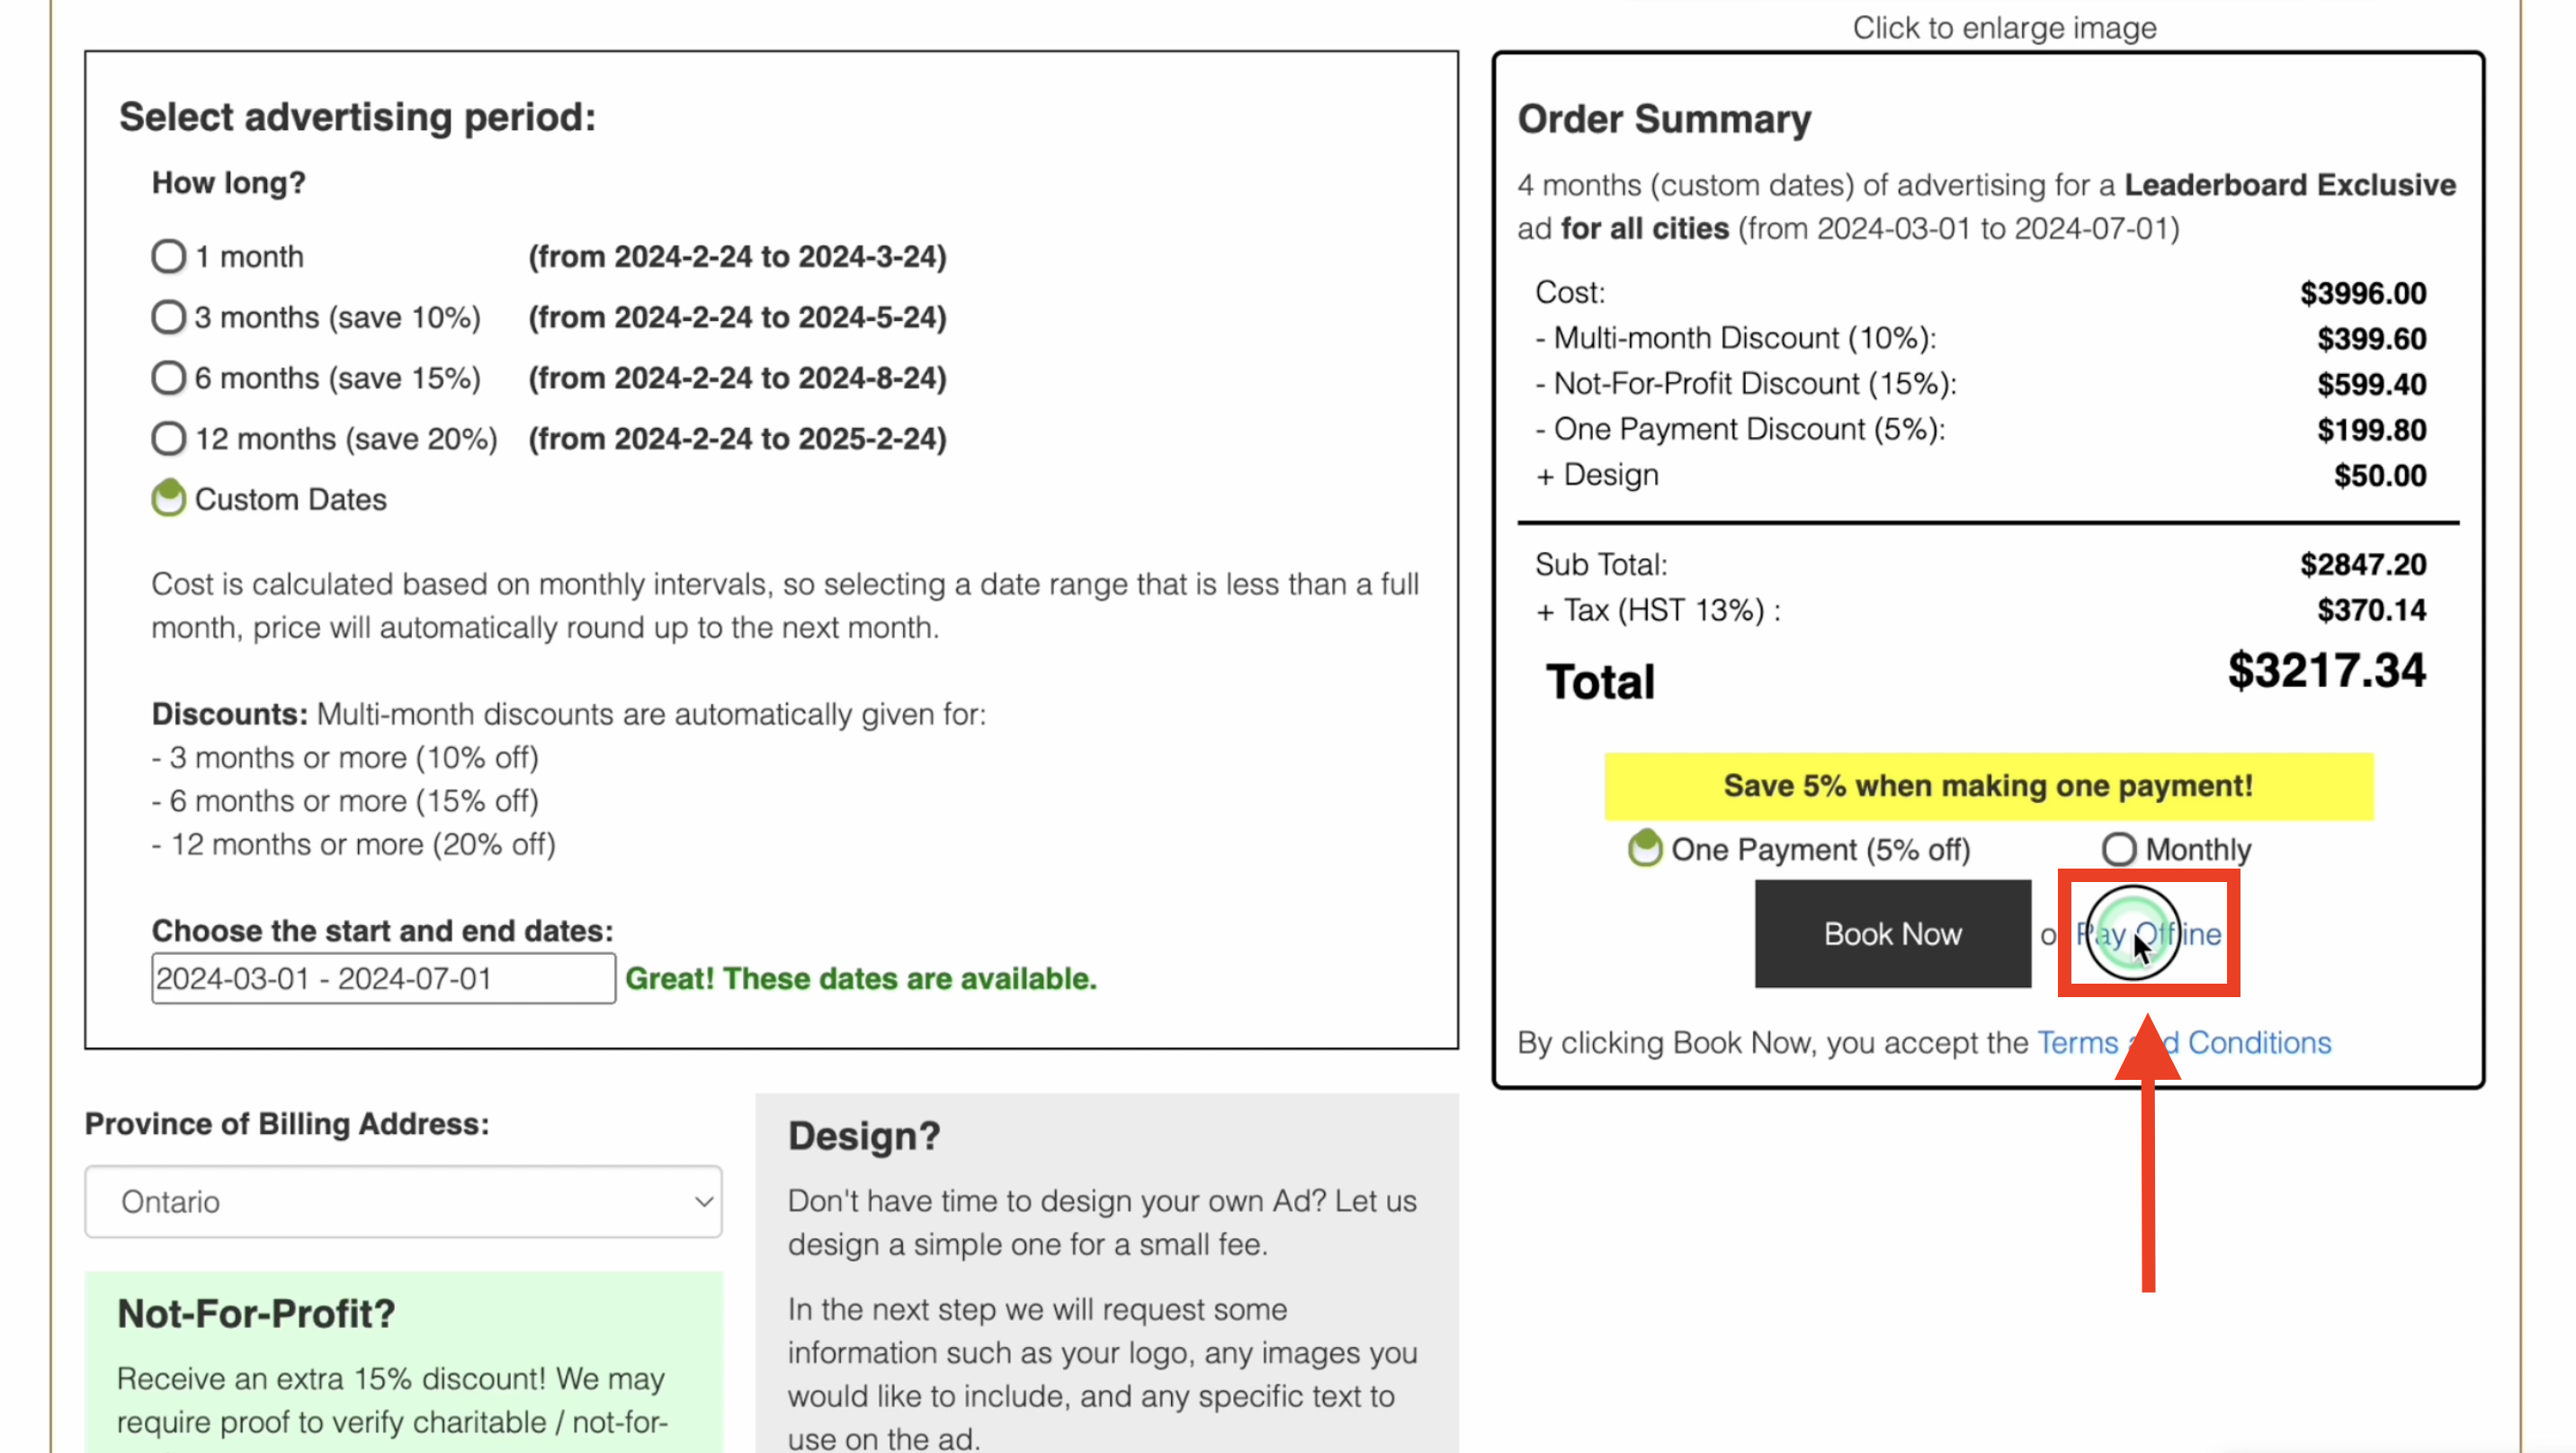
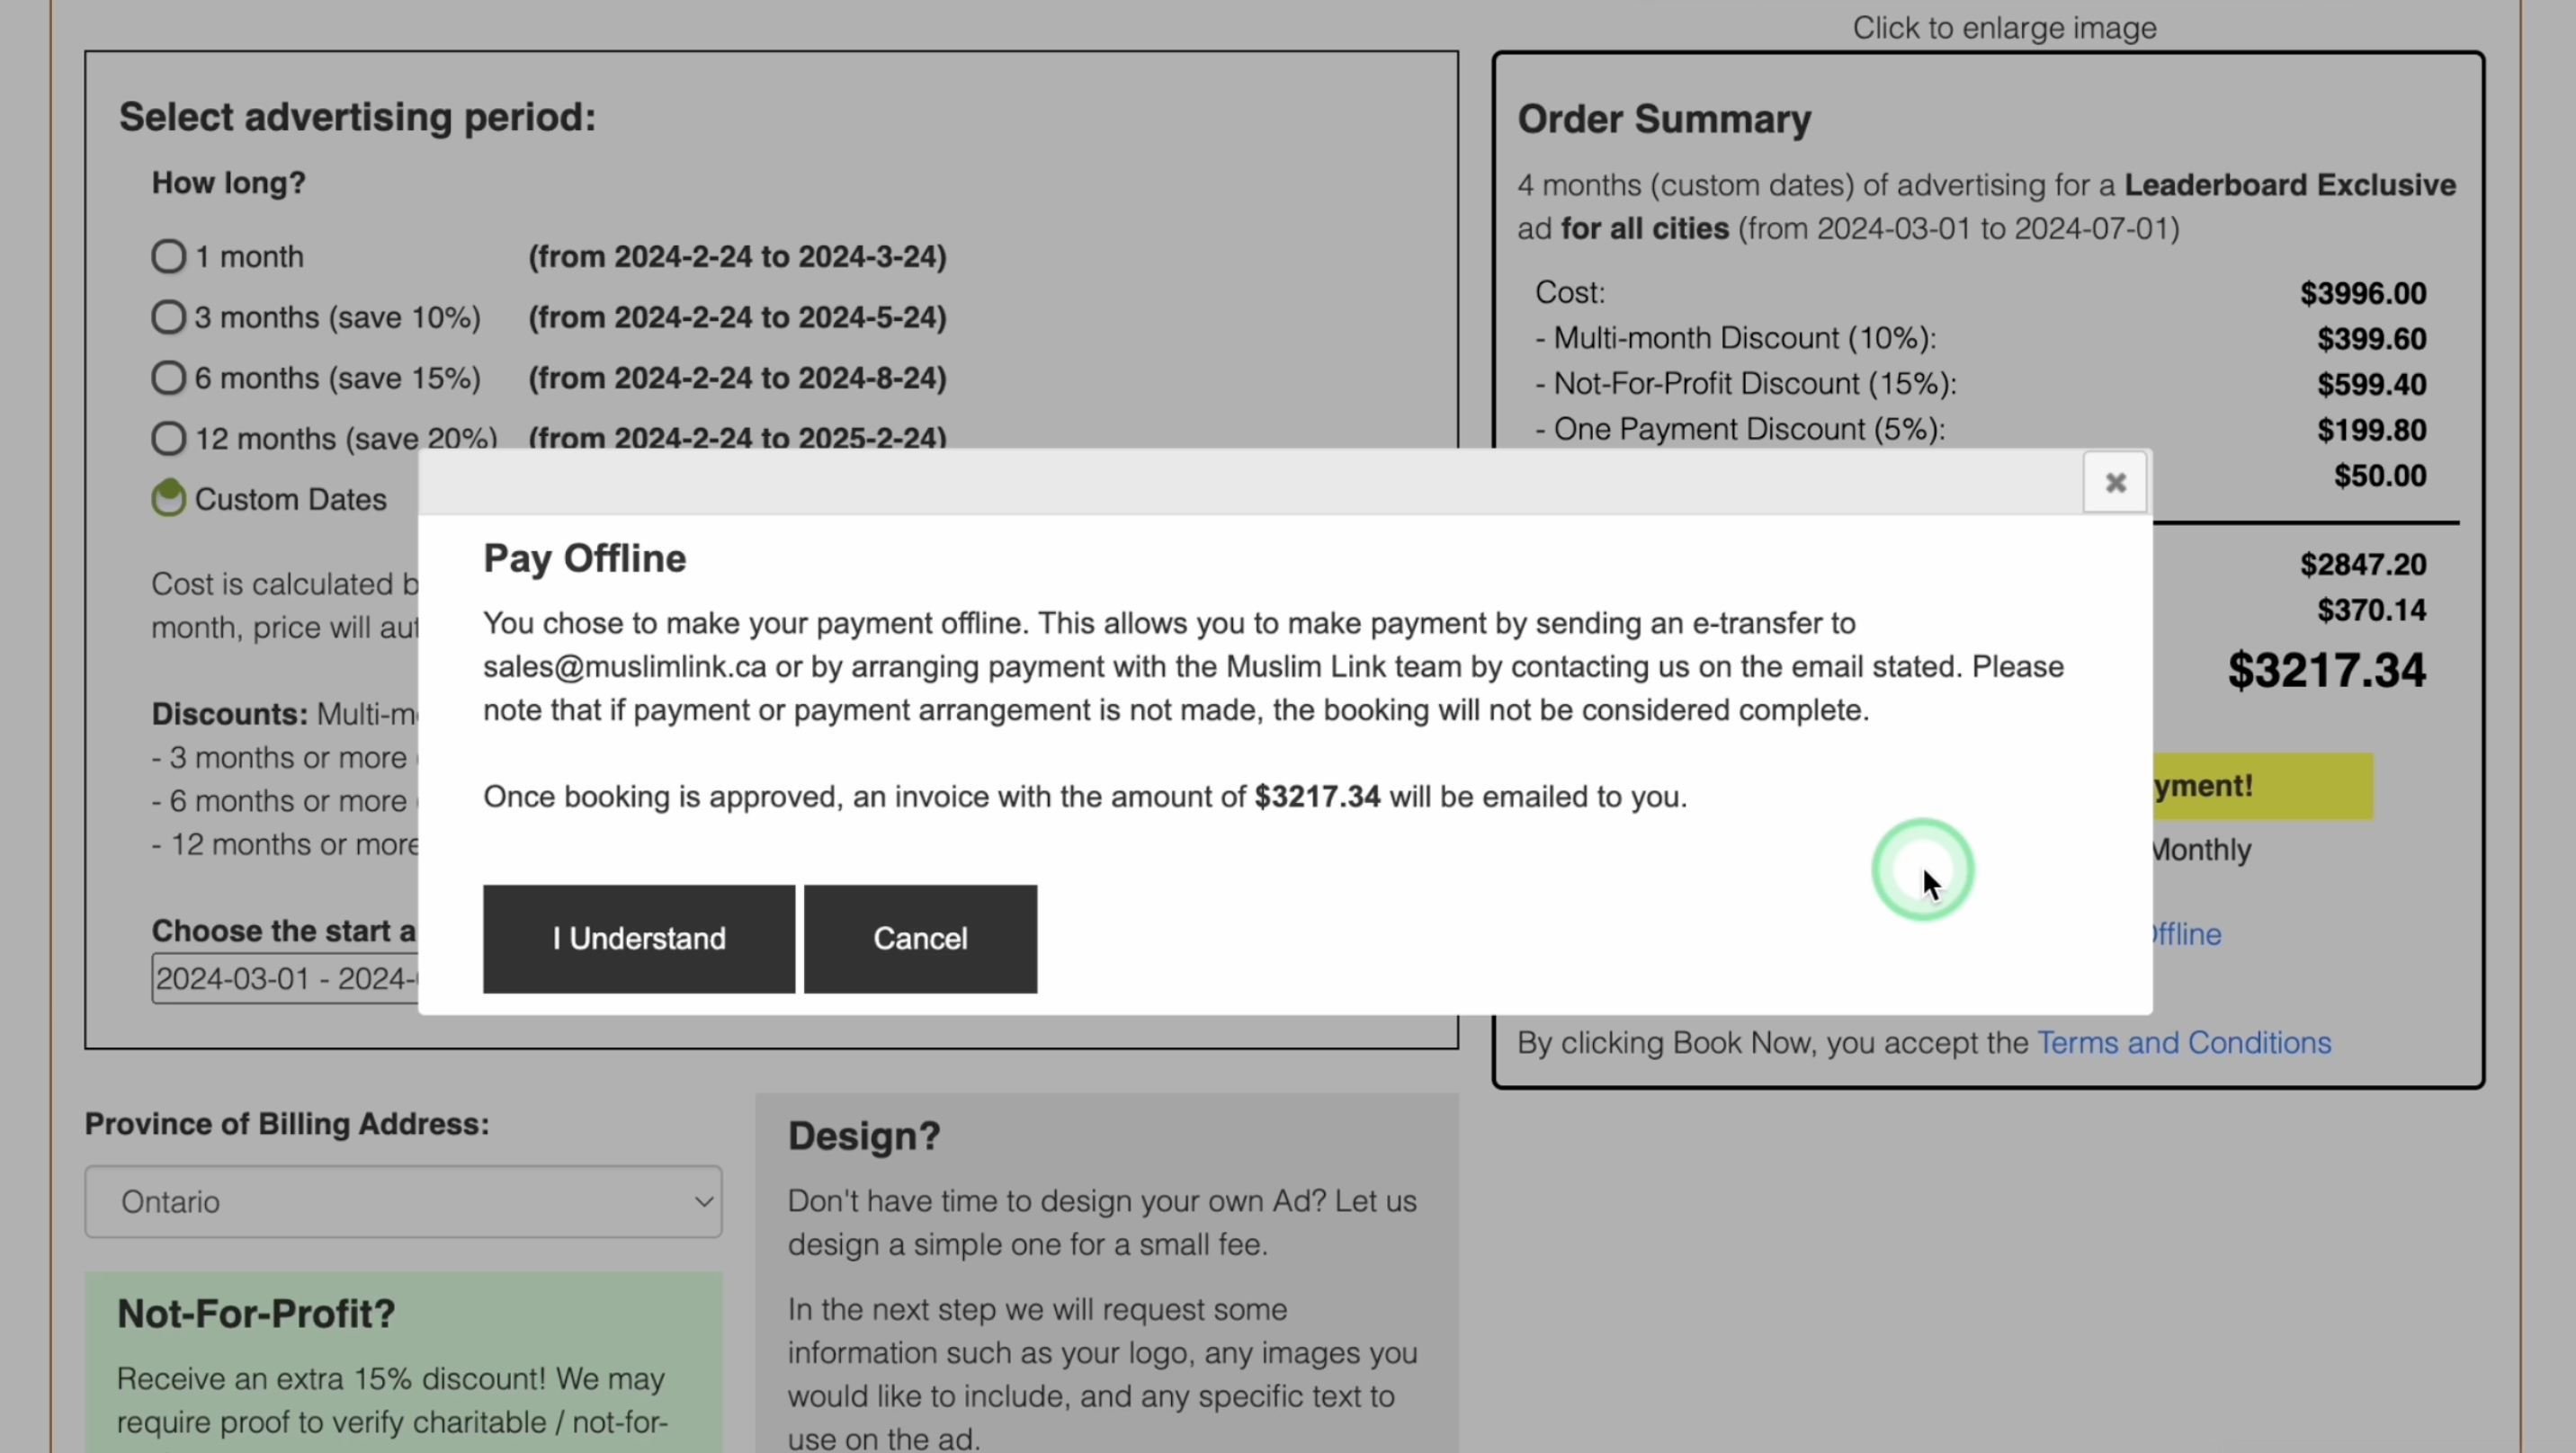
38. If you choose to pay offline, click “Pay Offline”.
39. You can settle it by sending an e-transfer to sales@muslimlink.ca or coordinating payment with our team via the provided email. Remember, the booking is only complete once payment or arrangements are finalized. Once approved, expect an email invoice.
40. Click “I Understand”.
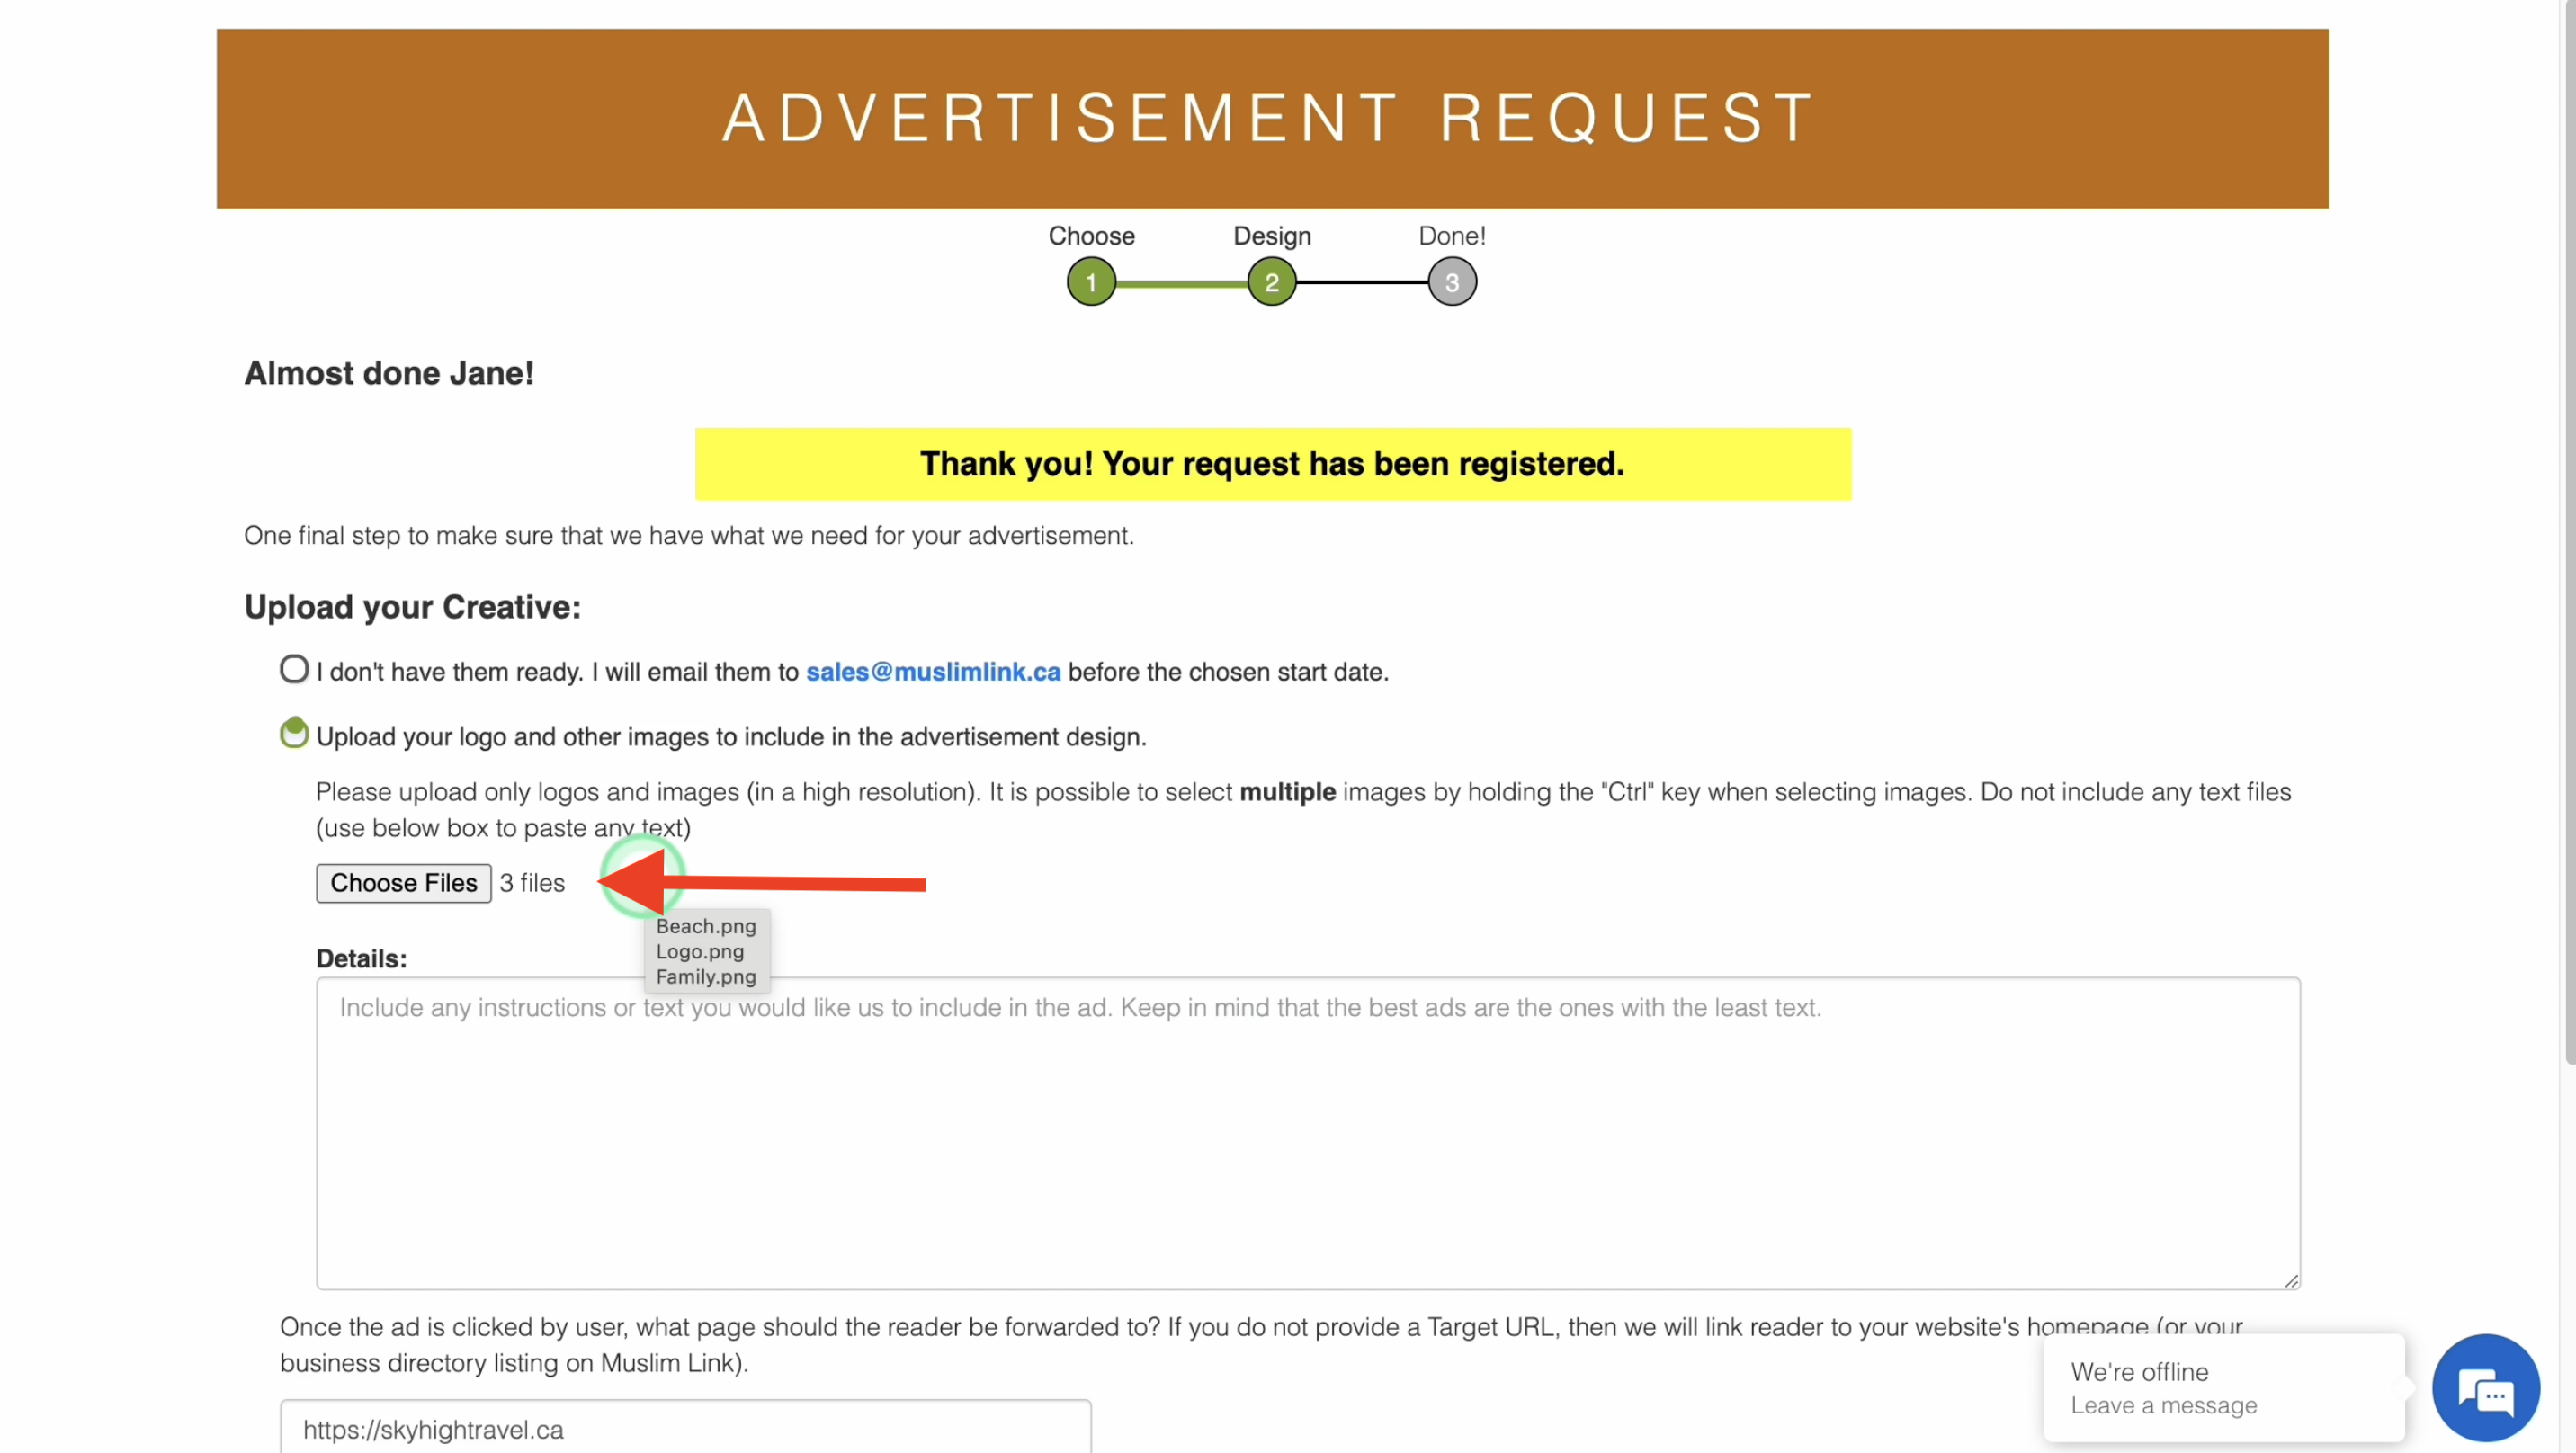
41. Upload your Creative: If you allowed us to design your ad, you must upload your assets and images here. You can send them later at our email or upload here. To upload multiple images, press and hold the control key while selecting the images.
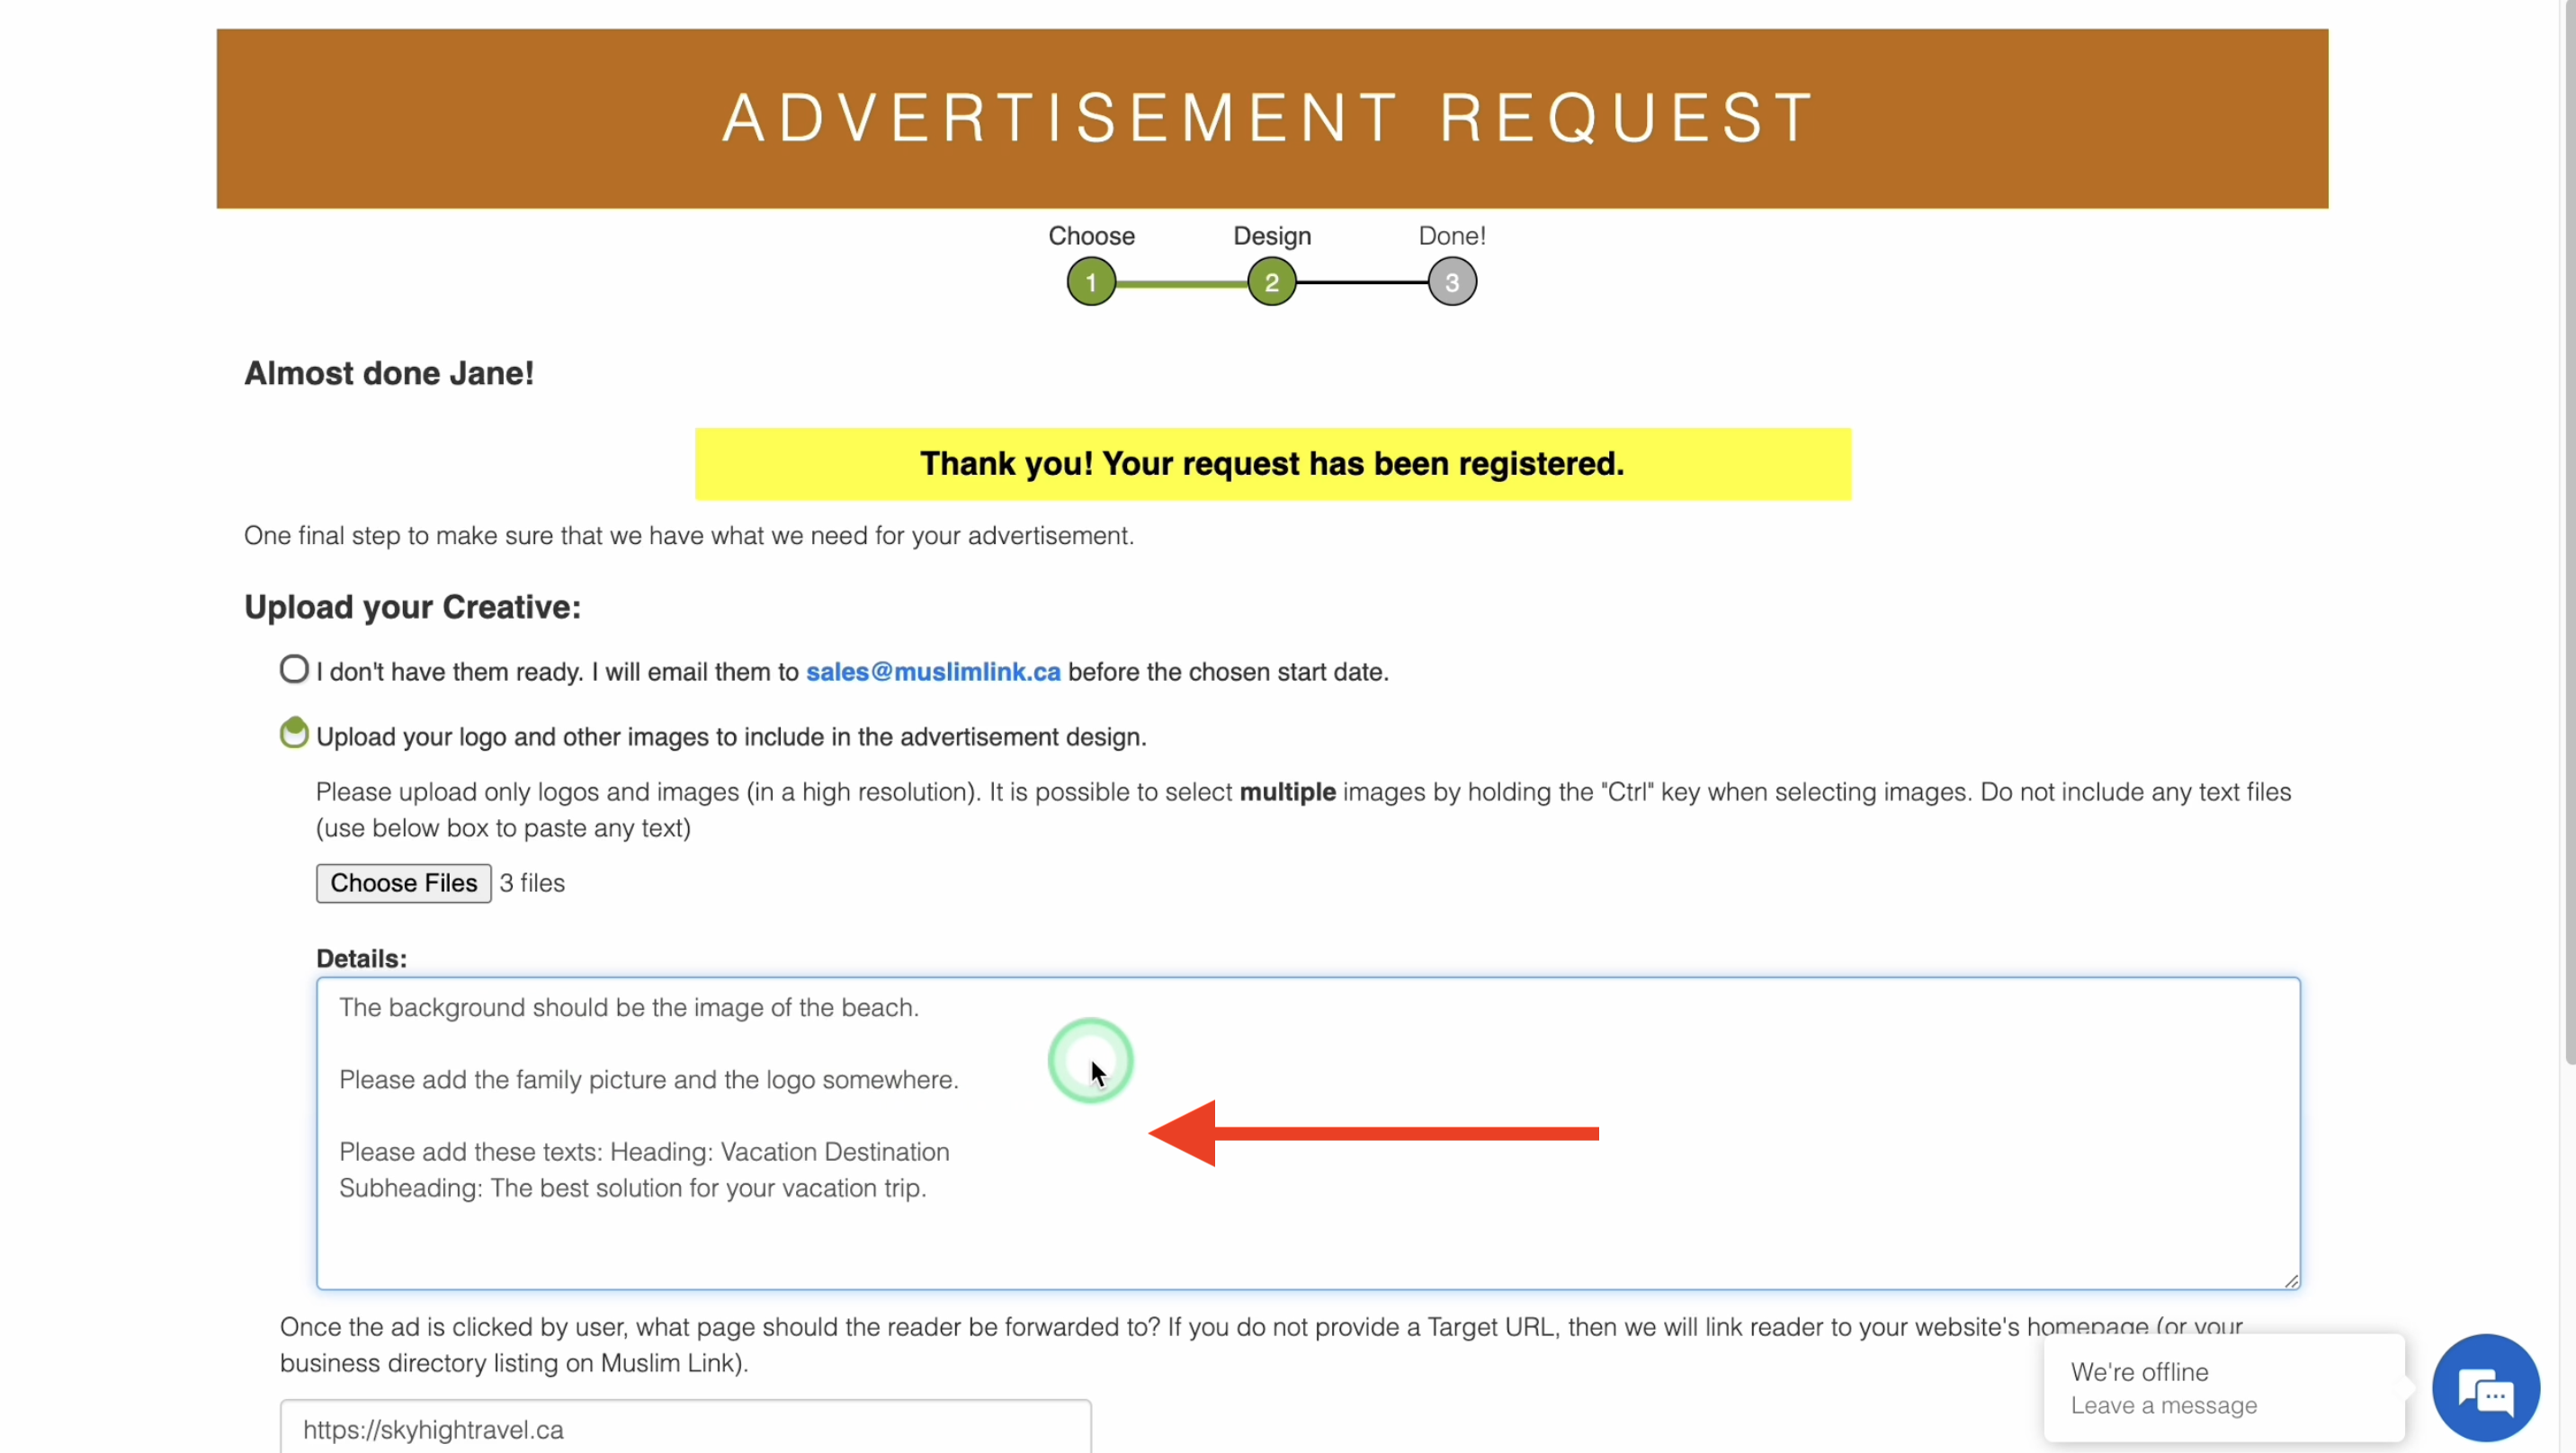
42. Details: Provide here details or instructions you want to add in the design such as the text.
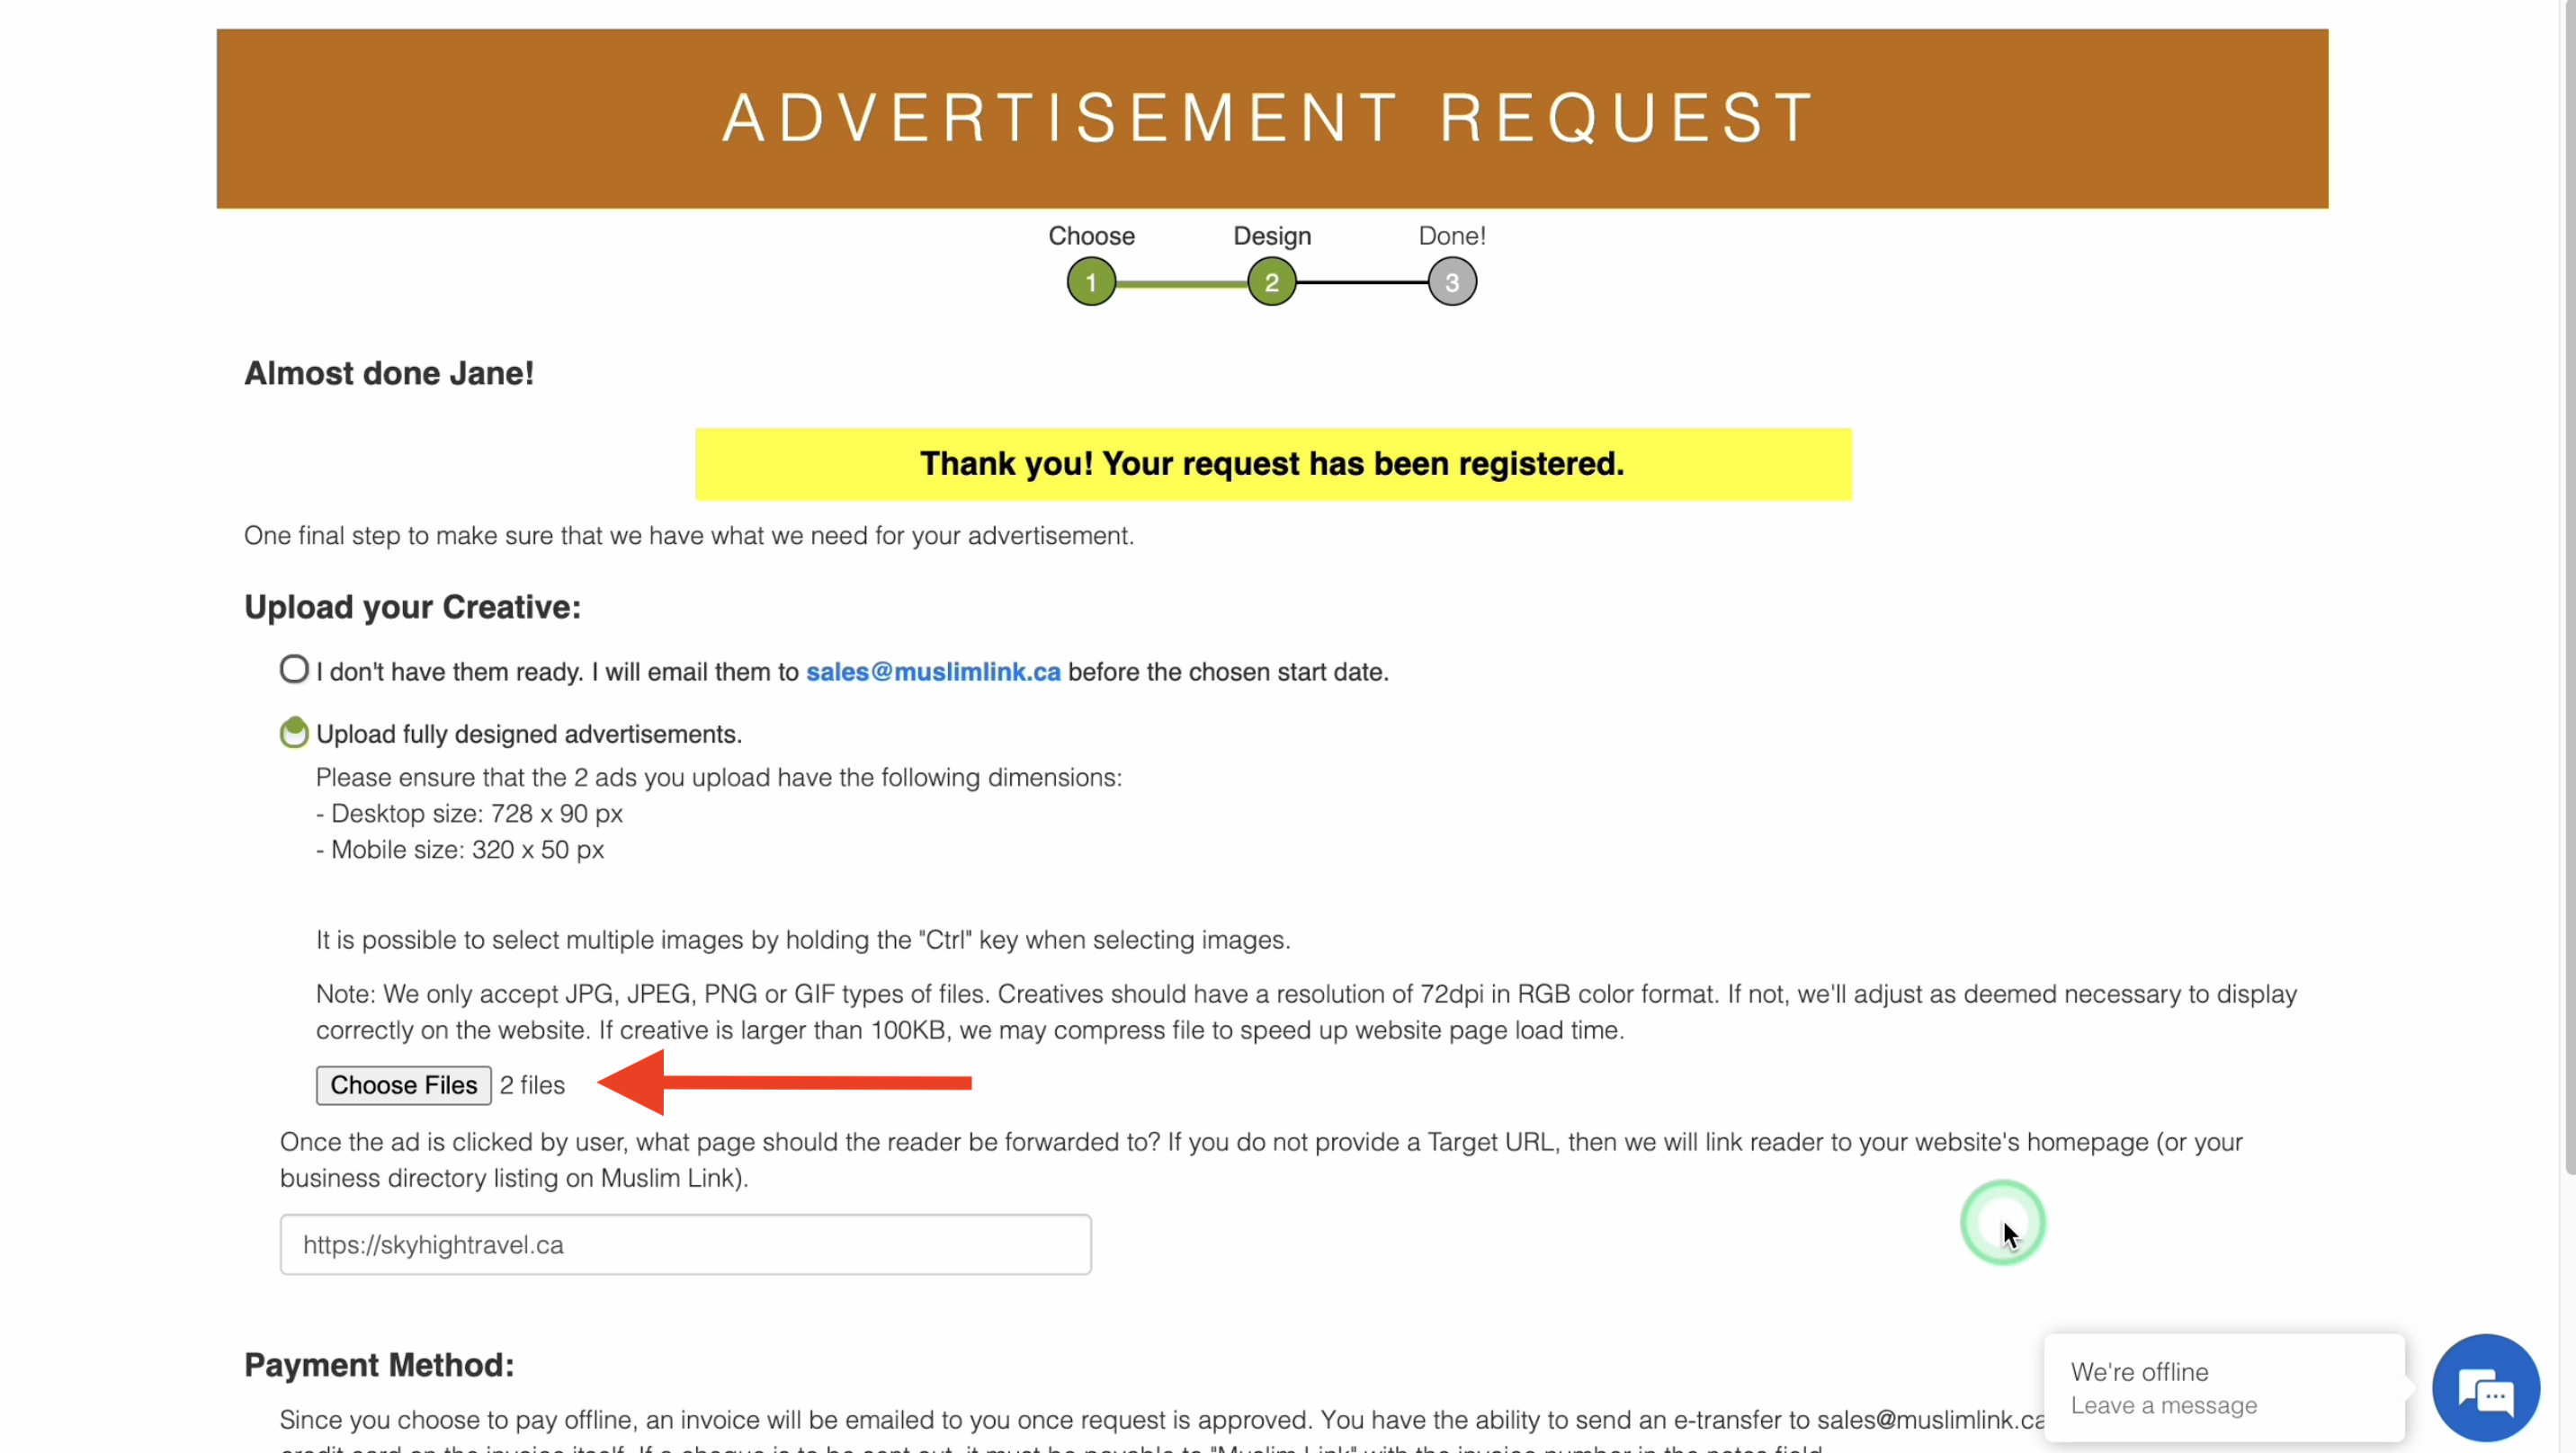
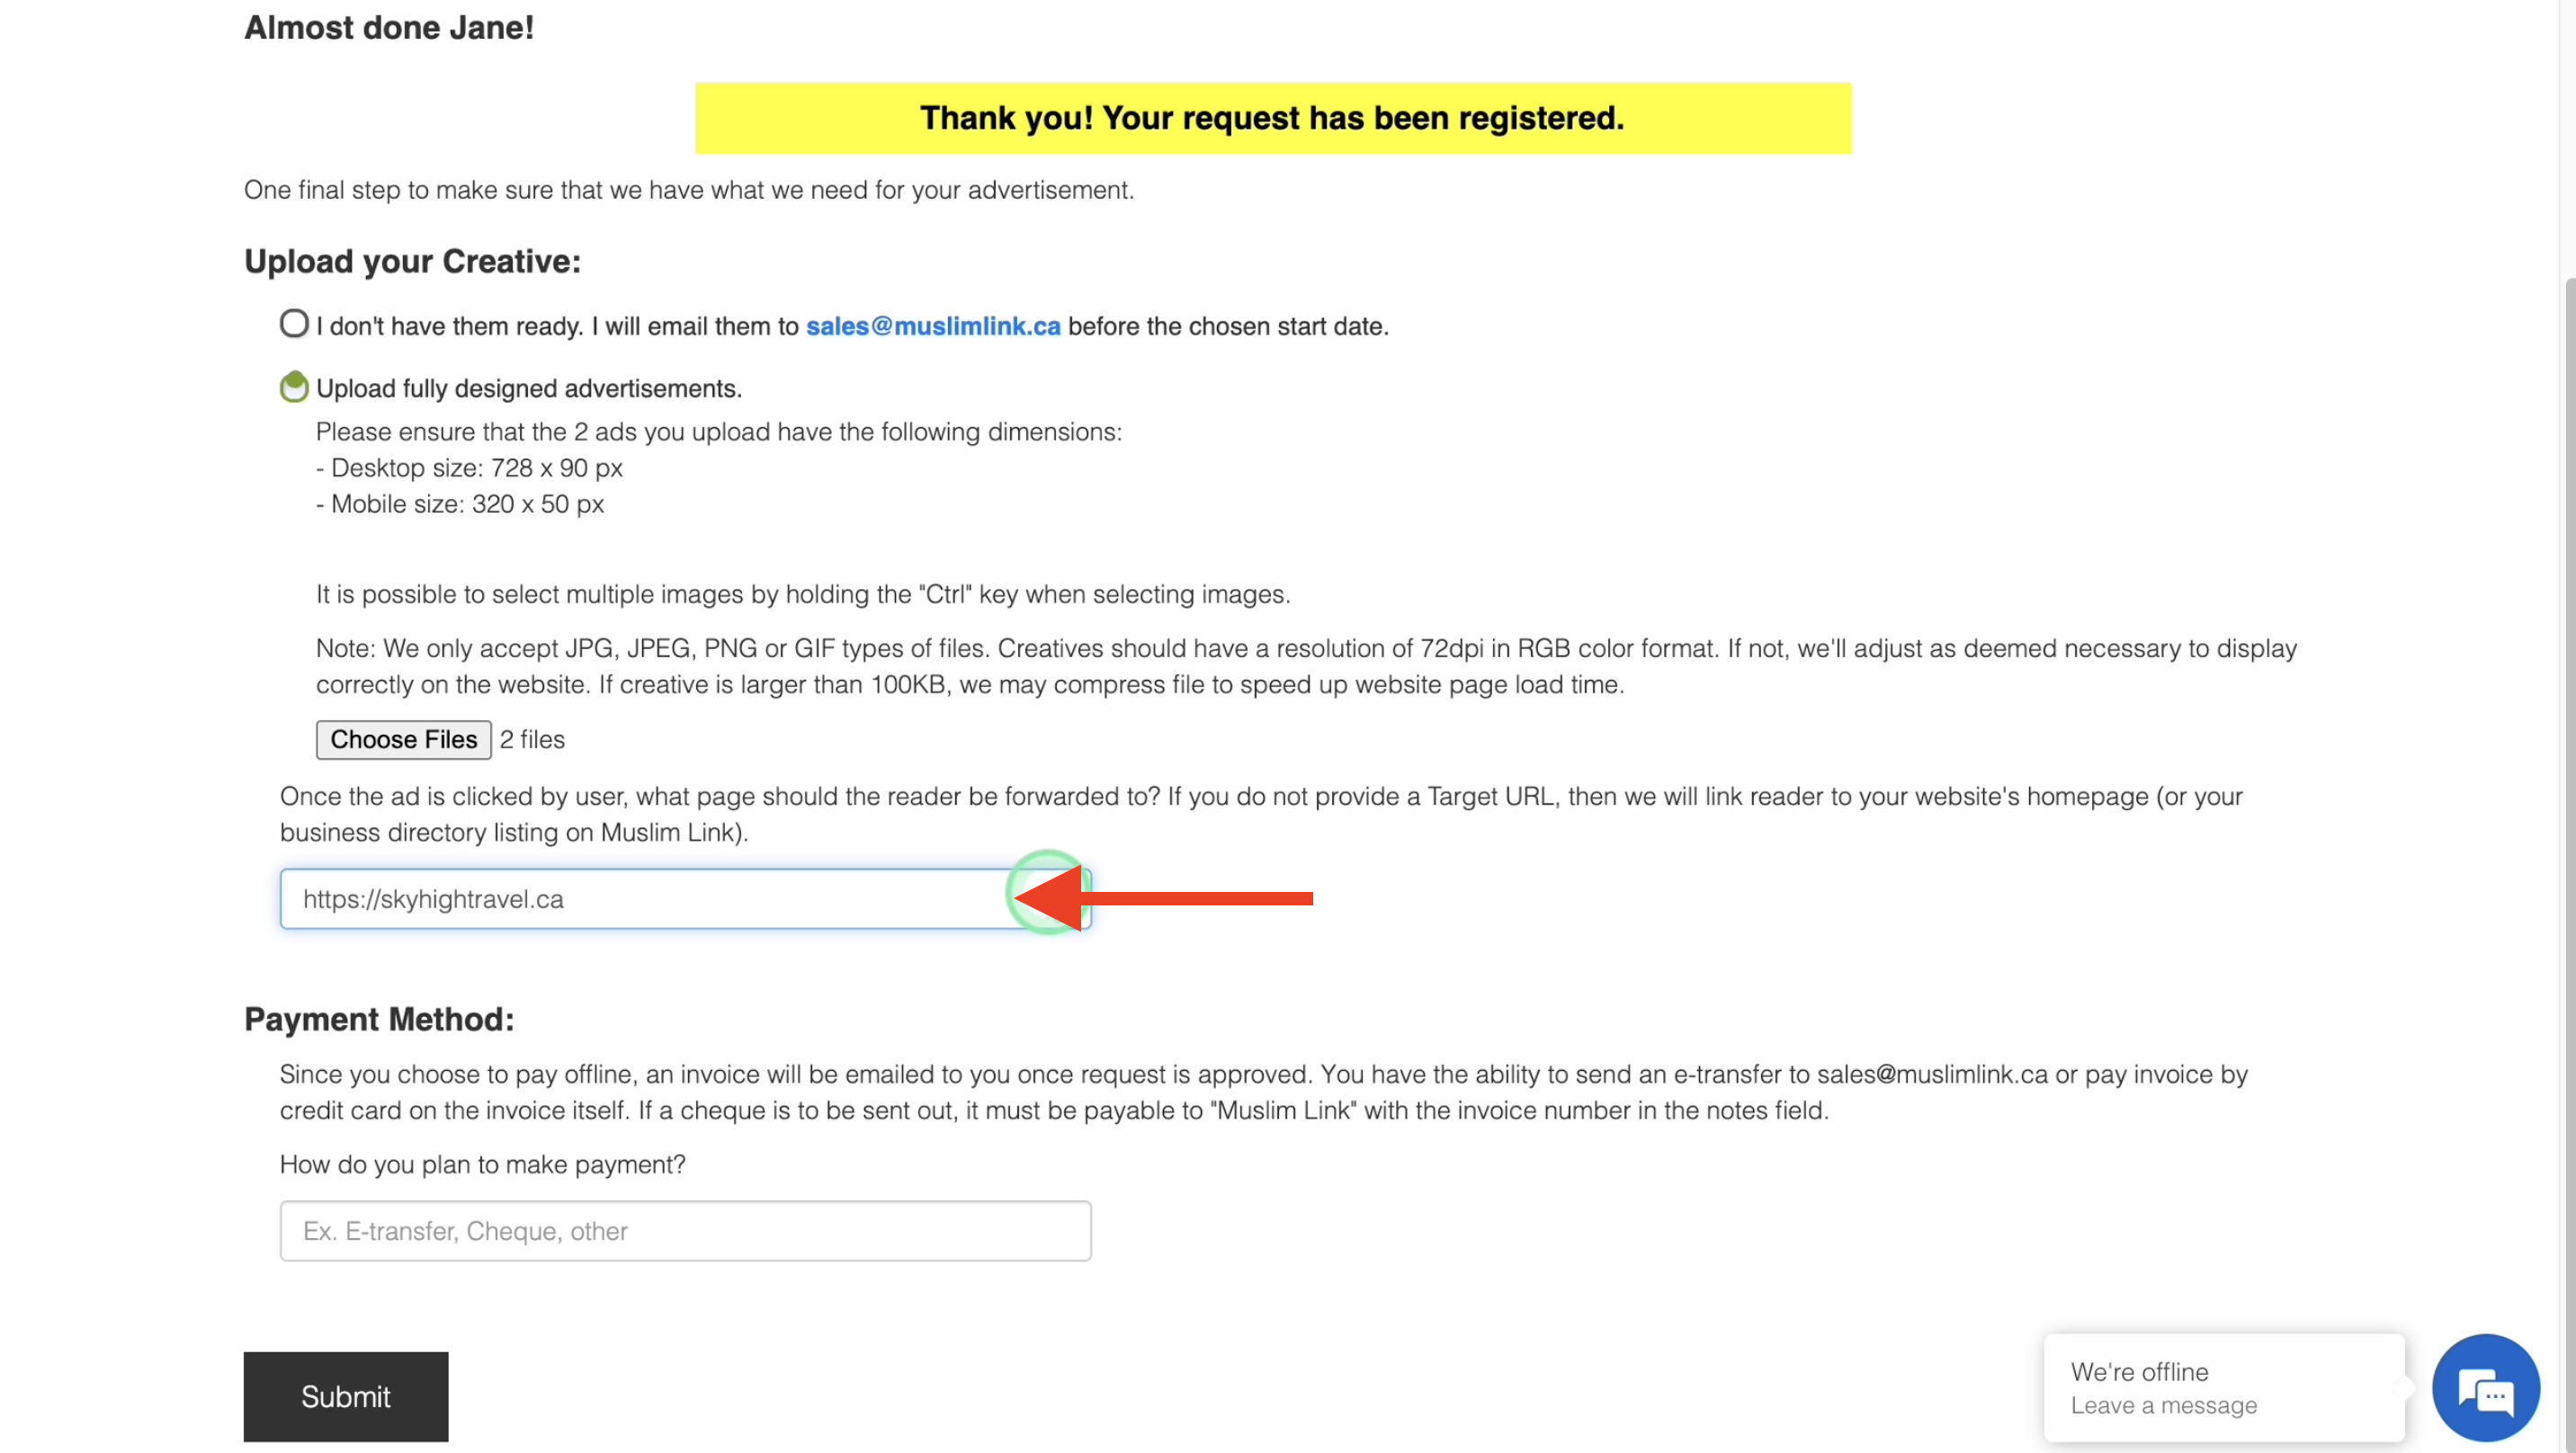
43. If you didn’t select us to make a design for you and you already have a ready-made design, this is how it shows. You can send them later at our email or upload here. Please follow the dimensions stated here. You must upload two images here that has the correct dimensions of the desktop ad and the mobile ad. You can upload two images by holding the control key for windows or command key for Mac while selecting the images. If you choose three or more images, you'll receive an error because you can only upload two images.
44. Target URL: Provide here the target URL of your ad. this should be the link where you want users to be directed when they click on your ad.
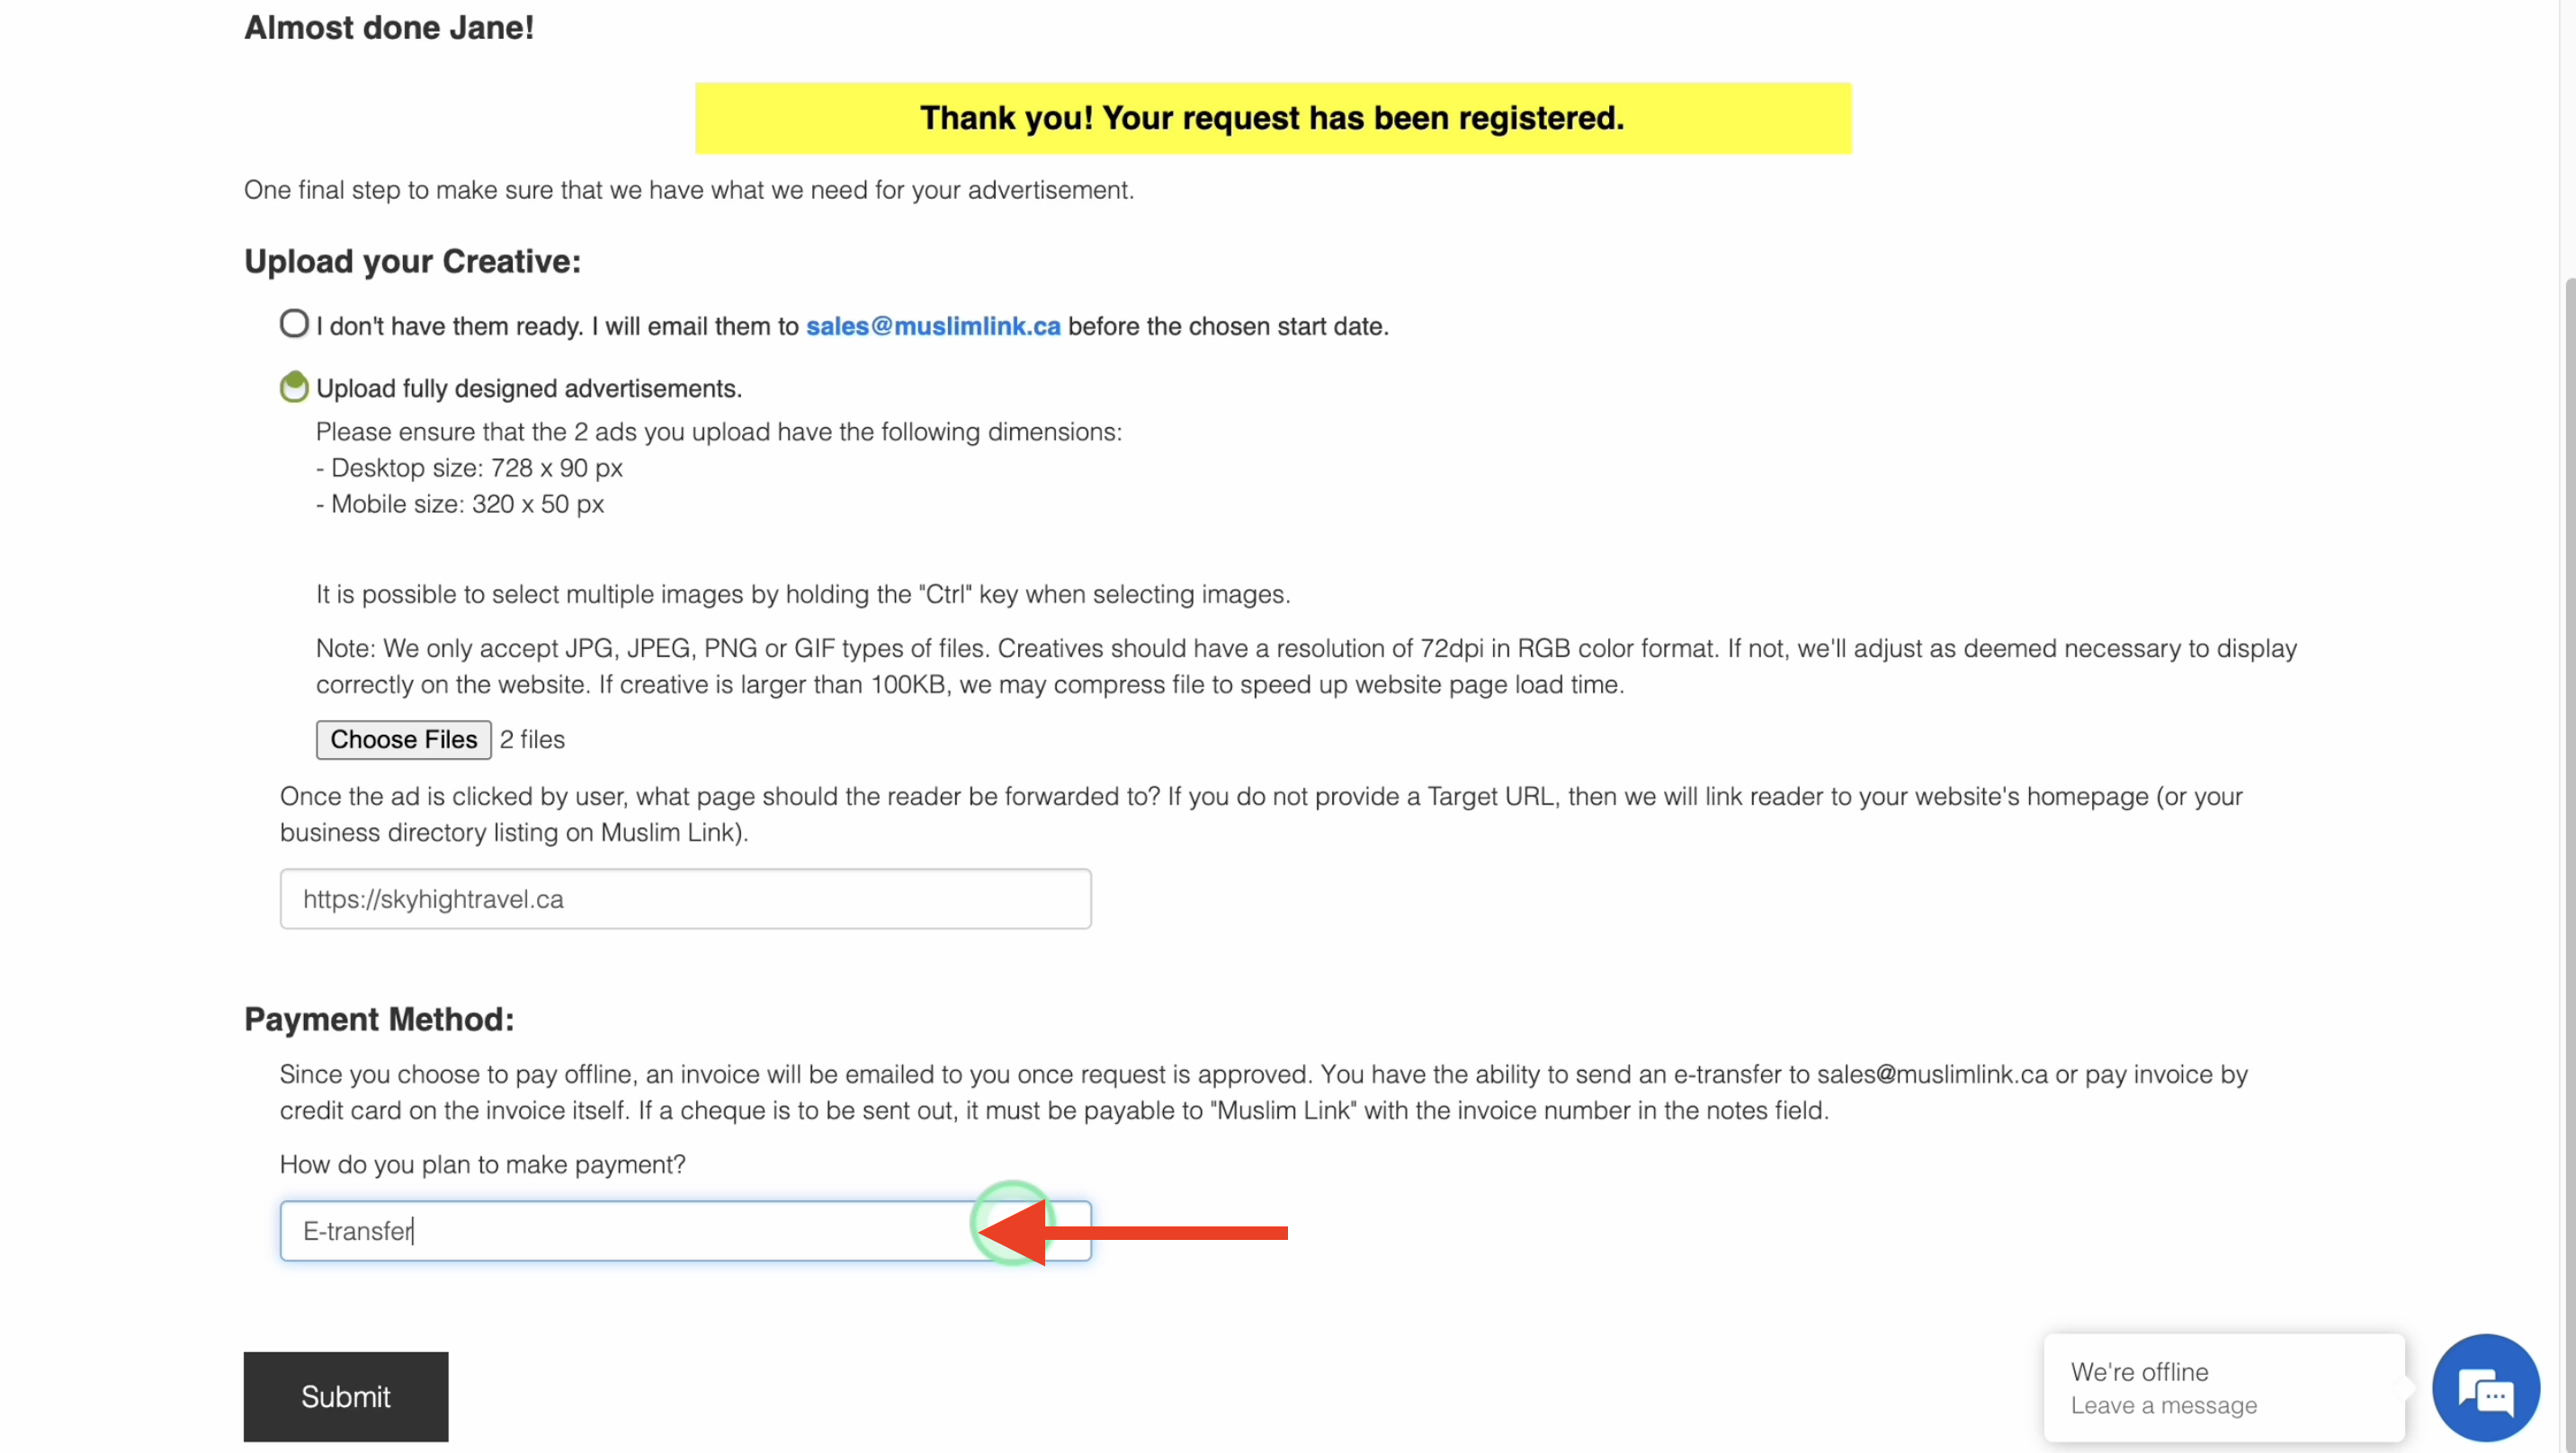
45. Payment Method: Since you choose to pay offline, enter here your payment method such as an e-transfer, cheque, or others.
46. Once done, click “Submit”.
47. Wait for admin approval. Once approved, you can now see your ad on your chosen location.


